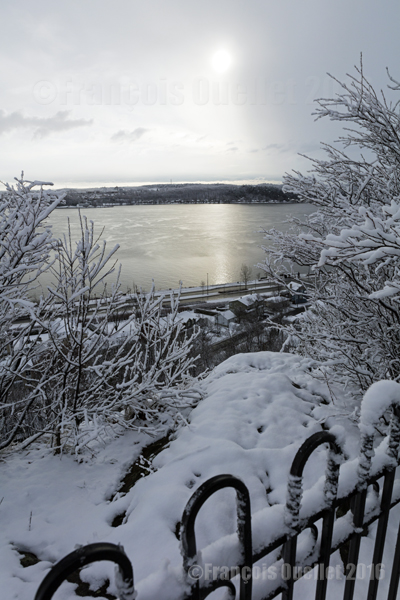
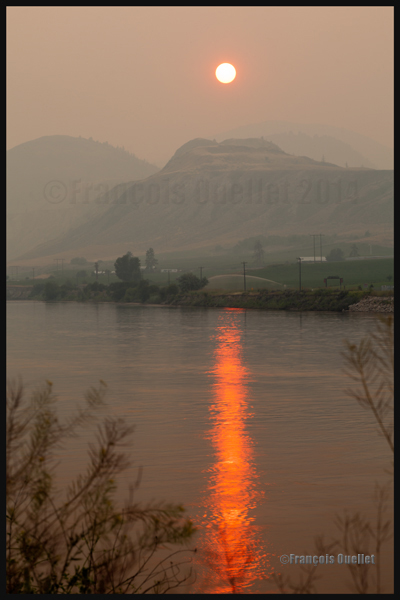
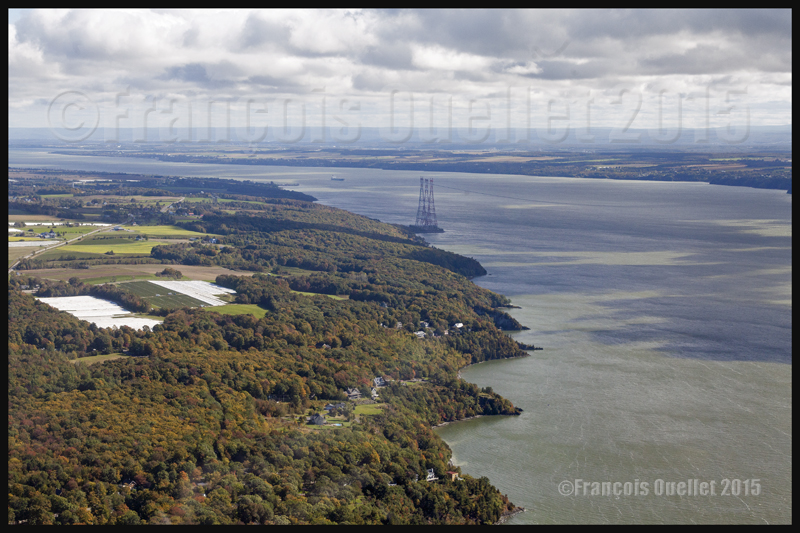
Quebec City in winter, in the Cap-au-Diable area (2016)
The picture above was taken in December 2016 at Cap-au-Diable, in Quebec City, with a Canon 5DSR full-frame camera equipped with a Canon EF 24-70mm f/2.8L US telephoto lens. A polarizing filter was not really needed here due to the soft light and the sun being in line with the lens. The exposure was still corrected by +1/3.
At this time of the year, the temperature is not too cold for the photographer’s bare hands and the light intensity is ideal throughout the day. The temperature hovering around 0 °C favors wet snow showers. This snow lightly sticks to the tree branches and, as long as the wind does not increase too much, it is possible to take interesting winter pictures. But it is necessary to act quickly
For the photo above, I was able to profit from a St-Lawrence Seaway that was still unfrozen, which allowed to capture the winter sun reflection. I had to proceed rapidly since there were clouds moving from the west, visible to the right of the picture. One minute later, the sun and its reflection were no longer visible.
The photos below were taken during in the same park.
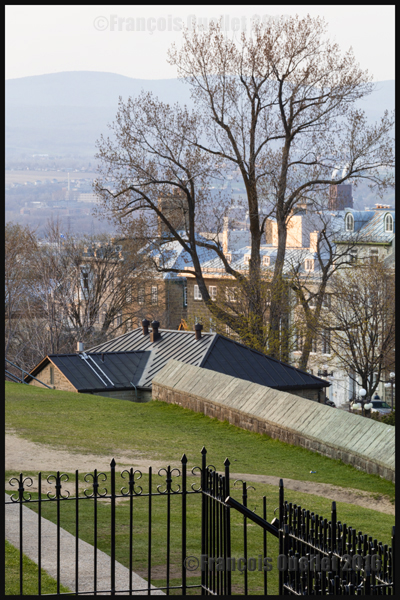
Parc du Cap-au-Diable, Quebec City (2016)
A house in the Cap-au-Diable park, Quebec City (2016)
For other photos on the province of Quebec and also Quebec City, click on the following links from my blog:
Here are a few recent photos taken during the month of May 2016 using a Canon 5DSR camera equipped with a Canon 70-200 f2.8L IS II USM telephoto lens. I was on île d’Orléans for the photo session, near the Horatio Walker promenade in Sainte-Pétronille.
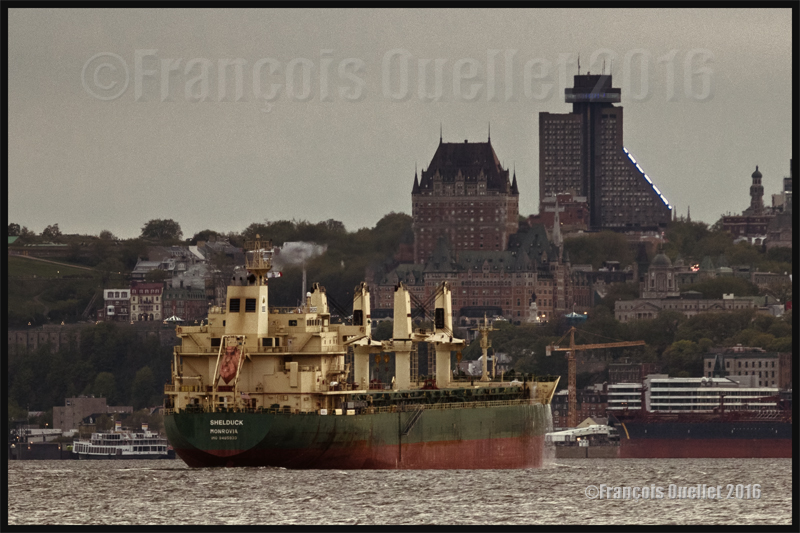
The vessel Shelduck (Monrovia) in front of Quebec City in 2016. The photo was taken with a Canon 5DSR
The picture above shows the vessel Shelduck flying the Liberian flag. It just crossed the narrow channel between île d’Orléans and Levis. This ship, built in 2012, is a bulk carrier. In the background it is possible to see Quebec City, with the Château Frontenac and the Hotel Le Concorde Quebec.
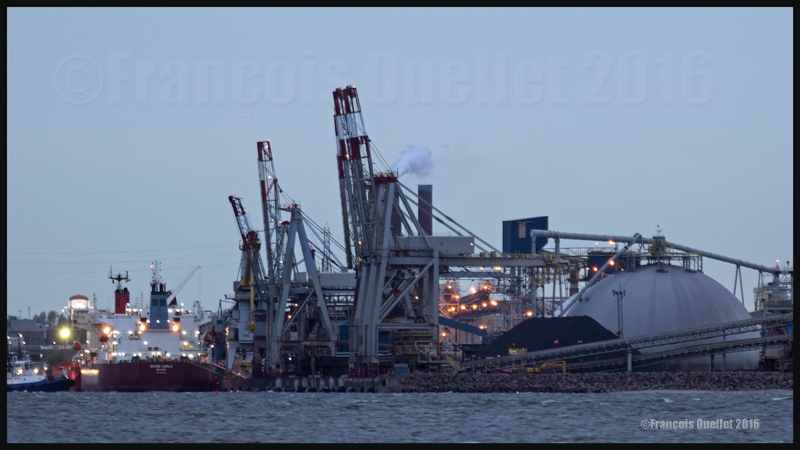
The photo below shows the Silver Carla (Majuro), a tanker used to carry oil and chemical products. It is moored at the Quebec harbour installations. The ship was built in 2014 and sails using the Marshall Islands flag of convenience.
The vessel Silver Carla (Majuro) and some of the Quebec harbour installations in May 2016
In the picture below, the tanker Cap Jean, property of Euronav, is approaching île d’Orléans. This tanker was initially supposed to be named St. Jean but the name’s religious connotation could have caused problems in some parts of world. The name Cap Jean was thus chosen.
The vessel Cap Jean, property of Euronav, in front of Quebec City in 2016
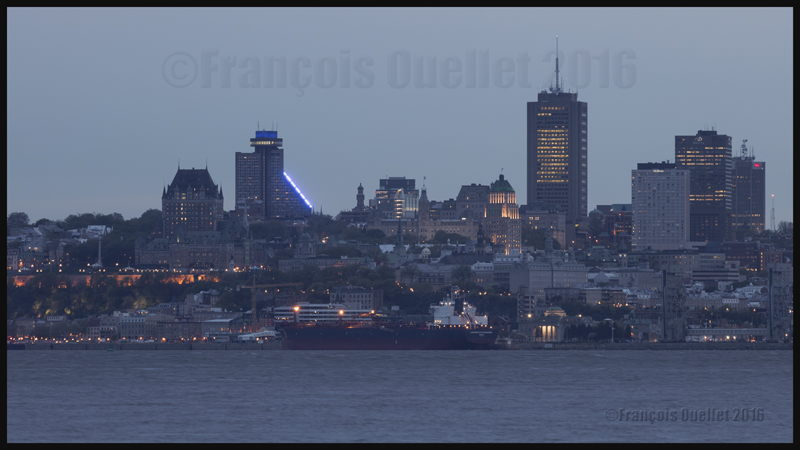
The photo below, also taken from île d’Orléans, offers an interesting view of Quebec City just before nightime. The Hotel Le Concorde Quebec’s new lighting system is visible in the distance. In the foreground, you can see the ship Laurentia Desgagnés.
The vessel Laurentia Desgagnés moored in front of Quebec City during a May 2016 evening.
Below, the ship Nilufer Sultan is heading towards Quebec harbour. Built in 2008, this oil tanker also uses the Marshall Islands flag of convenience.
The vessel Nilufer Sultan in front of Quebec City in 2016. Also visible are the Château Frontenac and the Hôtel Le Concorde Quebec.
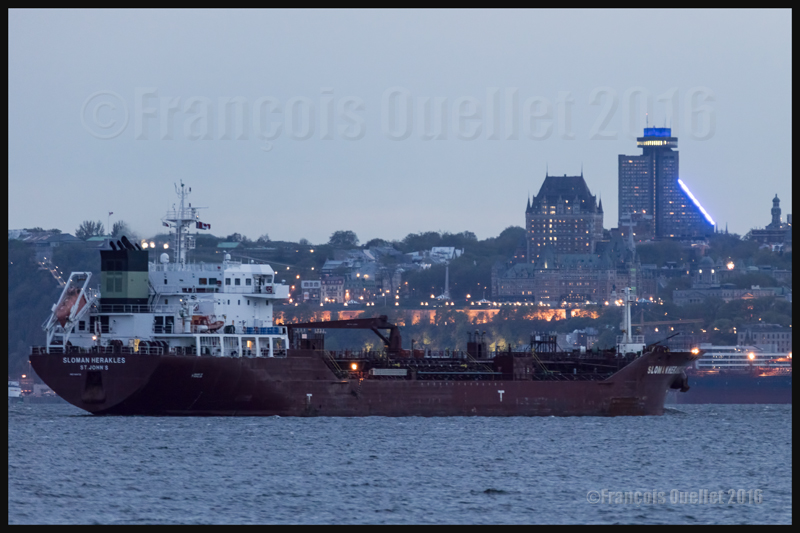
The photo below shows the tanker Sloman Herakles, normally based in St. John’s, Canada. It sails under the Antigua and Barbuda flag and is heading to Sarnia, Ontario.
The vessel Sloman Herakles (St. John’s) in front of Quebec City in 2016
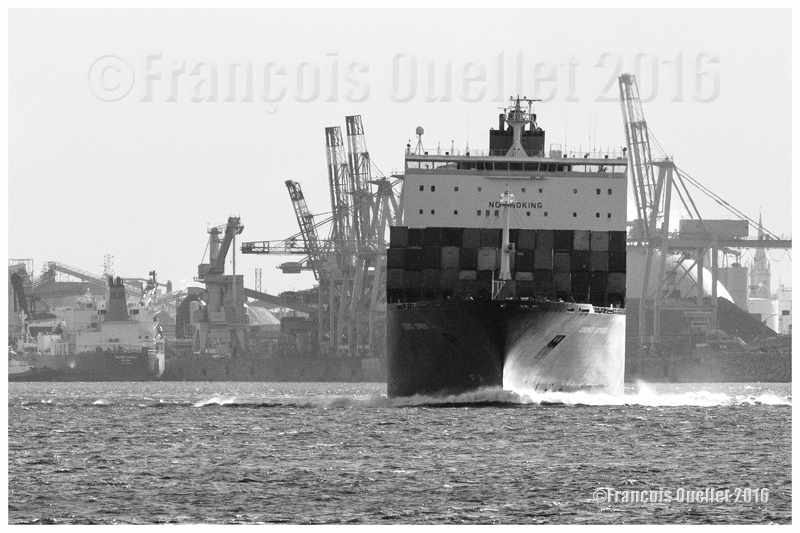
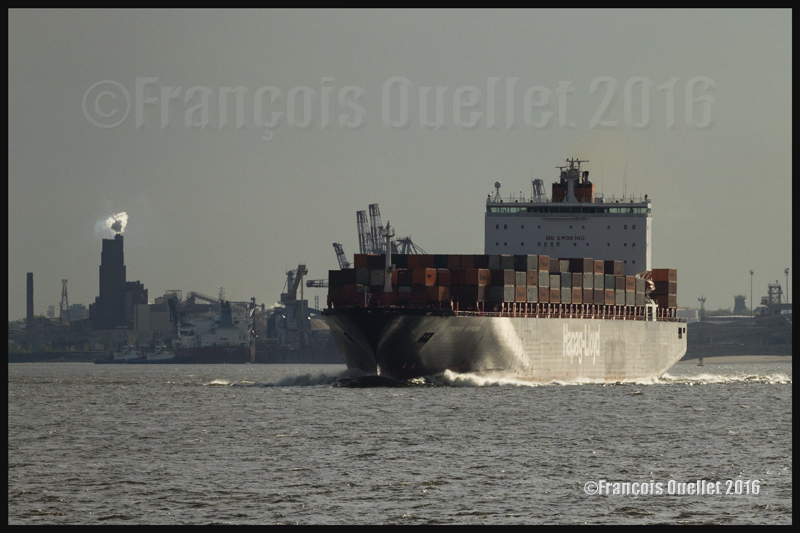
The two photos below show the container ship Toronto Express, property of the Hapag Lloyd Company. I chose to transform the first picture in black and white since the ship did not contrast enough with the background in the colored picture. It is actually slightly inclined since it is turning towards the right while approaching île d’Orléans. On the next picture, we can see in the background the smoking chimney of the Papiers White Birch Company, formerly called Daïshowa and later Stadacona.
Black and white photo of Hapag Lloyd’s Toronto Express in front of the Quebec harbour installations in May 2016
The Vessel Hapag Lloyd Toronto Express near the Quebec City Harbour in 2016. Photo taken with a Canon 5DSR full-frame camera
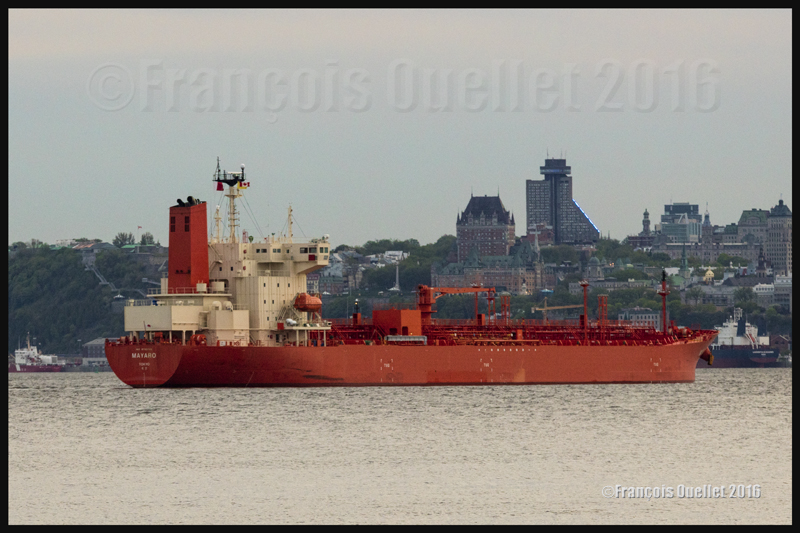
Below is the chemical tanker Mayaro (Japan) arriving near Quebec City in May 2016.
The vessel Mayaro (Tokyo) and Quebec Château Frontenac in the background. The picture was taken in 2016 with a Canon 5DSR
Taking pictures in the evening
Trying to take pictures of moving ships in the evening, using the smallest possible ISO, forces a photographer to use a tripod, a remote trigger and the camera’s mirror lock-up function to reduce vibrations. Ideally, it is best to find a spot where the tripod will be protected from the wind while ensuring that the camera’s strap is not moving at all. There is no need to use a polarizing filter at this time of the day: that would only be detrimental to the photo.
The Canon 5DSR DSLR full frame camera allows the photographer to take a picture in two steps, reducing even more the possibility of secondary vibrations. First, the mirror is lifted up. Then, two seconds later, the photo is finally taken. For a sharper image, it is best to use the Liveview function with a 16X enlargement and do a manual focus adjustment.
Risks associated with photography!
On île d’Orléans, many visitors use the surroundings banks to let their dog roam freely. This can cause a problem as the animal sometimes perceives the photographer and his photographic equipment as a potential threat to a master that it must protect… You will have been advised!
For other ship photos posted on my website, click on the following link:
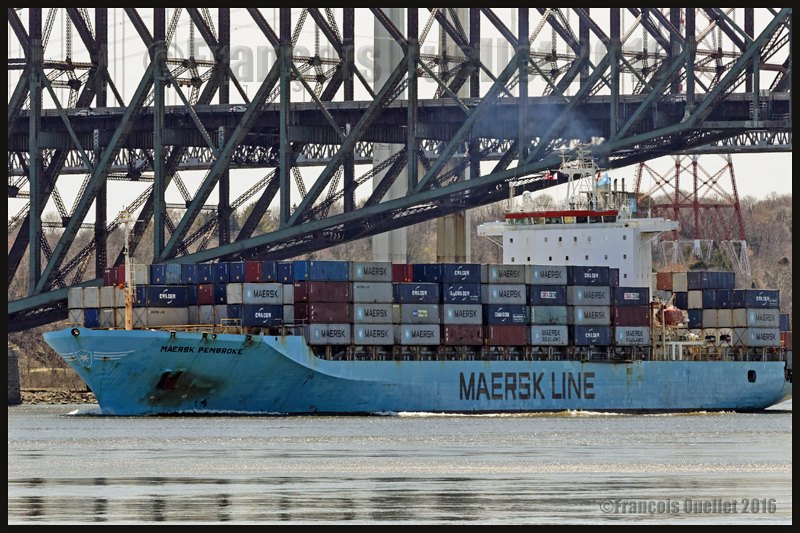
The container ship Maersk Pembroke under the Quebec Bridge, May 2016
Choosing what is important in a camera
Since there is actually no camera that has everything, whatever the brand, the buyer of a new camera must make choices: the type of sensor, the number of megapixels, the weight and size of the camera, the automatic focus’s speed and ability to follow a subject, the number of images per second, the performance under low light, the possibility to greatly enlarge a picture while maintaining its quality, advanced video functions, electronic communications with other devices, an extensive choice of lenses, etc. The list can be quite long…
The Canon 5DS(R): a specialized camera
A photographer happy with the Canon 5DS or 5DSR is one who needs a specialized camera offering both sharp images and the possibility of greatly enlarging the pictures it takes while maintaining the initial quality. This camera allows for more creativity as the possibility of extreme cropping beats, for now, everything that is on the market in the DSLR format.
Testing the potential of the Canon 5DSR when it comes to enlarging a picture
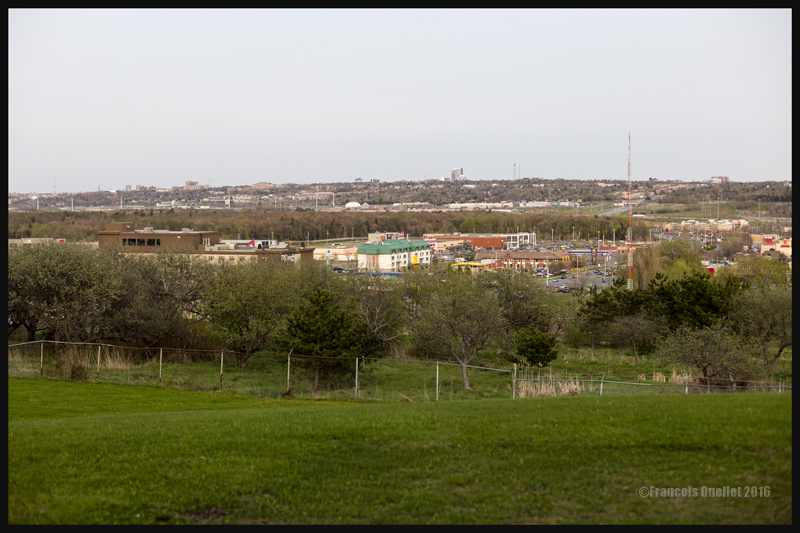
Here is an example of what this means: the photo below shows the yellow M of the McDonald’s restaurant photographed with a 50mm lens. Not easily visible…
Mc Donald’s restaurant’s yellow M captured with a 50 mm lens. Hard to see, of course!
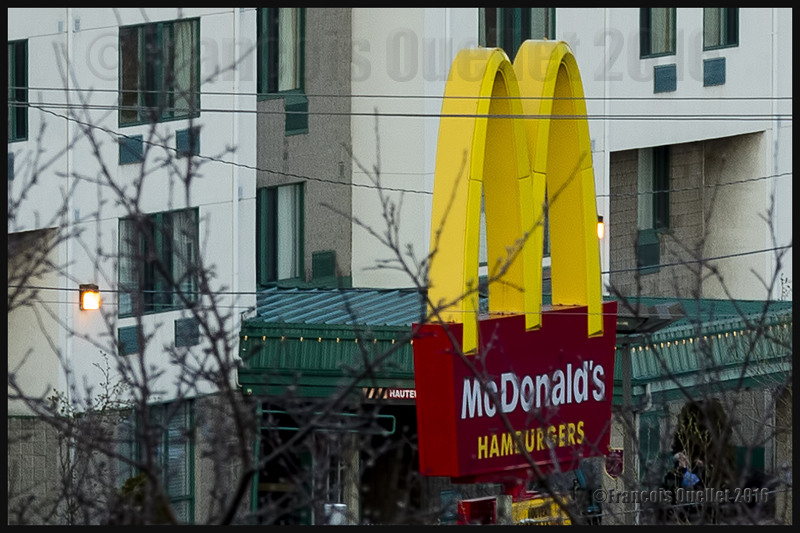
Then the next photo was taken with a Canon EF 70-200mm f/2.8L IS II USM telephoto lens set at a 200mm focal length.
Testing the Canon 5DSR: the Mc Donald’s restaurant’s yellow M enlarged through a Canon EF 70-200mm f/2.8L IS II USM telephoto lens. Focal length used: 200mm.
But the picture can be enlarged a lot more using the amazing resolution of the Canon 5DSR. The following picture shows the result after cropping the 200mm image: the yellow M now takes the whole vertical space available in the picture without any loss in quality.
The Mc Donald’s restaurant’s yellow M, after having been enlarged (focal 200mm) and cropped within the Canon 5DSR.
From my position on the hill, the yellow M was barely visible with the naked eye. By using a 200mm focal length, followed by serious cropping, I was able to obtain the result above. So it is possible to photograph a subject that is almost invisible without a telephoto lens and transform it into the principal subject of the picture without any loss in quality.
I chose the 5DSR because the anti-aliasing filter has been neutralized in the model R to offer even sharper images, although there is a risk of occasional moire effect when there are repetitive patterns in a scene. This is the compromise that Nikon users must also have to deal with.
Rethinking photography
The 50.6 megapixel full frame sensor in the Canon 5DS or 5DSR allows a new approach of photography for those who do not have access to a much more expensive and larger medium format camera that does not necessarily give really superior pictures.
When I go outside for a photo session, it seems to me that I now carry a huge telephoto lens without the weight and the cost. A lot of what seemed to be unavailable possibilities are now accessible.
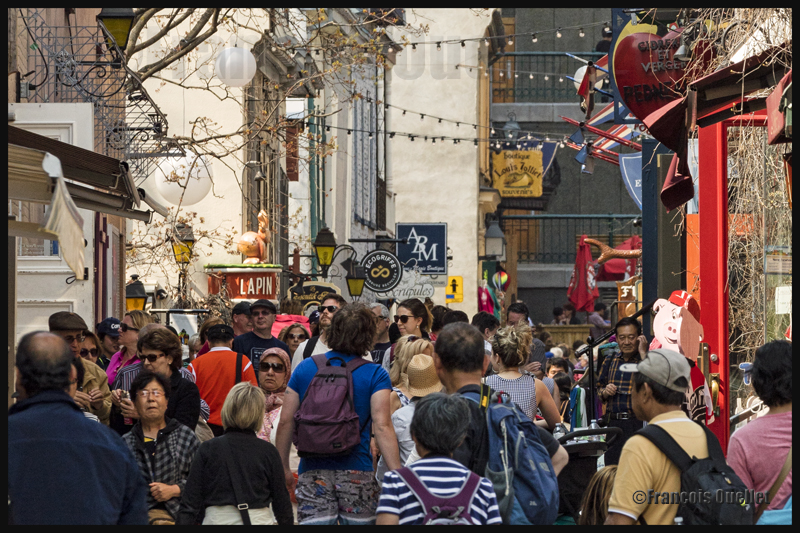
Taking pictures of people in the street is now less complicated: there are no more suspicious looks, artificial poses or people hiding their face. This is an ideal camera to capture people acting naturally without disrupting their routine. Gone is the feeling that you are bothering them in any way.
Quartier Petit-Champlain Old Quebec May 2016
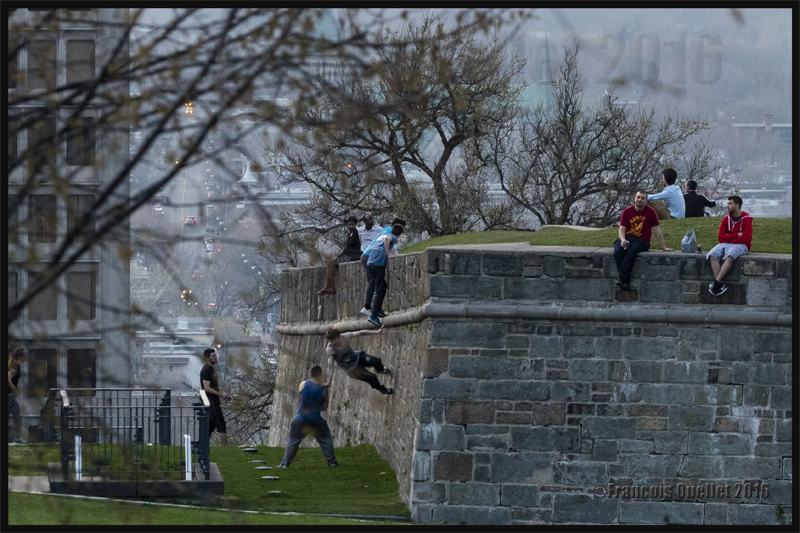
The photo below was taken while I was standing at least 300 meters from the scene, just after sunset. For those who are from Quebec City, I positioned the tripod on a high wall on the other side of Chemin St-Louis, near the St. Louis Gate. I had to slightly brighten up the picture to make the details more visible, risking at the same time to increase the digital noise. It was a May 2016 warm misty evening, which is clearly visible by the lack of details in the background as we look in the distance.
Quebecers defying gravity in Old Quebec, May 2016
But those are not the only possibilities of this camera. The Canon Company, in its promotional video, explains what exactly the camera was designed for:
How can someone maximize the use of a 50.6 megapixel full frame sensor
In order to bring a subject closer to you while fully benefiting from the Canon 5DSR 50.6 megapixel full frame sensor, it is obvious that there must be absolutely no vibrations. The photographer must therefore use a tripod, a remote control release and the mirror lock-up function. This allows for a very low ISO setting while avoiding a blurred picture.
The mirror lock-up function is very well thought through, with the possibility to choose a totally automatic processus according to a timing chosen by the photographer (between 0 and 2 seconds). The system eliminates any secondary micro vibrations.
In order to ensure an even better picture, the photographer must use Liveview and set it to the 16X enlargement available on that camera (versus 10X on my Canon 5D MKII) to manually adjust the focus. It is then possible to see the slightest vibrations caused by the wind. Doing so, I realized that my camera strap, lightly swaying in the wind, was causing some minimal vibrations. Every detail taken into consideration will improve the final result.
One must then ensure to immobilize the strap and even diminish the tripod height if possible when the wind is blowing. These steps will allow an incredible enlargement of a subject while maintaining the initial quality of the image offered by a full frame sensor.
Superior mirage effect (cold mirage)
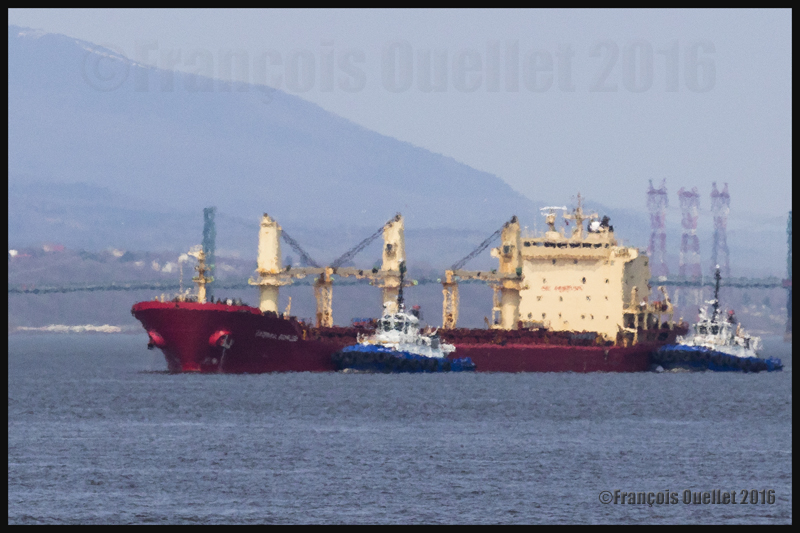
The photo below shows a ship being helped by two Ocean tugboats on its way towards the Quebec Harbour. The ship was at a good distance from the harbour; it is then possible to witness the superior mirage effect (cold mirage) resulting from a temperature inversion immediately over the water. The boats are deformed but the important close-up has not lowered the image quality. It has instead allowed to increase the atmospheric phenomenon effect.
Superior mirage (cold mirage) effect. Vessel and two Ocean tugboats on the St-Lawrence seaway heading to the Quebec Harbour, May 2016.
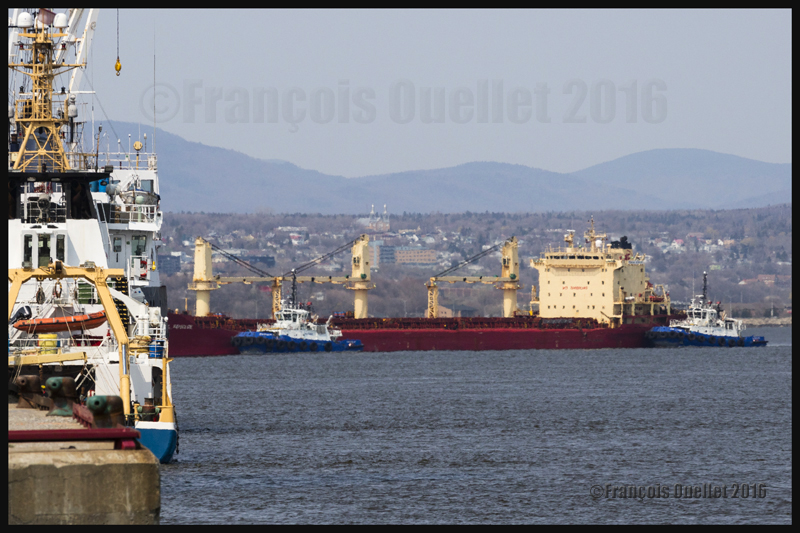
Once closer to the Quebec Harbour, the cold mirage effect decreased, as shown on the picture below:
Quebec Harbour, May 2016
The Canon 5DS or 5DSR without the use of a tripod or mirror-lock
Obviously, a tripod is not necessary if you do not intend to use a lot of cropping to enlarge a photo. You will obtain excellent results with the hand-held camera providing that you remember that this Canon DSLR is a specialized tool.
So many megapixels on a sensor of that size require that the photographer adapts his technique. But, as you can see from the picture below, it is totally possible to capture an aircraft in movement, even at dusk (May 11, 19:49), when the camera’s parameters are correctly adjusted. A higher shutter speed than normal is, in this case, absolutely mandatory.
The photo below shows an Air Canada Express Bombardier DHC-8-402NG (C-GSJZ) on final for runway 29 at the Quebec Jean-Lesage international airport (CYQB).
Bombardier DHC-8-Q-402NG (C-GSJZ — Air Canada Express) on final for the Quebec Jean-Lesage international airport, May 2016. Photo taken with a DSLR Canon 5DSR.
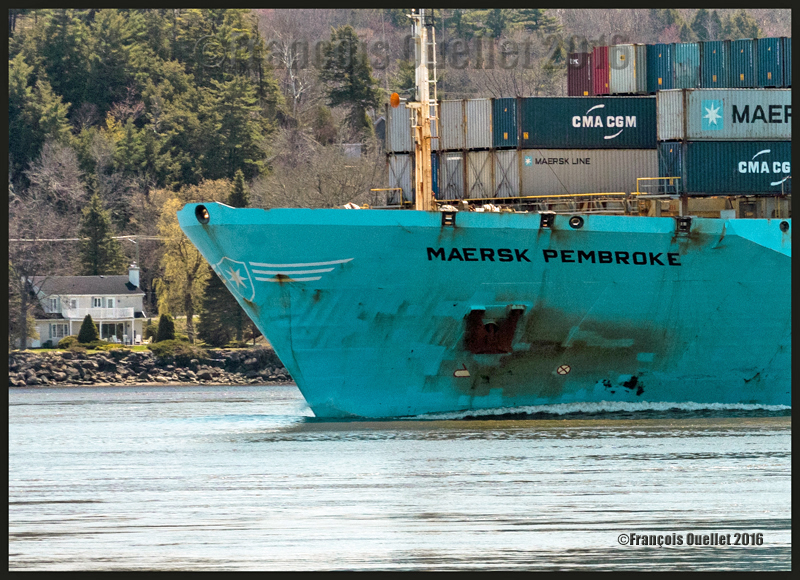
The Maersk Pembroke with the camera hand-held
The photo below shows the Maersk Pembroke container ship photographed with a hand-held camera using a Canon EF 70-200mm f/2.8L IS II USM telephoto lens during Spring 2016 near Quebec City. The focal length was only 140mm and the shutter speed 1/1000. The lens was equipped with a polarizing filter and the photo taken when the vessel was approaching the Quai des Cageux.
The Maersk Pembroke container ship on the St-Lawrence seaway near Quebec City, May 2016
The colours produced by the Canon 5DSR
The digital processing of the image and colours produced by the Canon 5DSR require different adjustments than what was necessary with the Canon 5D MKII. I am still learning how to handle the results produced by this camera so I will wait a bit before commenting.
View of Old Quebec from the St. Louis gate. Quebec City, May 2016
Night photography
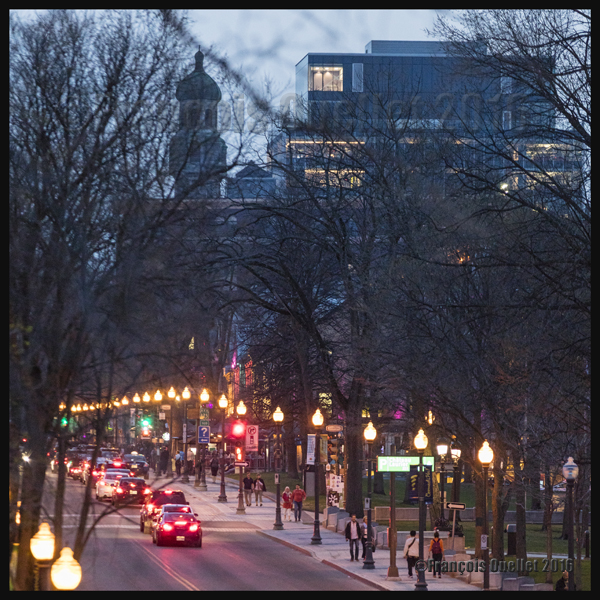
Here are two photos taken during the evening in Quebec City. The photo below required a 200mm focal, an ISO set at 4000 and a shutter speed at 1/30 in order to obtain something else than trailing lights. Luckily, the traffic was moving slowly…
Night photography, Grande-Allée avenue, Quebec City, May 2016
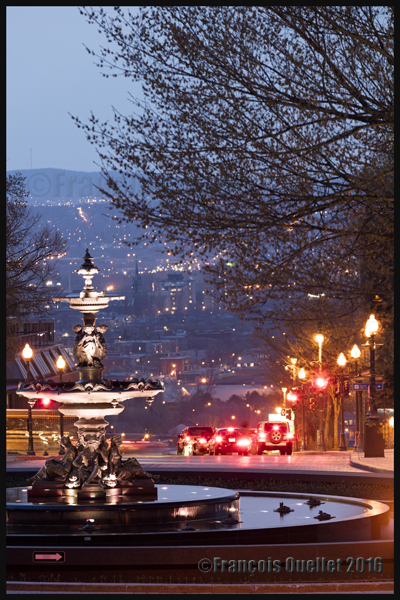
The picture below, taken with a 200 mm focal, required an exposure time a bit longer that one second with the ISO set at 800. To take the photo, I took advantage of the fact that the cars were momentarily stopped at a red light, so that they would be clearly visible.
Night photography, Tourny fountain and Quebec lower town, May 2016
The images per second of the Canon 5DS(R)
The Canon 5DSR is so far quite an impressive camera. I would have appreciated that Canon offer a higher rate of images per second (7 instead of 5) to make it more versatile.
The camera allows taking pictures with smaller formats than 50.6 MP, the two other options being 28 MP and 12 MP. If the camera can deliver five images per second with 50.6 MP RAW files, we can deduct that it is able to offer more speed for smaller formats. But the camera is blocked at 5 IMS so that it, I suppose, does not compete with other existing Canon models of the same category…
Nonetheless, Canon says that the rapid sequence of shooting lasts longer if the photographer uses the smaller files provided. So it is not faster, but it keeps on firing for a longer period. My guess is that it would only require a new firmware version to improve this camera’s number of images per second.
For other night pictures, click on the following link to my site:
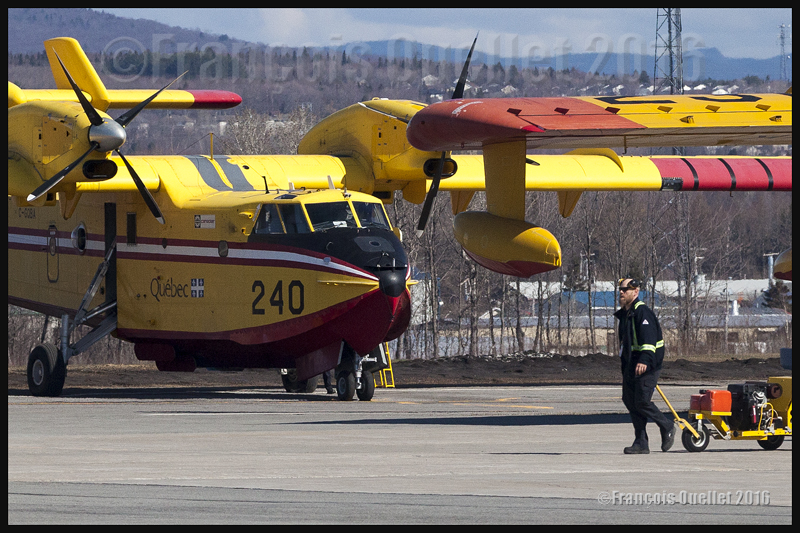
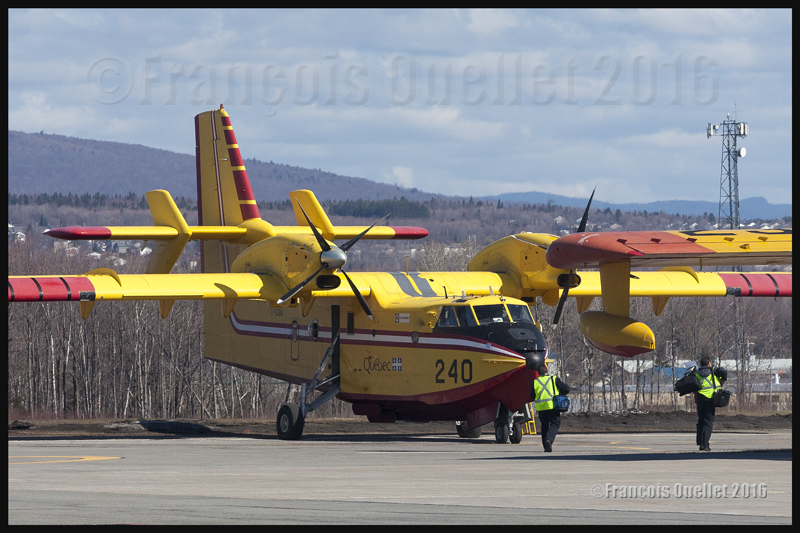
A Bombardier CL-415 water bomber, property of the Government of Quebec, is being prepared for its flight towards Fort McMurray, May 2016
Quebec’s CL-415s helping out in Fort McMurray
On May 5th, 2016, according to what had been announced by the Government of Quebec, four CL-415s took off from the Quebec Jean-Lesage international airport (CYQB) heading to Fort McMurray, Alberta, to help in the fight against widespread forest fires in that province. It is the worst natural disaster that Canada has known in its history.
Preparing flight crews and aircrafts for such a long cross-country trip naturally demands much coordination from the SOPFEU (Society for the protection of forests against fires). Once they will have landed at the Fort McMurray airport, the pilots of those CL-415s will be under the direct command of the Albertan authorities in charge of fighting the wildfires, since the latter are best positioned to know exactly what the local needs are.
I figure that the flight service specialists (FSS) of the Nav Canada flight information center (FIC) in Edmonton must have quite busy days with the increased aerial activity associated with the numerous fires…
Crew members are walking towards the Government of Quebec CL-415; they will soon be airborne and heading to Fort McMurray in Alberta, to fight the forest fires (2016)
The picture above shows crew members heading towards their assigned aircraft. Once they start working in the Fort McMurray region, they will not only have to directly fight the forest fires but also head to sectors that have not yet been touched by fire and water the area thoroughly to prevent new wildfires.
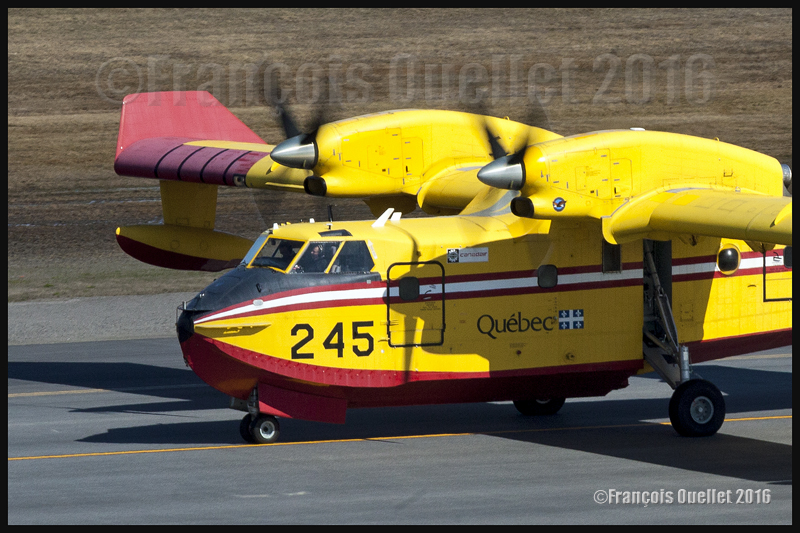
A Government of Quebec CL-415 number 245 is taxiing at the Quebec Jean-Lesage international airport to take-off towards Fort McMurray, in Alberta, to help fight the out of control forest fires in that province during May 2016.
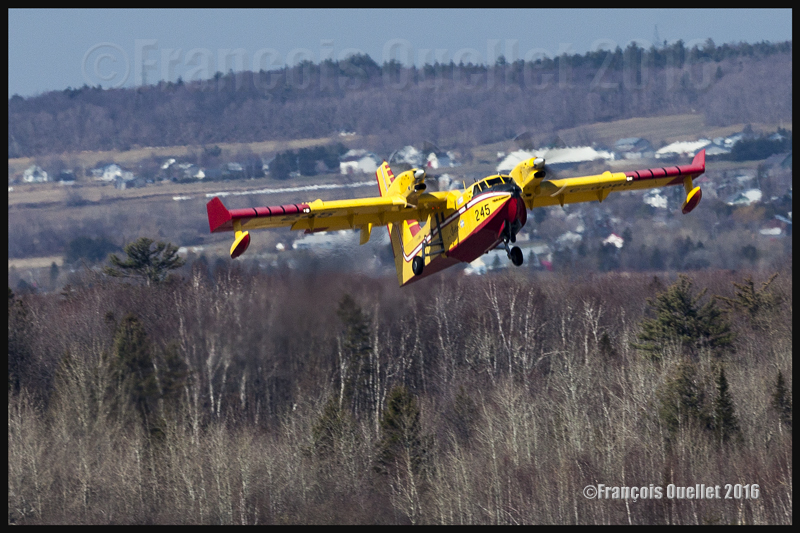
Taking pictures of propeller-driven aircrafts
A Bombardier CL-415 water bomber takes off from the Quebec Jean-Lesage international airport heading to Fort McMurray, in Alberta, to help fight the forest fires (2016)
It is a bit touchy to photograph propeller-driven aircrafts while making sure that there is a sensation of movement. In a natural reflex to want to avoid blurred pictures, the photographer uses a shutter speed that corresponds to the focal used for the shot. In the case of the picture above, the focal was 400mm. But if a shutter speed of 1/400 had been used, the propellers would have been totally immobilized and the aircraft would have looked like its climbing while not using its engines.
It was necessary to reduce the speed to 1/160, thus increasing the risk of obtaining a blurred picture. In order to get both image sharpness and moving propellers visual effect, the photographer has to follow exactly the movement of the aircraft with the camera so that it looks totally immobile in the viewfinder. This asks for a bit of practice but allows for more realistic photos.
The CL-415 in a black and white photo
Black and white photo of a Bombardier CL-415 (C-GQBG) flying over Quebec City in 2015
The government of Canada helping out Alberta’s citizens
The government of Canada, under Justin Trudeau, has promised to match the amounts of money offered by all Canadians to the Red Cross society toward helping the Fort McMurray population.
Obviously, its contribution will not stop there (in fact, far from it), but the message is for the whole Canadian population to contribute generously to support the efforts of the Red Cross. It is already estimated that the material damages will reach at least nine billion dollars and that numerous years will be required to rebuild everything. The Liberal Party of Canada had built its political campaign around the need to invest for the renewal of infrastructures. With the Fort McMurray fires, there will be plenty of new unplanned expenses ahead.
More than 1,400 firemen are fighting the wildfires. So few, there has been very few lives lost, although “very few” is always too much. The crisis is, according to everyone, well managed by the government of Alberta.
At the time of writing, there was still no rain forecasted for days to come and the drought was also extending to the southern half of Saskatchewan and part of Manitoba. The winds were expected to increase, which would mean that even more resources would be needed in the near future to bring those wildfires under control.
It seems to me that the government of many Canadian provinces would benefit in acquiring new water bombers like the CL-415 to give them an increased margin of manoeuver that would allow them to react more quickly, if we take into account the tendency for the ever growing number and size of forest fires. In the picture below, the government of Quebec CL-415 number 247 is just airborne from Quebec to Fort McMurray.
A Bombardier CL-415 C-GQBK airborne from the Quebec Jean-Lesage international airport heading to Fort McMurray, Alberta, in May 2016
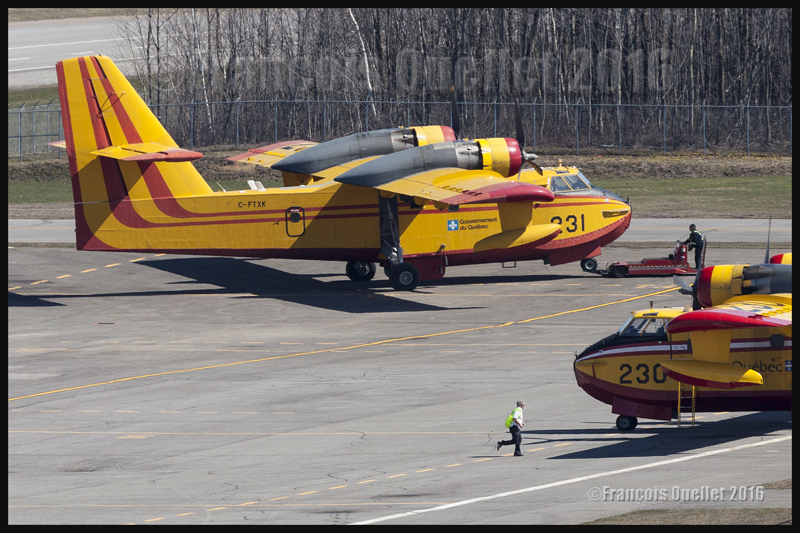
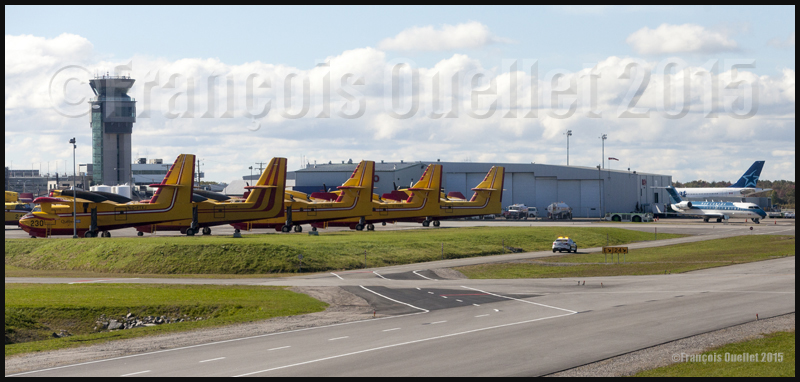
The CL-215s will not head to Fort McMurray
While several CL-415s are leaving for Alberta, few water bombers, like the two Canadair CL-215s shown below, stay at the Quebec Jean-Lesage international airport in case of forest fires in the province and also to be used for the seasonal rehearsal needed for every pilot before they are dispatched across the province of Quebec.
Two Canadair CL-215 water bombers parked at the Quebec Jean-Lesage international airport in May 2016.
Global warming
Some people can say that global warming is not responsible for the increasing number of extended wildfires. They might be right, but I prefer to adopt a wider view than only what is going on in Alberta. Heat transfer between the north and south are now more extreme in order to equalize the temperatures around the globe. All means to reduce the difference in temperatures between the equator and the poles are at work and this causes increasing problems to particular regions.
The Kamloops region in British-Columbia, when numerous forest fires were raging 2014.
A powerful El Nino phenomenon, repetitive Omega blocks, the air circulation in different cells (Hadley, Ferrell, polar, Walker) all participate in the heat exchange. At a more reduced scale, we also regularly hear of cold and warm fronts in the meteorological forecasts.
It is certainly not local warm fronts that are responsible for the fact that a thinner layer of permafrost is unable to ensure the stability of Arctic runways anymore. Nor are fronts responsible for the fact that houses on stilts do not have a stable foundation anymore. Many heat records have been established these past years in northern Canada. There will certainly be large amounts of money to spend to rebuild the Nordic infrastructures.
Brush fires as soon as April in Alberta
This year, as soon as April, there were widespread brush fires in a region as north as Fort McMurray in Alberta because winter has not brought much snow to humidify the land during Spring. I thus wondered what would happen once in July. Albertans did not need to wait that long to get the answer.
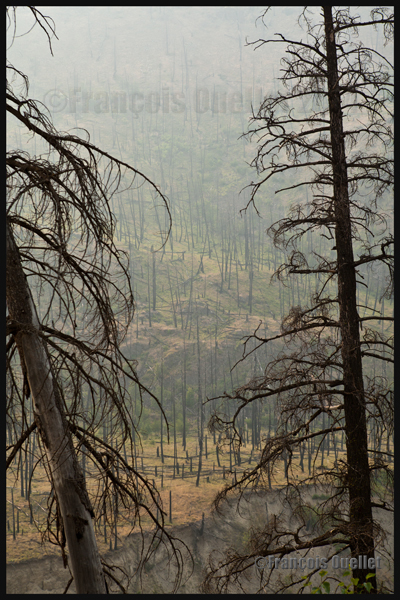
Western Canada forest after a fire (2014)
The modelization of climatic changes indicates that, in the Fort McMurray region, the forest fire season is already fifteen days longer that it used to be. More heat might favor more droughts. But an increase in temperature also favors the development of thunderstorms and with them comes lighting that will start up new fires.
One thing is sure: insurance companies will not lose time with the different theories on global warming. The reinsurers (those who insure the insurance companies) have the obligation to limit their losses to stay afloat and premiums will quickly increase to answer to the thousands of claims following an increasing number of natural disasters.
Photos of the local air traffic in Quebec, just after the CL-415s departed to Fort McMurray
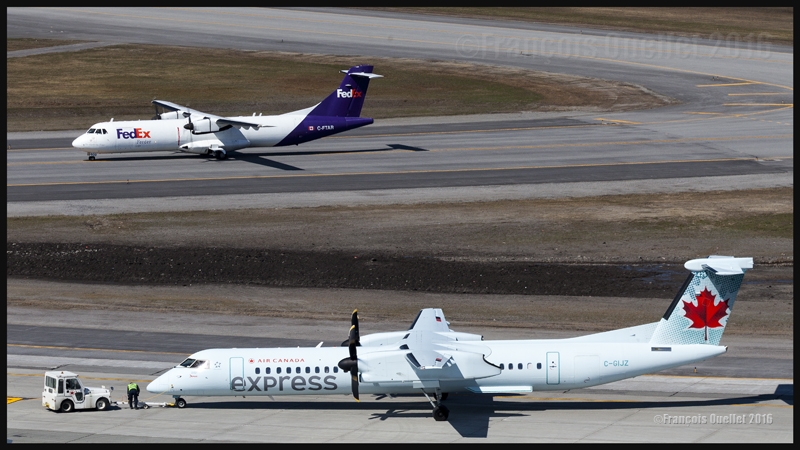
FedEx ATR 72-202F C-FTAR and Air Canada Express Bombardier DHC-8-Q-402NG (C-GIJZ) at the Quebec Jean-Lesage international airport in May 2016
At the Quebec airport, between the take offs of the four Bombardier CL-415 towards Fort McMurray, I was able to take few pictures of the local air traffic. In the photo above, it is possible to see a FedEx ATR 72 (C-FTAR) taxiing toward the ramp after a landing runway 06. An Air Canada Express Bombardier DHC-8-402 (Q-400) (C-GIJZ) was also being towed for is imminent departure.
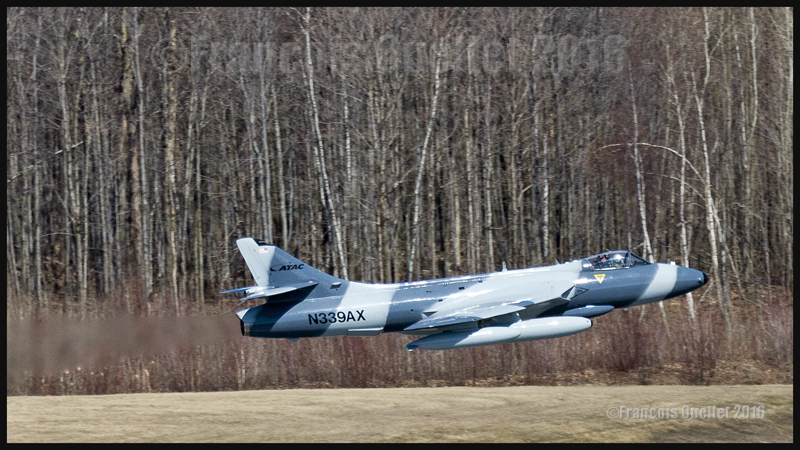
ATAC’s Hawker Hunter N339AX
Being in luck, I was able to capture a Hawker Hunter (N339AX) belonging to the American company ATAC, just airborne from Quebec. As for any military jet, it is difficult to ignore them on take-off: the reactor’s noise is there to remind you of their presence…
A Hawker Hunter belonging to the american company ATAC is airborne from the Quebec Jean-Lesage international airport (CYQB), May 2016
A Hawker Hunter, from the american company ATAC, is airborne from the Quebec Jean-Lesage international airport (CYQB) in May 2016
The pictures above have been taken with a Canon 5D MKII camera, equipped with a telephoto lens Canon 70-200 f2.8L IS II USM with a polarizing filter and a Canon Extender EF 2X III which brought the focal length to 400 mm. Even then, more cropping was necessary to enlarge the aircraft since I was quite far away from the runway.
Wishing to ensure that the image was sharp (a blurred picture is more probable with a 400 mm focal length while the photographer attempts to follow a fast flying jet), I adjusted the shutter speed to 1/1600 and made sure that the automatic focus was set on AI servo.
I now realized that a slower speed could have worked a bit better since it would have allowed showing a blurred forest in the background while keeping the aircraft sharp. But it is not often that you have the opportunity to see a Hawker Hunter in flight these days and I played safe with the shutter speed. The ideal shot will be for another day…
CL-415s and CL-215s together in Quebec (2012 photo)
CL-415 and CL-215 water bombers belonging to the Gouvernment of Quebec. Quebec Jean-Lesage international airport (CYQB) 2012
A last picture, taken few years ago, during autumn 2012, shows numerous water bombers CL-415 and CL-215 parked at the Quebec Jean-Lesage international airport (CYQB). During the off- season, the water bombers are brought back to Quebec City from the different bases were they have been in operation during summertime.
For other articles on aviation and photography, click on the following link: Aviation photography
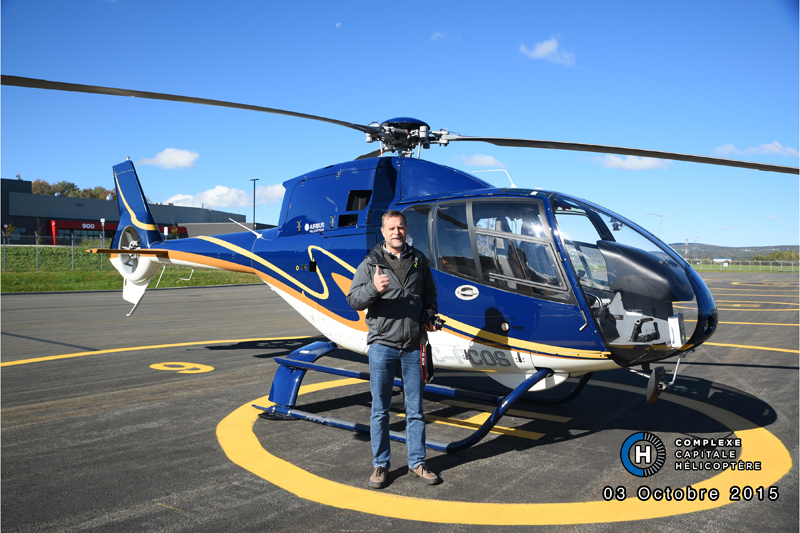
A souvenir photo in front of a Eurocopter EC120 Colibri (C-FCOS) at the Quebec Jean-Lesage international airport (2015)
December 2013. Time for retirement had come. On my last working shift as a flight service specialist (FSS), I was able to share good memories of the past experiences as a Transport Canada and later Nav Canada employee. A shift supervisor had bought an excellent chocolate cake which was rapidly taken care of by the employees.
The next year, during an official retirement party including two other retirees, the Nav Canada flight information center (FIC) employees in Quebec City (CYQB) presented us with several gifts. I used the gift certificates to book a helicopter ride.
The pilot headed towards the Quebec Bridge then followed the St-Lawrence Seaway to Old Quebec. He then flew towards the Davie shipyard, Île d’Orléans, the Montmorency falls and then returned to the Quebec Jean-Lesage international airport. During the flight, we were able to witness the arrival of the Queen Mary II cruise ship in Old Quebec. Here are some pictures that I took during the flight:
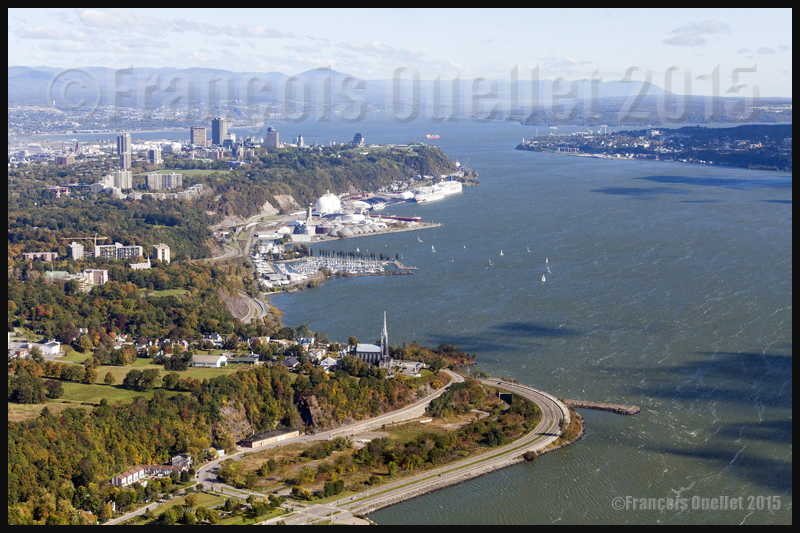
Samuel-de-Champlain promenade and St-Lawrence Seaway in 2015
The Queen Mary II passing by Île d’Orléans enroute to Quebec in 2015
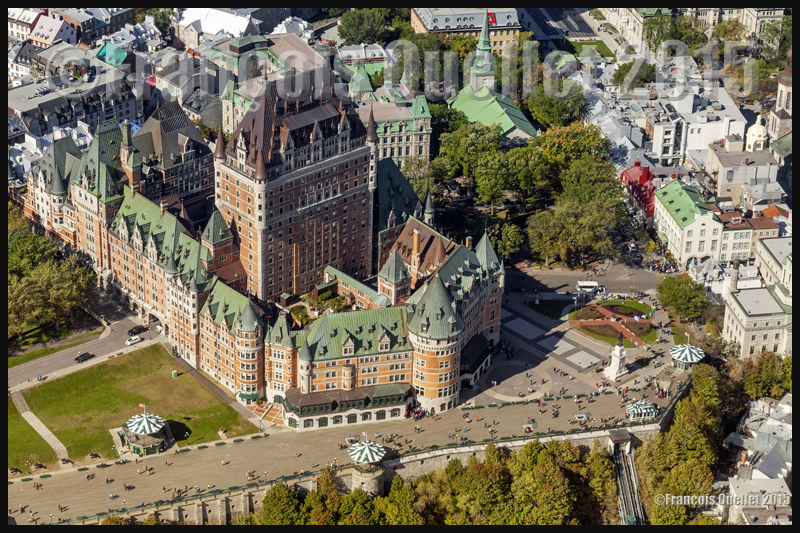
The Château Frontenac, Dufferin Terrace and a small part of Old Quebec in 2015
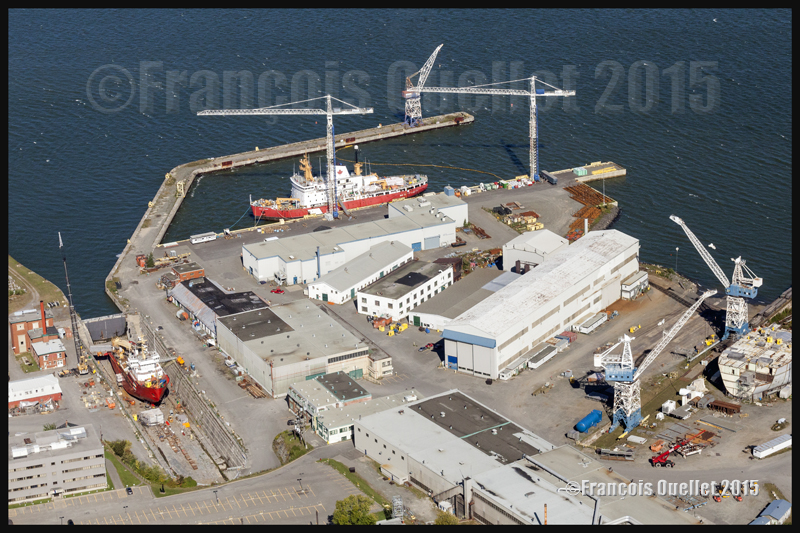
Davie shipyard in Quebec (2015)
Orleans Island and St-Lawrence Seaway, Quebec, 2015
Quebec Jean-Lesage international airport in 2015. The Nav Canada installations are visible (control tower and flight information center (FIC))
I hope you liked the real life stories as pilot, flight instructor, Transport Canada student and flight service specialist in Inukjuak, Rouyn-Noranda, Iqaluit and Quebec City, as well as FSS for Nav Canada at the flight information center in Quebec City. I have included all the stories and photos on my web site www.francoisouellet.ca , in the following “real life stories” sections:
There were naturally many more stories that would have deserved to be written but, due to their particular nature, those stories had to stay confidential.
Thanks for the encouragements and comments shared in person or via electronic communication.
N.B.: All the articles published on the web site https://francoisouellet.ca/en/ are under copyright protection. All rights reserved. Thanks for your understanding.
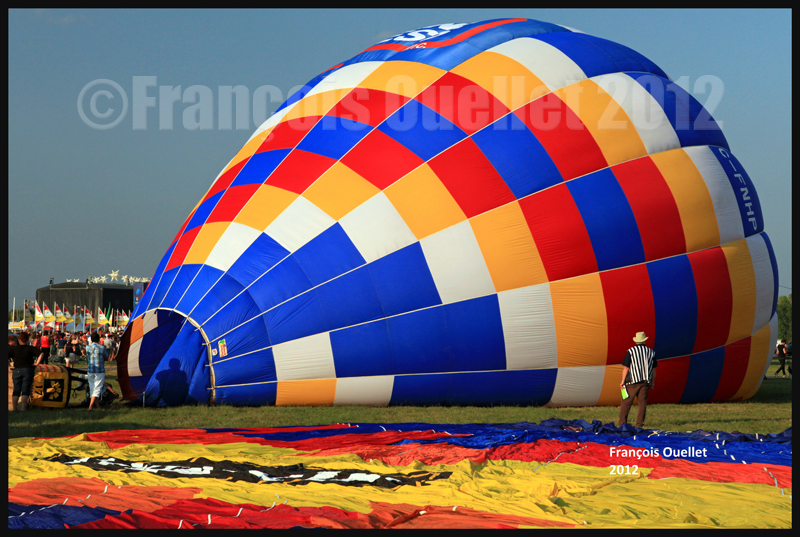
The hot air balloon C-FNHP is being inflated at the St-Jean-sur-Richelieu festival in 2012
The Nav Canada flight service specialists (FSS) working at the flight information center (FIC) at the Quebec Jean-Lesage international airport (CYQB) regularly receive telephone calls from hot air balloon pilots preparing their next flight. Actual and forecasted wind conditions are important, be it on the ground or in the air. But the FSS must also take into account the slightest possibility of a rain shower that would wet the balloon’s envelope, the variation in the convection according to the time of the day which would then affect the winds, the local effects, etc.
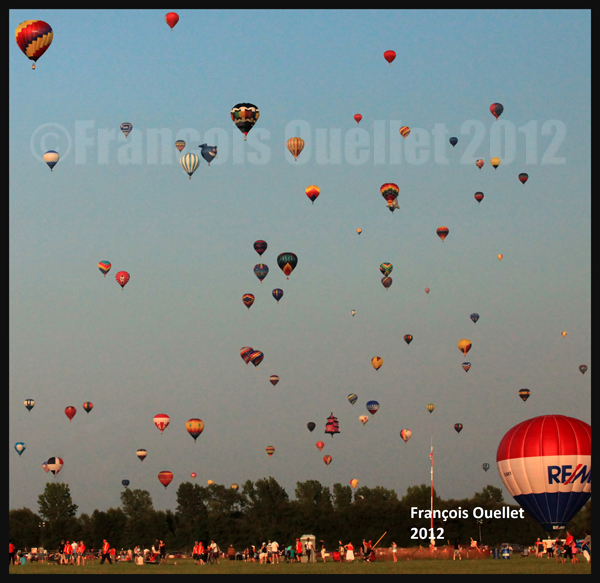
Although it is interesting to brief a hot air balloon pilot on the telephone, it is far better to witness their activity when getting ready for a flight. And the effect is even more striking when you position yourself in the middle of a field where more than a hundred hot air balloons lift altogether.
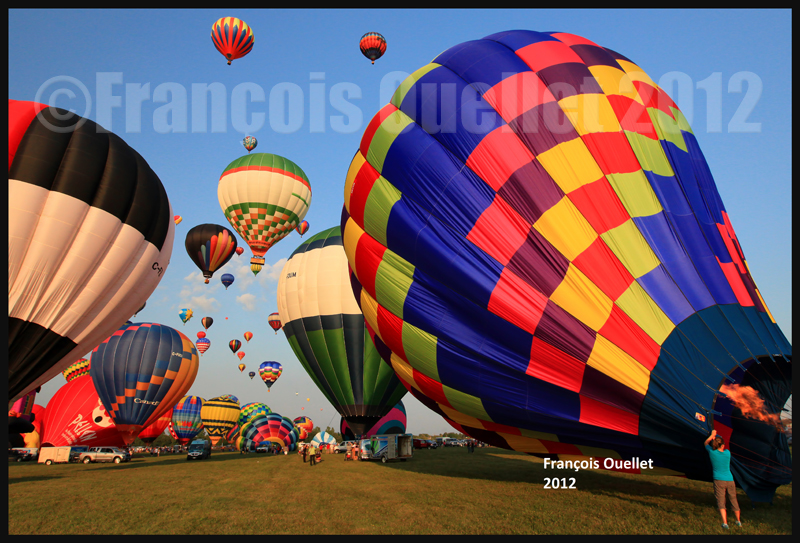
A first group of hot air balloons are autorized to lift at the St-Jean-sur-Richelieu festival in 2012
Summer 2012. A beautiful day was expected in St-Jean-sur-Richelieu. Blue sky and calm winds were forecasted for the evening. There would certainly be photo opportunities (Canon 5D MKII).
The field where the balloons were being prepared was fenced, but there were here and there openings and it seemed possible to enter the area without attracting too much attention. I made an attempt and could rapidly live the frenzy associated with the preparation and launch of more than one hundred hot air balloons.
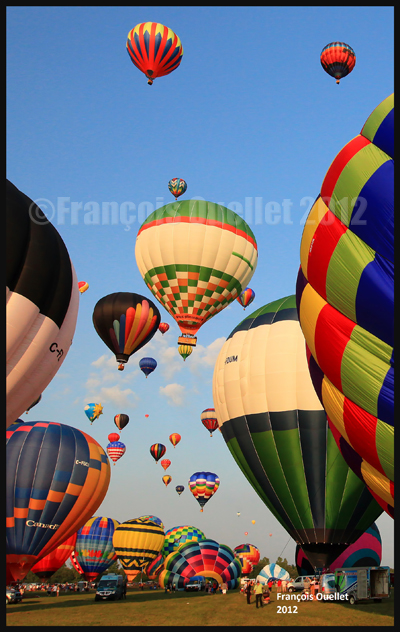
Rising hot air balloons in St-Jean-sur-Richelieu in 2012
The balloons progressively took shape and it became possible to see their designs and superb colours. Each team was taking care of the last details that ensure a synchronized launch when the signal would be given. The organizer eventually gave the go ahead signal and the hot air balloons all lifted up within a very short time span. This was a magnificent show!
Hot air ballons at the St-Jean-sur-Richelieu Festival in 2012
Visitors at the 2012 St-Jean-sur-Richelieu hot air balloons festival
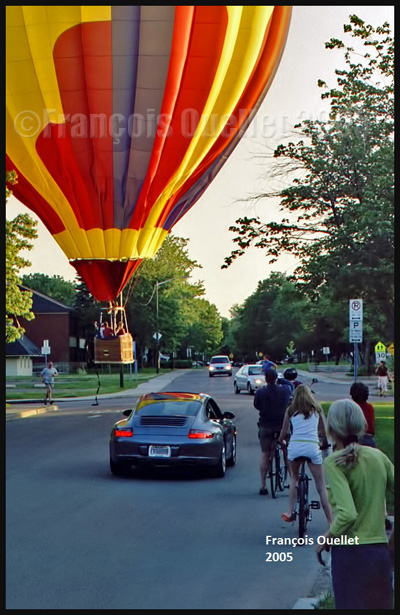
Few years earlier, during summer 2005, a hot air balloon had flown over our house in Quebec City at about one hundred feet. This was not a normal situation to witness that balloon slowly lose altitude and get closer to electrical wires. I had taken my bike and followed the balloon since it became obvious that the pilot was trying to land, possibly short of propane gas.
The pilot did not have an easy task, flying low over the city streets, close to the wires and other obstacles. The passengers must have been wondering what would be the issue of that flight. Arriving near a school, the pilot had seen a small parking lot and tried to land there, avoiding the church steeple on the other side of the street.
We were few citizens to hang to the basket and immobilize it while the balloon’s envelope was slowly deflating. I was able to take a shot of that unusual balloon’s approach…
Hot air balloon landing on a Quebec City street in 2005
Nav Canada control tower with, in the foreground, several CL-215 and Cl-415, a Nav Canada Challenger, and an Air Transat Airbus at the Quebec Jean-Lesage international airport (CYQB).
On a stormy summer day, Air Canada called the Nav Canada flight information center (FIC) at the Quebec Jean-Lesage international airport (CYQB) on the Montreal frequency. The pilot was flying an Airbus and was about to take-off from the Montreal Pierre-Elliott-Trudeau international airport to Halifax, but there was violent weather that had to be avoided.
Normally, big airlines have their own briefing and flight planning services. However, rapidly changing weather sometimes requires last minute adjustments. In the case of the Air Canada flight, severe thunderstorms forbid a direct path from Montreal to Halifax. The pilot was looking for the best option: go around the thunderstorms by flying north over Mont-Joli then eastward to Halifax or fly southward to United States then head east to Halifax.
Both solutions were possible but the objective was to pick the route that would diminish the pilot’s chances to have to divert to an alternate airport.
Radar imagery became the essential tool to propose a solution. Knowing the time lapse between two images, it was possible to evaluate the weather system’s speed. By calculating what was the distance left for the system to arrive in Halifax, and knowing the system’s speed, the flight service specialist (FSS) was able to estimate as precisely as possible the time when the thunderstorms would move over the destination airport.
The pilot having calculated the estimated time of arrival to Halifax for both the south and north routes, and now knowing at what time the weather system would be over Halifax, he understood that the best option was the southern route through United States. If there was no last minute modification in the system’s speed, he would be able to land in Halifax between twenty and thirty minutes before the first thunderstorm cells arrive over the airport.
It is fairly uncommon to receive an official feedback from the pilot of a big company like Air Canada. But the next day, surprising the flight service specialist (FSS), the pilot called back, presenting himself as the one who had made a flight from Montreal to Halifax the precedent day. He wanted to thank the FSS who had helped him in his decision making since, as he said it, the route via the United States had been a success and he was able to land his Airbus thirty minutes before the arrival of the thunderstorms. That kind of call certainly helps any employee to start a working day on the good foot…!
The Nav Canada flight information center (FIC) in Quebec City (CYQB) does not normally take calls from the general public since air traffic services are centered on the needs of pilots.
But a particularly urgent situation sometimes dictate a more flexible approach. I remember a telephone call we received on the 800 line, during a very hot summer day of 2007. A worker in charge of the installation of dynamite in a mine in the Abitibi region told the flight service specialist (FSS) that he was working for a big company and that an important blasting operation was to be undertaken soon. He was in the middle of the blasting site, having just completed the installation of the detonators and explosives on the whole area.
He was wondering if there could be something he did not know about the weather since there were very dark clouds coming his way. The flight information center FSS was aware of the meteorological situation in Abitibi, and it was certainly not appropriate for a blasting operation. The caller was told that gigantic thunderstorm cells were forming in his sector and that the lightning detectors were already recording hundreds of strikes.
His actual position, in the middle of detonators and dynamite, was certainly problematic, to say the least. Without asking anything else, he told us that he was getting out of the site quickly…
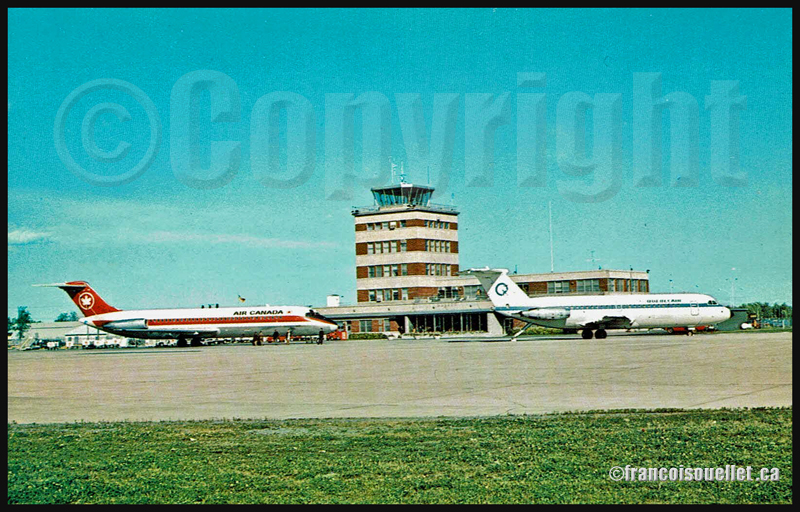
Old Quebec airport terminal with an Air Canada DC-9 and a QuebecAir BAC 1-11 (on aviation postcard)
Around 1996, during the summer, an Air Canada DC-9 captain visited the Transport Canada flight service station in Québec City (CYQB) to receive a last minute briefing on the weather conditions between Quebec and Toronto.
All the passengers were already on board, but the captain had noticed a rapid change in the size of thunderstorms approaching the Québec City airport. Wishing to make the best decision, he requested the latest information on the approaching line of thunderstorms before proceeding with the takeoff.
The weather radar and satellite pictures showed a wall of convective cells that a DC-9 would not be able to go through. It would not fly high enough nor be able to go around the system unless it made a detour through Val-d’Or to the north or the Tennessee to the south.
The captain already knew the consequences of his decision. He nonetheless took the phone and called Air Canada’s dispatch in Toronto, announcing that he would not leave Quebec until the weather was acceptable. He could envision the missed transfers in Toronto for most of his passengers, and their bad mood in face of the lengthy delays he expected in Québec City.
Nevertheless, his decision was made and he left the flight service station satisfied. He knew very well that a line of heavy thunderstorms had often been the cause of accidents and that no aircraft, whatever the size, was safe when dealing with a wall of severe thunderstorms.
The flight service specialists (FSS) were happy with the captain’s decision since, throughout the years, the FSS often witnessed far less commendable behaviour from pilots of all categories. Judgment is the capacity to evaluate consequences, and it is not given to everybody.
April 2013, at the Nav Canada Flight Information Center (FIC) in Québec City. This morning’s meterological forecasts indicate the possibility of dust devils. This type of obstacle to visibility is rare. The pilots call the flight service specialists (FSS) to know what “PO” means on the weather charts.
In spite of the calm winds and blue sky all over southern Quebec, the weather conditions can give birth to local wind shears. If they lift sand, dust or other small particles, those wind shears will become visible and cause dust devils five to ten meters in diameter.
A pilot would have to be unlucky to cross a rare dust devil. However, I remember an event I witnessed thirty years ago while I was working at the Transport Canada Rouyn-Noranda flight service station.
On a hot summer day, an aircraft landed in Rouyn-Noranda after a cross-country flight from Montreal. The pilot was making a short stopover to have his logbook stamped at the flight service station. The weather conditions were ideal at the airport: dry air, calm winds and a cloudless sky.
Once his run-up was completed on the taxiway, the pilot slowly headed for the runway 26 threshold. Once aligned and ready for take-off, he made the last few adjustments.
Few seconds later, the flight service specialists heard an emergency locater transmitter signal. Looking again at the runway, they saw that the aircraft was still on the threshold, but upside down.
A strong windshear had overturned the single-engine aircraft. The airport wind speed indicator being located farther away from the threshold only indicated calm winds.
The souvenir of this story reminded me that nature can always surprise the best prepared pilot. I imagine that this event shocked the student pilot as he tried, like us, to figure out what had just happened. I do hope that this adventure did not discourage him from flying.