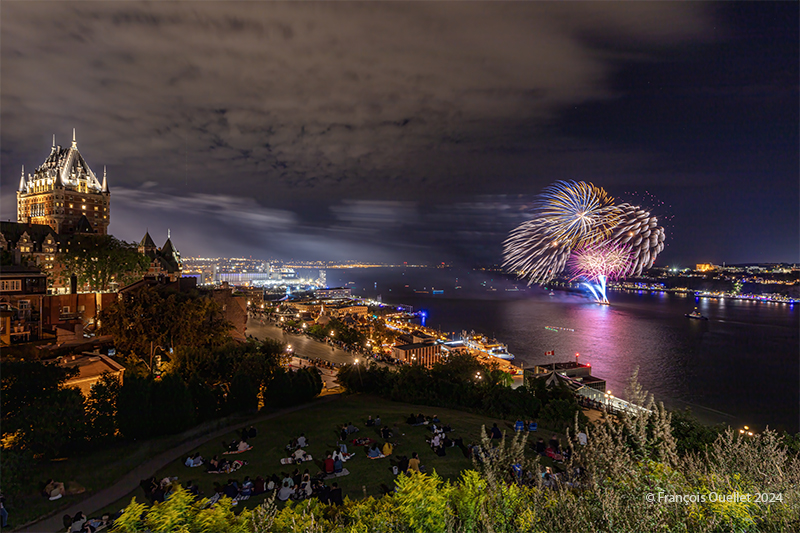
This year, the Grands Feux Loto-Québec are lit from a barge in the middle of the St. Lawrence River, between Lévis and Quebec City. A tugboat from the Ocean Group company secures the barge with a cable for the duration of the event.
I took the above shot with a Canon 5DSr full-frame camera equipped with a remote shutter release and a tripod-mounted Canon EF 11-24 mm F/4L lens. The super-wide-angle lens can capture both the Château Frontenac and the lights and city of Lévis across the river.
The BULB mode lets you set your own exposure time and take creative initiatives. The brilliant path from launch to explosion is captured in a single photo.
As soon as the bursts begin, you try a five-second exposure and observe the result. Then adjust by stretching the exposure time until good effects are achieved.
One mistake to avoid is leaving the shutter open for too long. When this happens, flashes of light build up on top of each other, and all you see in the final photo is blurry, glowing white.
Working with a RAW file offers much greater flexibility than with a JPEG file when processing the image on the computer.
ISO 200 seems the best option here for several reasons: even if the activity takes place in full darkness, we want to avoid significant digital noise. A low ISO will also lengthen the exposure time and allow us to capture beautiful streaks at the moment of the explosions.
What’s more, the lights will illuminate the scene, reducing exposure time to a reasonable length. Finally, a layer of altocumulus cloud above the Château Frontenac serves today as an artificial light reflector in the photo above.
Grands Feux Loto-Québec, August 2024
A depth of field between 8 and 13 ensures sufficiently accurate light at a reasonable distance.
Whether to focus manually or automatically remains a matter of taste. It should be noted that darkness can cause problems for autofocus. However, trial and error can sometimes produce interesting effects.
If you’re using manual focus, use the camera’s backlit screen to magnify the scene as much as possible and adjust the focus as required. You then return to the normal size display for the duration of the fireworks, taking care not to inadvertently touch the focus adjustment ring when changing the zoom.
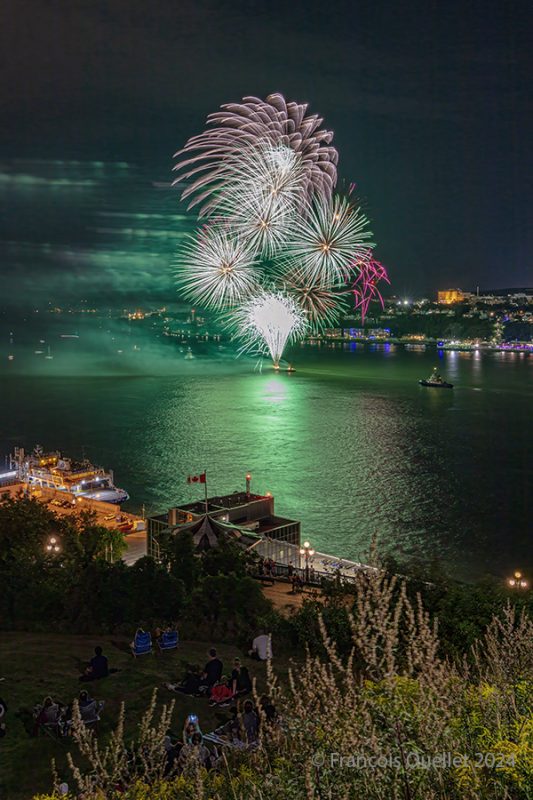
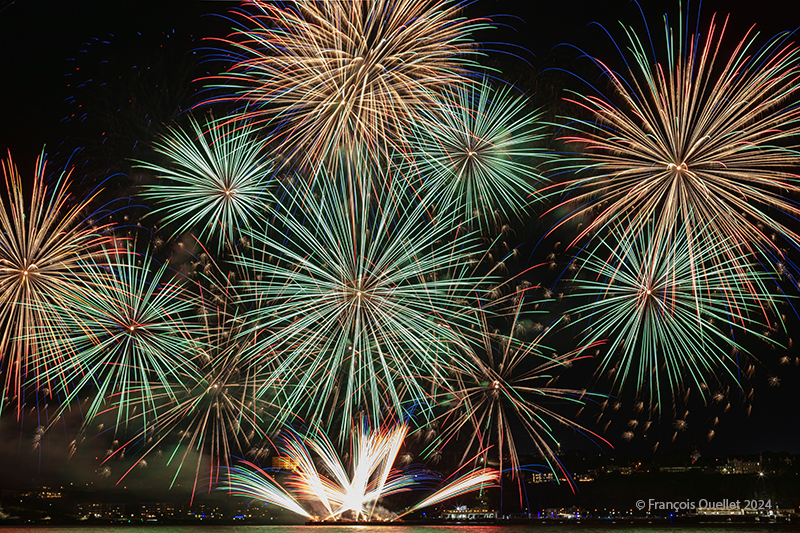
Fireworks at the Grands Feux Loto-Québec 2024
Consider using a heavy tripod. In windy conditions, it will better resist vibrations during long exposures.
A final word of advice: fireworks attract a lot of people, some of whom are content with a fairly limited personal space, if they have one at all. Protecting your photographic area becomes an important objective, to avoid the tripod getting snagged or someone moving in front of you when enthusiasm takes over. So, arrive well in advance to choose the best location for you to work in, while protecting your work area.
For example, for the photos above, I had set up between a ramp fixed on a steep slope in front of me and a bush at the rear. No one could stand in front of me and no one could pass behind me because of the bush. I thus had only the sides to worry about. It sounds like an unnecessary concern, but these days everyone is filming fireworks and continually repositioning themselves without regard to their neighbors. Make life easier for yourself by making the necessary arrangements before the show.
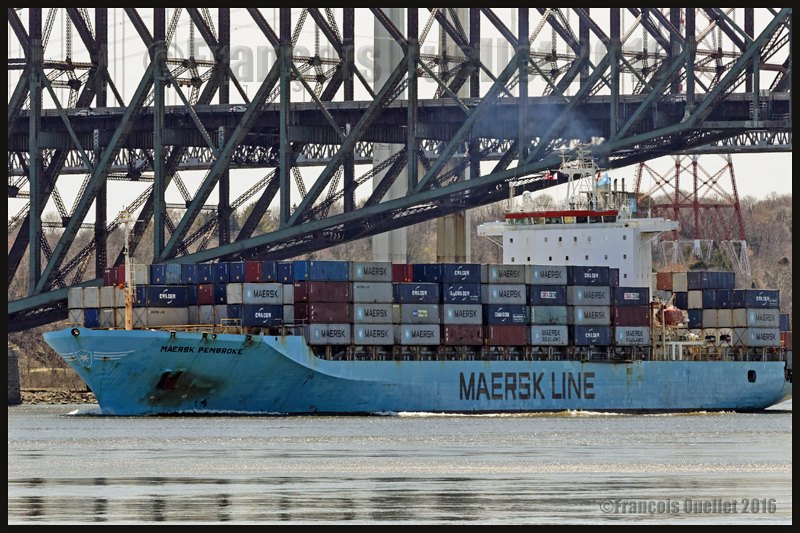
The container ship Maersk Pembroke under the Quebec Bridge, May 2016
Choosing what is important in a camera
Since there is actually no camera that has everything, whatever the brand, the buyer of a new camera must make choices: the type of sensor, the number of megapixels, the weight and size of the camera, the automatic focus’s speed and ability to follow a subject, the number of images per second, the performance under low light, the possibility to greatly enlarge a picture while maintaining its quality, advanced video functions, electronic communications with other devices, an extensive choice of lenses, etc. The list can be quite long…
The Canon 5DS(R): a specialized camera
A photographer happy with the Canon 5DS or 5DSR is one who needs a specialized camera offering both sharp images and the possibility of greatly enlarging the pictures it takes while maintaining the initial quality. This camera allows for more creativity as the possibility of extreme cropping beats, for now, everything that is on the market in the DSLR format.
Testing the potential of the Canon 5DSR when it comes to enlarging a picture
Here is an example of what this means: the photo below shows the yellow M of the McDonald’s restaurant photographed with a 50mm lens. Not easily visible…
Mc Donald’s restaurant’s yellow M captured with a 50 mm lens. Hard to see, of course!
Then the next photo was taken with a Canon EF 70-200mm f/2.8L IS II USM telephoto lens set at a 200mm focal length.
Testing the Canon 5DSR: the Mc Donald’s restaurant’s yellow M enlarged through a Canon EF 70-200mm f/2.8L IS II USM telephoto lens. Focal length used: 200mm.
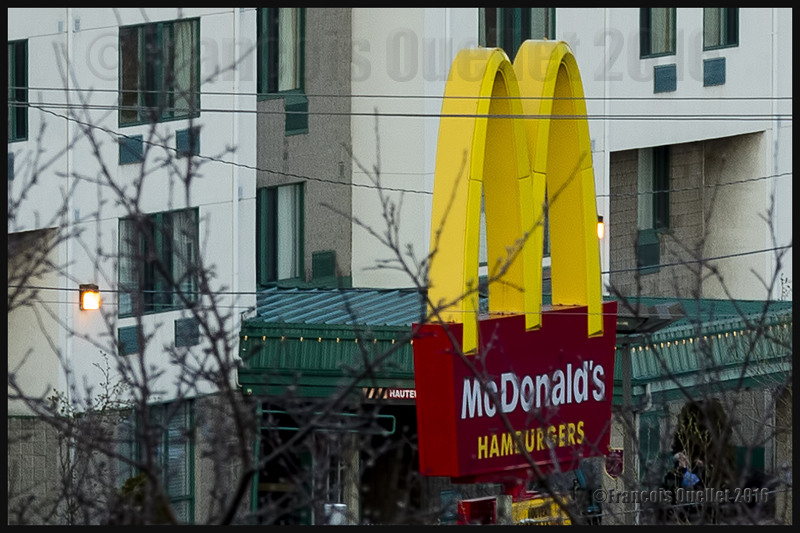
But the picture can be enlarged a lot more using the amazing resolution of the Canon 5DSR. The following picture shows the result after cropping the 200mm image: the yellow M now takes the whole vertical space available in the picture without any loss in quality.
The Mc Donald’s restaurant’s yellow M, after having been enlarged (focal 200mm) and cropped within the Canon 5DSR.
From my position on the hill, the yellow M was barely visible with the naked eye. By using a 200mm focal length, followed by serious cropping, I was able to obtain the result above. So it is possible to photograph a subject that is almost invisible without a telephoto lens and transform it into the principal subject of the picture without any loss in quality.
I chose the 5DSR because the anti-aliasing filter has been neutralized in the model R to offer even sharper images, although there is a risk of occasional moire effect when there are repetitive patterns in a scene. This is the compromise that Nikon users must also have to deal with.
Rethinking photography
The 50.6 megapixel full frame sensor in the Canon 5DS or 5DSR allows a new approach of photography for those who do not have access to a much more expensive and larger medium format camera that does not necessarily give really superior pictures.
When I go outside for a photo session, it seems to me that I now carry a huge telephoto lens without the weight and the cost. A lot of what seemed to be unavailable possibilities are now accessible.
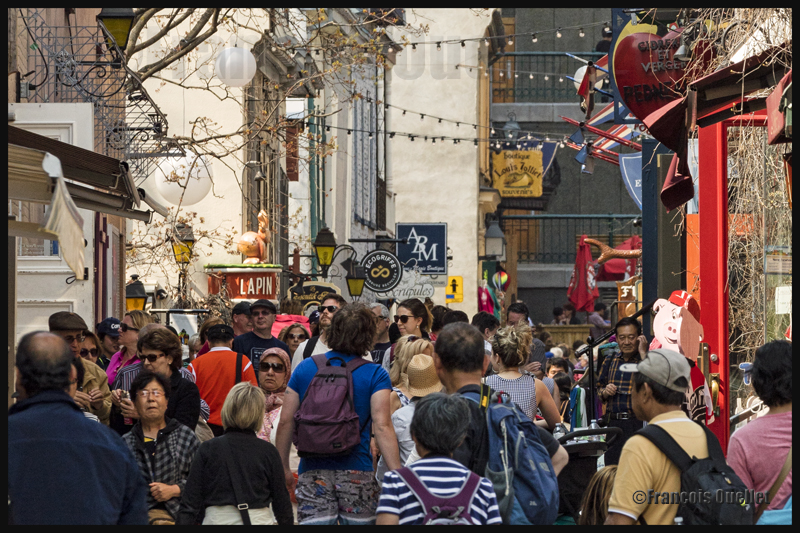
Taking pictures of people in the street is now less complicated: there are no more suspicious looks, artificial poses or people hiding their face. This is an ideal camera to capture people acting naturally without disrupting their routine. Gone is the feeling that you are bothering them in any way.
Quartier Petit-Champlain Old Quebec May 2016
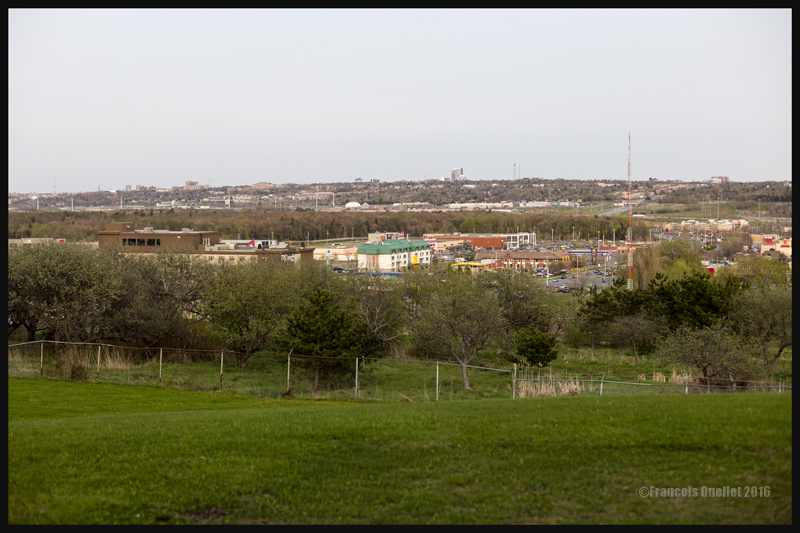
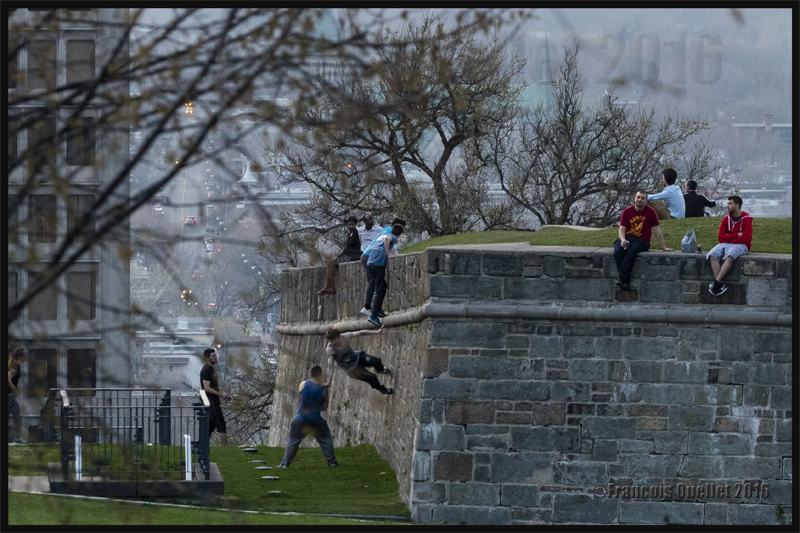
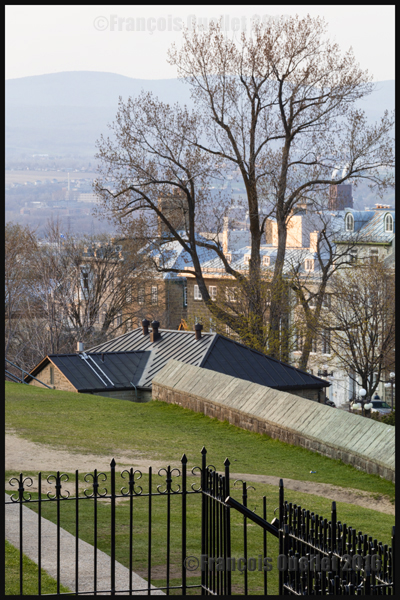
The photo below was taken while I was standing at least 300 meters from the scene, just after sunset. For those who are from Quebec City, I positioned the tripod on a high wall on the other side of Chemin St-Louis, near the St. Louis Gate. I had to slightly brighten up the picture to make the details more visible, risking at the same time to increase the digital noise. It was a May 2016 warm misty evening, which is clearly visible by the lack of details in the background as we look in the distance.
Quebecers defying gravity in Old Quebec, May 2016
But those are not the only possibilities of this camera. The Canon Company, in its promotional video, explains what exactly the camera was designed for:
How can someone maximize the use of a 50.6 megapixel full frame sensor
In order to bring a subject closer to you while fully benefiting from the Canon 5DSR 50.6 megapixel full frame sensor, it is obvious that there must be absolutely no vibrations. The photographer must therefore use a tripod, a remote control release and the mirror lock-up function. This allows for a very low ISO setting while avoiding a blurred picture.
The mirror lock-up function is very well thought through, with the possibility to choose a totally automatic processus according to a timing chosen by the photographer (between 0 and 2 seconds). The system eliminates any secondary micro vibrations.
In order to ensure an even better picture, the photographer must use Liveview and set it to the 16X enlargement available on that camera (versus 10X on my Canon 5D MKII) to manually adjust the focus. It is then possible to see the slightest vibrations caused by the wind. Doing so, I realized that my camera strap, lightly swaying in the wind, was causing some minimal vibrations. Every detail taken into consideration will improve the final result.
One must then ensure to immobilize the strap and even diminish the tripod height if possible when the wind is blowing. These steps will allow an incredible enlargement of a subject while maintaining the initial quality of the image offered by a full frame sensor.
Superior mirage effect (cold mirage)
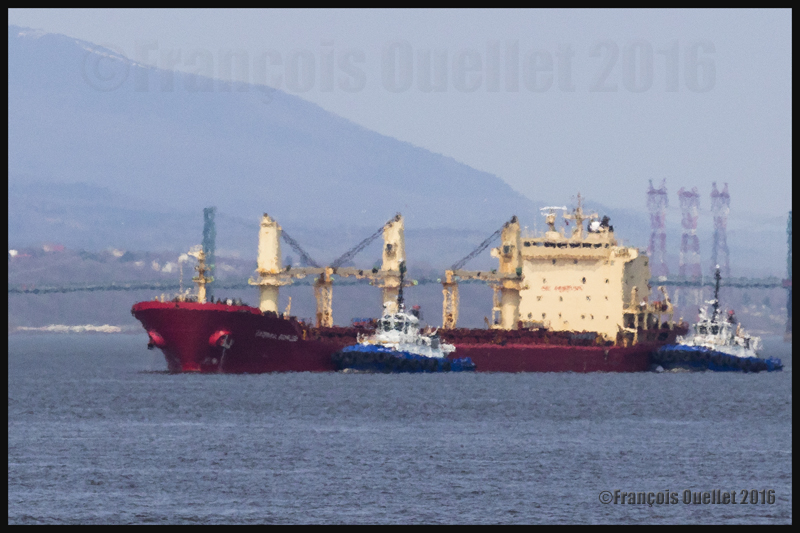
The photo below shows a ship being helped by two Ocean tugboats on its way towards the Quebec Harbour. The ship was at a good distance from the harbour; it is then possible to witness the superior mirage effect (cold mirage) resulting from a temperature inversion immediately over the water. The boats are deformed but the important close-up has not lowered the image quality. It has instead allowed to increase the atmospheric phenomenon effect.
Superior mirage (cold mirage) effect. Vessel and two Ocean tugboats on the St-Lawrence seaway heading to the Quebec Harbour, May 2016.
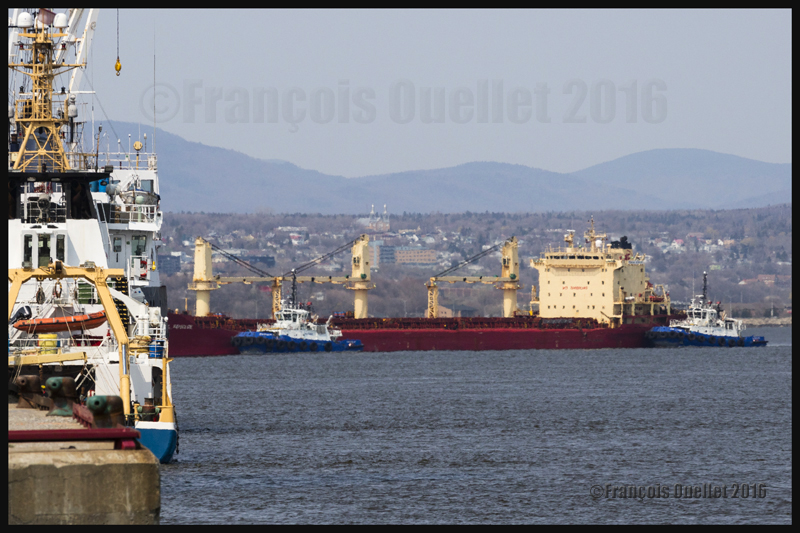
Once closer to the Quebec Harbour, the cold mirage effect decreased, as shown on the picture below:
Quebec Harbour, May 2016
The Canon 5DS or 5DSR without the use of a tripod or mirror-lock
Obviously, a tripod is not necessary if you do not intend to use a lot of cropping to enlarge a photo. You will obtain excellent results with the hand-held camera providing that you remember that this Canon DSLR is a specialized tool.
So many megapixels on a sensor of that size require that the photographer adapts his technique. But, as you can see from the picture below, it is totally possible to capture an aircraft in movement, even at dusk (May 11, 19:49), when the camera’s parameters are correctly adjusted. A higher shutter speed than normal is, in this case, absolutely mandatory.
The photo below shows an Air Canada Express Bombardier DHC-8-402NG (C-GSJZ) on final for runway 29 at the Quebec Jean-Lesage international airport (CYQB).
Bombardier DHC-8-Q-402NG (C-GSJZ — Air Canada Express) on final for the Quebec Jean-Lesage international airport, May 2016. Photo taken with a DSLR Canon 5DSR.
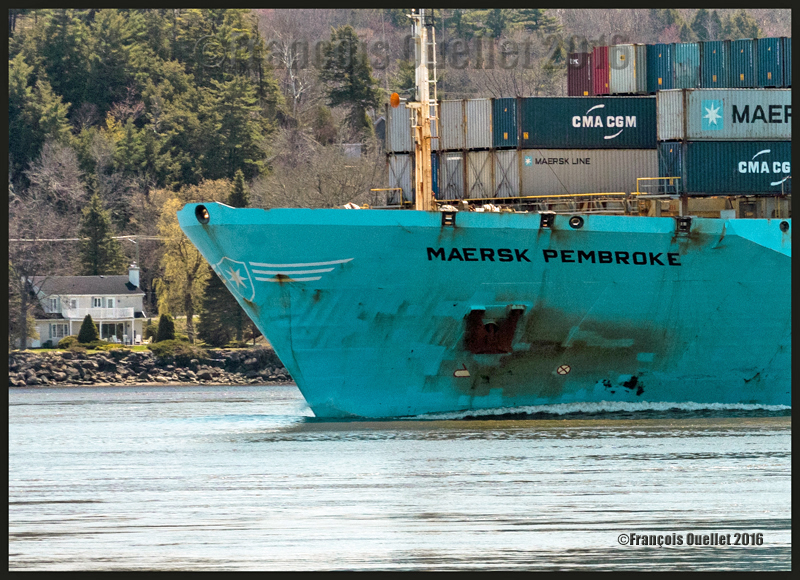
The Maersk Pembroke with the camera hand-held
The photo below shows the Maersk Pembroke container ship photographed with a hand-held camera using a Canon EF 70-200mm f/2.8L IS II USM telephoto lens during Spring 2016 near Quebec City. The focal length was only 140mm and the shutter speed 1/1000. The lens was equipped with a polarizing filter and the photo taken when the vessel was approaching the Quai des Cageux.
The Maersk Pembroke container ship on the St-Lawrence seaway near Quebec City, May 2016
The colours produced by the Canon 5DSR
The digital processing of the image and colours produced by the Canon 5DSR require different adjustments than what was necessary with the Canon 5D MKII. I am still learning how to handle the results produced by this camera so I will wait a bit before commenting.
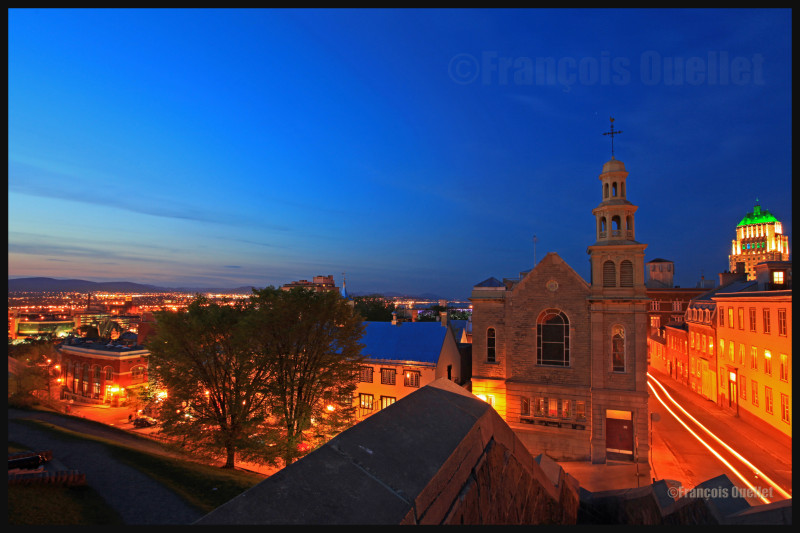
View of Old Quebec from the St. Louis gate. Quebec City, May 2016
Night photography
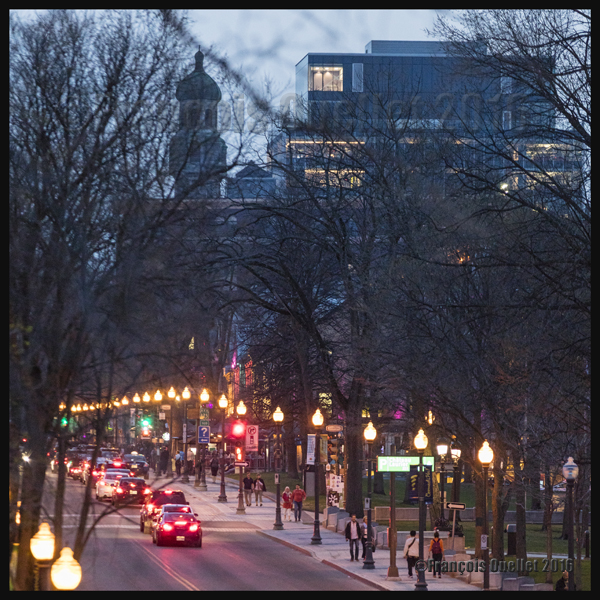
Here are two photos taken during the evening in Quebec City. The photo below required a 200mm focal, an ISO set at 4000 and a shutter speed at 1/30 in order to obtain something else than trailing lights. Luckily, the traffic was moving slowly…
Night photography, Grande-Allée avenue, Quebec City, May 2016
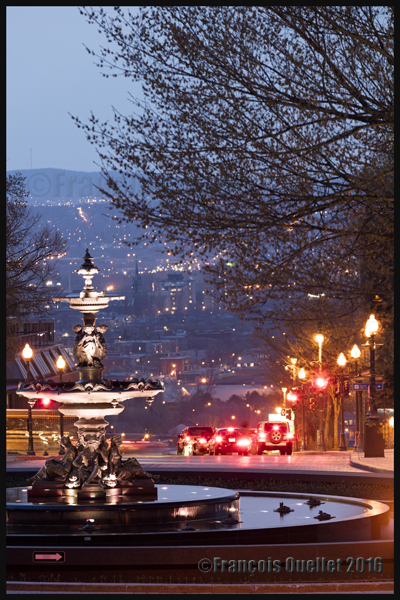
The picture below, taken with a 200 mm focal, required an exposure time a bit longer that one second with the ISO set at 800. To take the photo, I took advantage of the fact that the cars were momentarily stopped at a red light, so that they would be clearly visible.
Night photography, Tourny fountain and Quebec lower town, May 2016
The images per second of the Canon 5DS(R)
The Canon 5DSR is so far quite an impressive camera. I would have appreciated that Canon offer a higher rate of images per second (7 instead of 5) to make it more versatile.
The camera allows taking pictures with smaller formats than 50.6 MP, the two other options being 28 MP and 12 MP. If the camera can deliver five images per second with 50.6 MP RAW files, we can deduct that it is able to offer more speed for smaller formats. But the camera is blocked at 5 IMS so that it, I suppose, does not compete with other existing Canon models of the same category…
Nonetheless, Canon says that the rapid sequence of shooting lasts longer if the photographer uses the smaller files provided. So it is not faster, but it keeps on firing for a longer period. My guess is that it would only require a new firmware version to improve this camera’s number of images per second.
For other night pictures, click on the following link to my site:
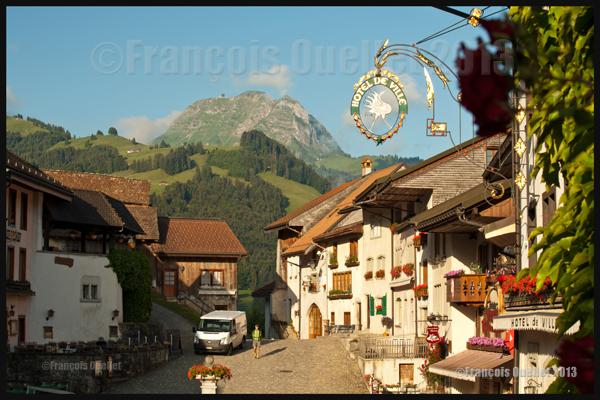
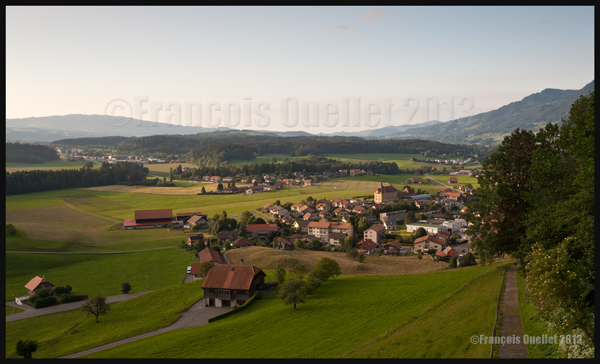
Gruyères and the Moleson in the background, Switzerland 2013
The city of Gruyères is located in the Prealps, in the Friburg County in Switzerland. It is a very charming small medieval town where cars are forbidden (the white van shown in the picture above is only used for morning delivery). In the city, one can visit the Gruyères Castle (Château de Gruyères), the H.R.Giger Museum (creator of the “Alien” in the movie Alien), the Tibet Museum, a cheese factory and boutiques. There are also some restaurants.
In the picture above, shot with a Canon 5D MKII, it is possible to see the Moléson in the background, a mountain that rises only 512 metres above the surrounding terrain but is still at more than 2000 meters above sea level. It is a tourist attraction that should not be neglected since it is very well equipped for all types of visitors, with a funicular and cable car. The visitors also have access to very interesting walking paths, for all ages and experiences.
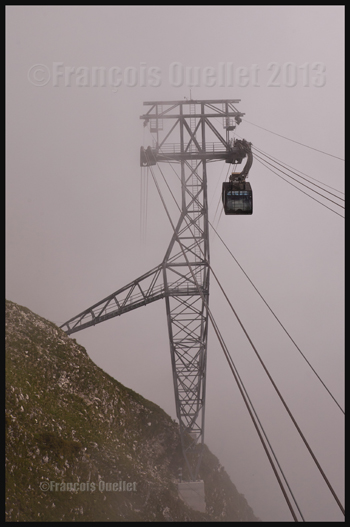
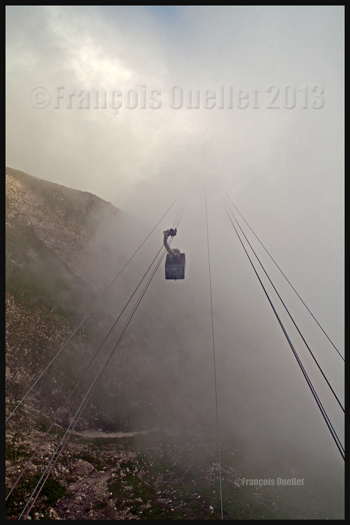
Moleson cable car, in the Gruyeres region, Switzerland 2013
When you use a cable car and do not see where it is leading due to the presence of clouds, you have to trust human engineering. But we are in Switzerland, so it should be all right!
The Moleson cable car, Switzerland 2013
The Moléson summit offers superb views. The small cumuliform clouds visible in the morning around the mountain progressively lift up due to daytime heating and eventually become beautiful cumulus clouds that add life to any pictures.
Moleson summit in the clouds, Switzerland 2013
Once on top of the Moléson, it is possible to use a modern metal stairway to gain even more height and access a platform allowing an unobstructed panoramic view. The picture above was taken with a Canon EF 16-35mm f2.8L II USM wide-angle zoom lens equipped with a polarizing filter.
Metal stairs leading to an observation post on top of the Moleson, Gruyeres region, Switzerland 2013
When ready to go down the mountain, the visitor has two choices: travel with the cable car and funicular he used when coming up, or slowly walk along an easily accessible path through beautiful green landscapes. The more experienced trekkers might decide to walk along the crests of surrounding mountains. We chose to walk on paths covered with flowers.
Path on the Moleson, Switzerland 2013
Back to Gruyères, a visit of the Château de Gruyères and both museums is a must, as well as a tour of the cheese factory. You might want to spend some time in the boutiques too and try the local restaurants. It is also the moment to take a few pictures…
Inside the Gruyeres medieval city, Switzerland, 2013
The old architecture of the buildings in Gruyères as well as the neighbouring countryside allow for very interesting photographic compositions. A well-known photography technique consists in using an opening in a building and using it as a second frame (a frame within a frame). I made sure that the background was clear enough to improve the visual effect. An aperture around 16 allowed for an appropriate depth-of-field.
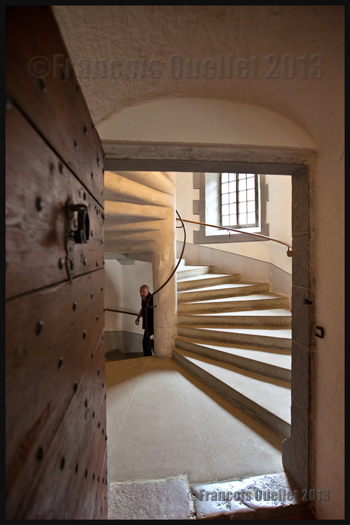
Spiraling stairs in the Gruyeres Castle, Switzerland 2013
The picture above shows a spiraling staircase inside the Château de Gruyères. I can barely imagine what the results would have been if I had had access to the new Canon 11-24mm wide-angle lens. But nonetheless, the Canon EF 16-35mm f2.8L II USM zoom lens did a good job.
The beauty of the full frame sensor mounted on the Canon 5D MKII DSLR is that a wide-angle shot taken at a 16mm focal will stay at 16mm while with a smaller sensor, like the APS-C, the photographer is facing a conversion factor of 1.5 or 1.6X, which transforms the 16-35mm wide-angle into a 24-52mm, in the best of cases. The APS-C sensor is interesting when used with a telephoto lens but a bit less when comes the time to take wide-angle shots.
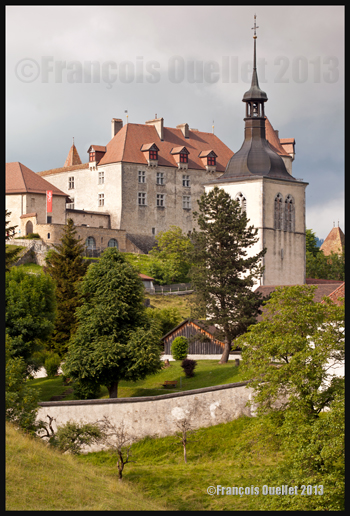
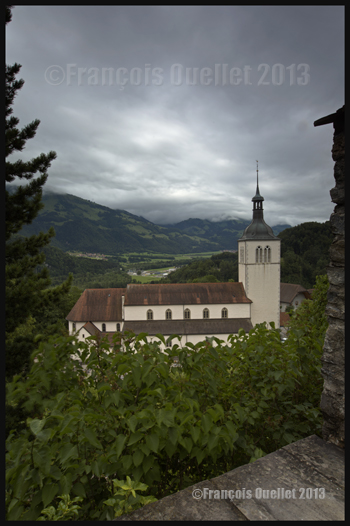
The picture below presents the Château de Gruyères seen from a neighbouring field.
Gruyeres old architecture, Switzerland 2013
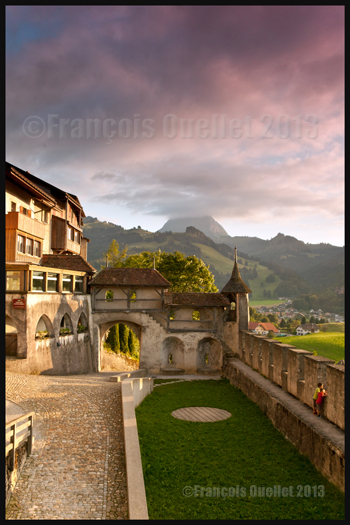
As the sun was setting down, I tried a shot from inside the castle. It was interesting to see the two little boys standing up alongside the wall and admiring the sunset. At the same time, it was possible to see the Moléson in the distance, its summit hidden in the clouds.
Due to the strong light contrasts, it was necessary to use a Hi-Tech ND graduated filter installed on my Canon 16-35mm wide-angle zoom lens. The Digital SLR Photography magazine, in one of its recent editions, made a comparison between ND grad filters and indicated that the Hi-Tech filter had a slight magenta coloration instead of a neutral grey. I think it is easily visible in the picture below. The photo could have been corrected with Photoshop but I thought of keeping it as it was since the scenery looked somewhat unreal already.
View from the Gruyeres Castle and the Moleson, Switzerland 2013
Once the sun was below the horizon, the more subtle colours gave a totally new look to the countryside. On the picture below, it is possible to see on the right a small path that a visitor can take to head down to the nearby village.
Gruyeres region in the sunset, Switzerland 2013
All the sceneries are not that easy to capture and it is sometimes necessary to use HDR photography to extend the dynamic range and take care of extreme light contrasts. The photo below needed five different exposures that were subsequently processed with the Photomatix image editing software. Useless to say, it was necessary to use the mirror lock-up function, a tripod and a remote control release.
View from the Gruyères Castle, Switzerland, in HDR 2013
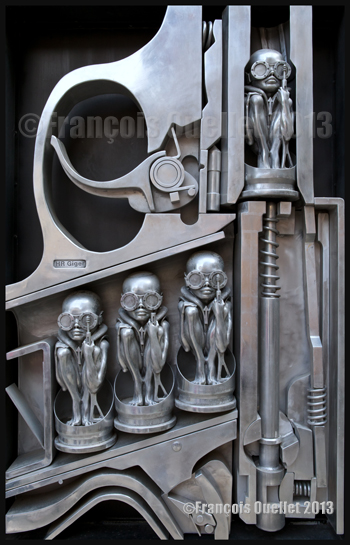
Here is, as the final picture, an idea of what is waiting for you at the H.R. Giger Museum. If there is a strange but very interesting museum, it is this one.
Artwork in front of the H R Giger Museum, Gruyeres, Switzerland 2013
Other pictures of Europe and around the world will be posted in the coming months…
Facing a field of flowers, a photographer has to choose among many possibilities. Here are just a few:
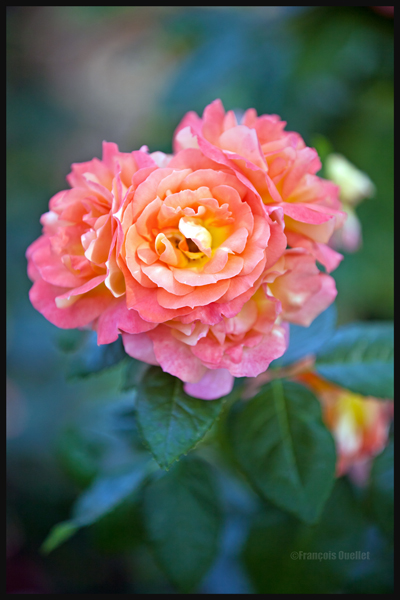
1) He can choose a really beautiful flower and make it the sole point of attraction. In that case, he must decide if the background will be free of any distractions.
A rose from the English Garden in Geneva, 2013.
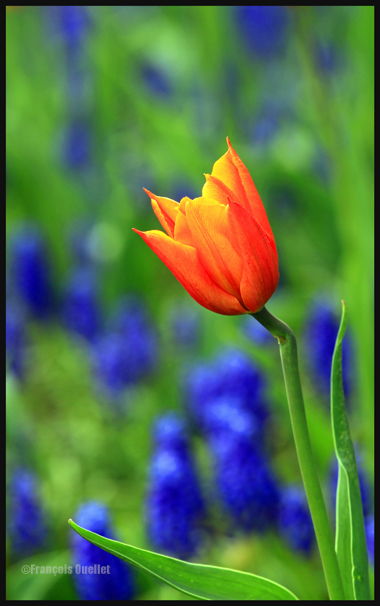
2) He can profit from a blurred background that is of a color dramatically opposed to the color of the chosen flower.
A tulip in the Bois-de-Coulonge, Québec City.
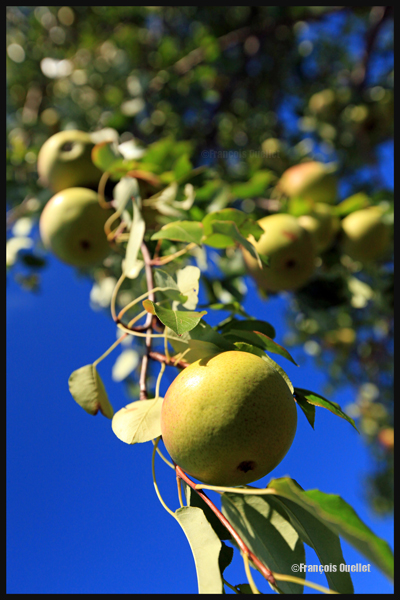
3) He might favor an overhead or a low angle shot. As this choice of the angle of view does not apply only to flowers, I found in my archives a low angle shot of a pear tree located in St-Nicolas, Québec. Here it is, so that you can see what kind of effect can be obtained.
Pears from Saint-Nicolas, Québec.
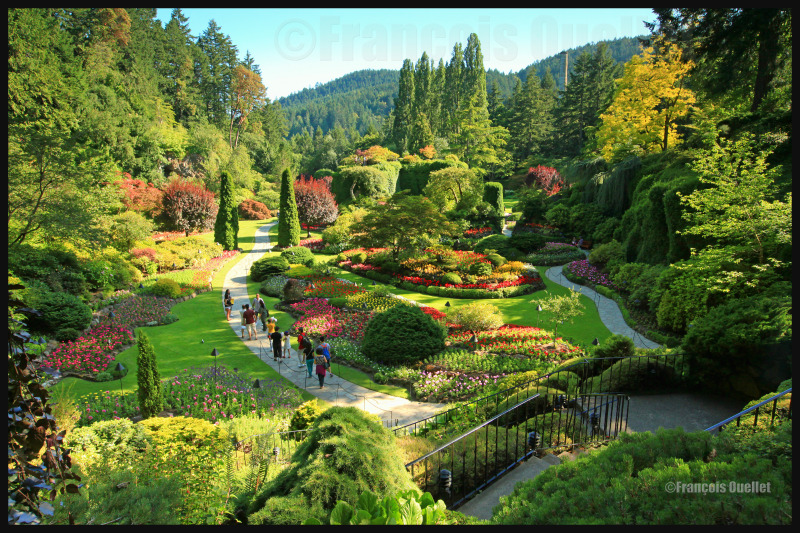
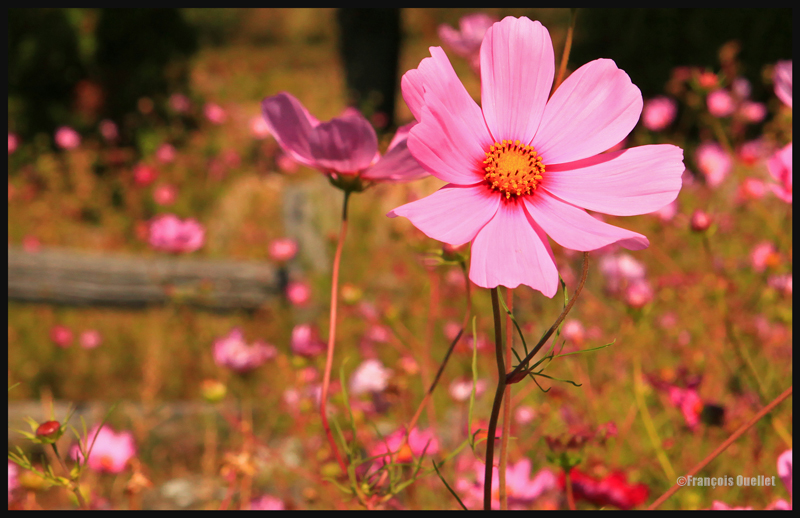
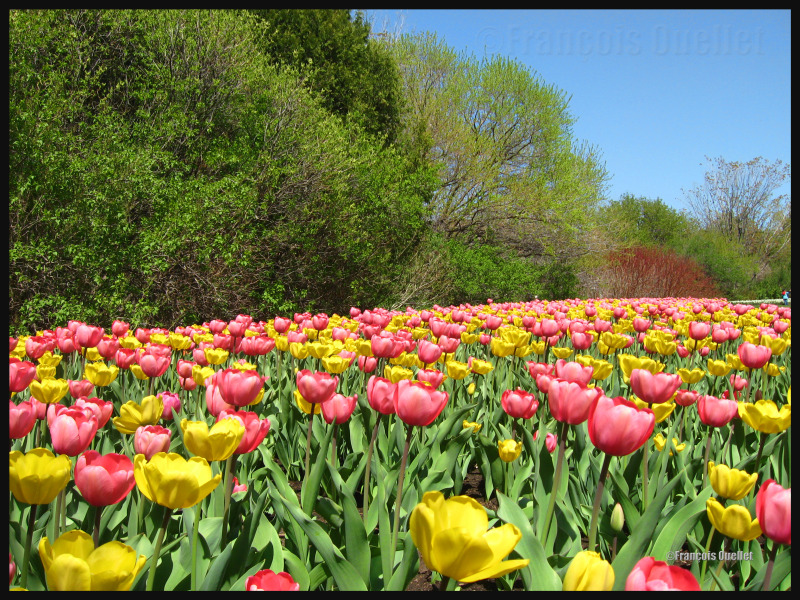
4) He can decide to show many flowers on the same picture, considering the interesting impact produced by all the color dots.
A field of flowers in Saint-Nicolas, Québec.
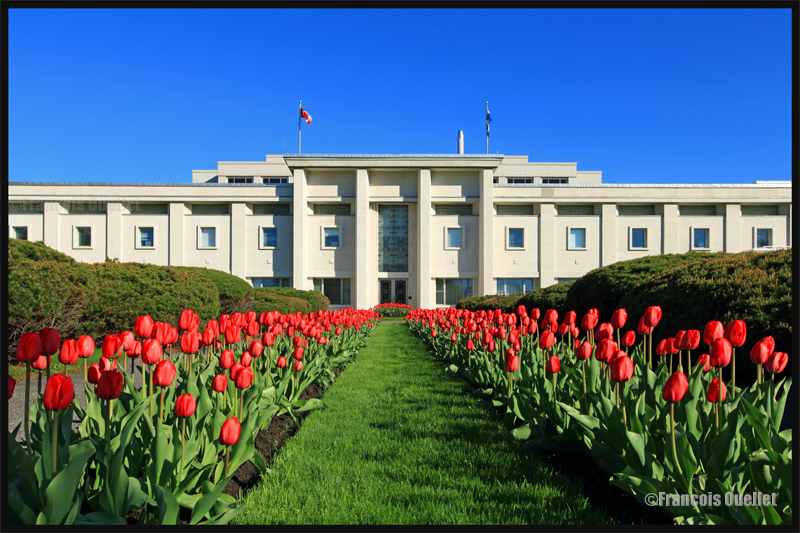
5) He might also use the flowers as accessories to direct the eye of the viewer to another point of interest like, for example, a building with special architectural characteristics.
Industrielle Alliance building, Quebec City, 2012
Flowers as accessories to improve a beautiful landscape in the background.
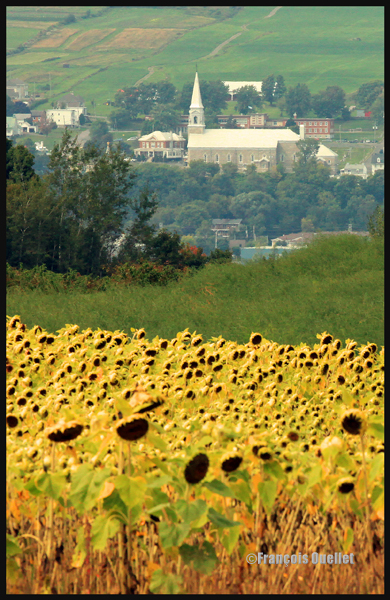
Sunflowers on Île d’Orléans
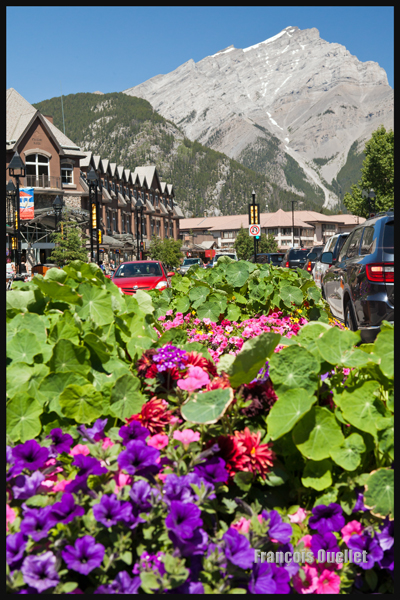
Photo of a part of Banff downtown, Alberta, Canada 2014
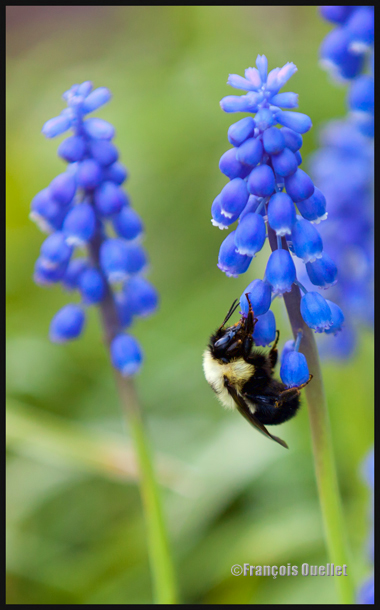
The flowers and the bumblebee are two interesting subjects; they complement each other in this picture. It would be hard for me to decide which one I prefer.
Bumblebee on a flower in the Parc du Bois-de-Coulonge, Québec City
Unless there is no other possibility, it is better to avoid shooting flowers under full sun as there will be considerable reflection on their petals. If you have no choice, use a polarizing filter, well adjusted, to reduce the undesirable effects of direct sunlight.
The ideal day to get out and take pictures of flowers is a day without wind, where there is a bright light but dimmed by an overcast sky.
The quality of colors and contrasts will be maximized if the pictures are taken during the morning or at the end of the afternoon.
Aperture has a definite impact on the final result. With a wide aperture (smaller numbers like F2.8 or F4.0) you will get a sharp subject with everything blurred around it. This will make your flower stand out. With a small aperture (bigger numbers like F14, F16), both foreground and background will be sharper, with an even better result using a wide-angle lens. Your flower will lose a bit of its impact as all the elements in the picture will now shine. Below is a picture taken in Ontario, during the Ottawa Tulip Festival.
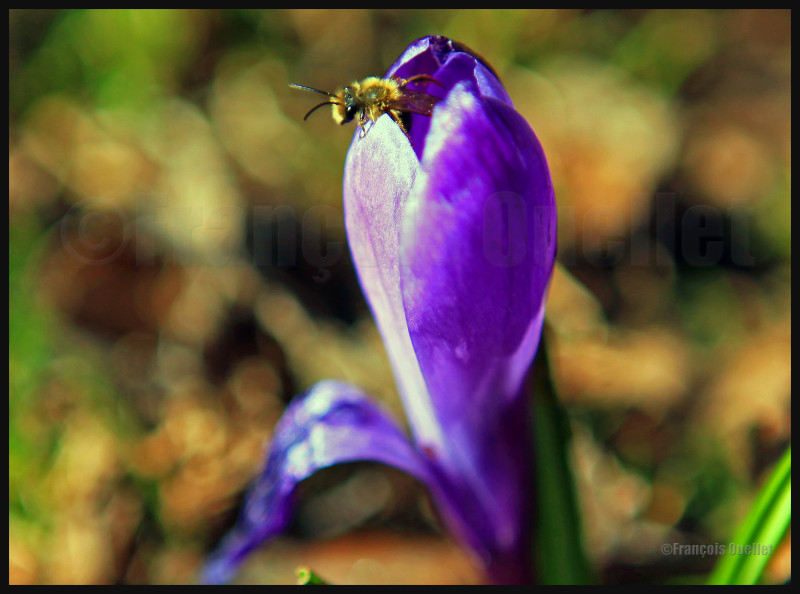
Macrophotography:
April 2012 on the Plains of Abraham: A bee makes its way out of a crocus.
1) Remove any dirt from the plant you want to capture and choose a plant whose petals are in perfect condition.
2) Use a tripod, a remote control release and the mirror lock-up (MLU) function for better results.
3) The camera should ideally be used with manual focus, for improved sharpness. In order to verify if the picture will be in focus, look at the LCD screen and enlarge the picture (5X or 10X). You will immediately see if a minor adjustment is needed to get a sharp photo or to improve the depth-of-field.
The histogram should be checked upon taking the picture to immediately compensate for the necessary amount of light.
You can use a flash to reduce aperture. You must adjust it so that it’s not shooting at full power otherwise there will be too much reflection and you will lose all the delicate nuances of colors and contrasts.
A method that will produce surprising results is called “zoom burst”. You slowly move the zoom of a lens on all its focal length while the shutter remains open during the process. You must select a speed that is slow enough to accommodate the full deflection of the zoom. You should know that many shots are normally needed before you get a satisfying image.
Every lens offers different possibilities:
1) The macro lens is useful if you wish to capture very precise details on the flower. To add an interesting effect, you can even spray the flower lightly with water so that a few droplets remain on the petals.
2) The wide-angle lens allows you to transform an image and give it an original perspective. The effect will be more important if you shoot the flower from a special angle like, for example, from the ground up. If you must lie on the ground, use a little carpet to keep yourself clean and dry. I bought a right-angle finder to ease the workload when shooting under complicated angles. This could be a potentially interesting addition to your equipment.
3) Finally, the telephoto allows you to pick a particular flower and, because of compressed perspective, offers you a background filled with multiple colors.
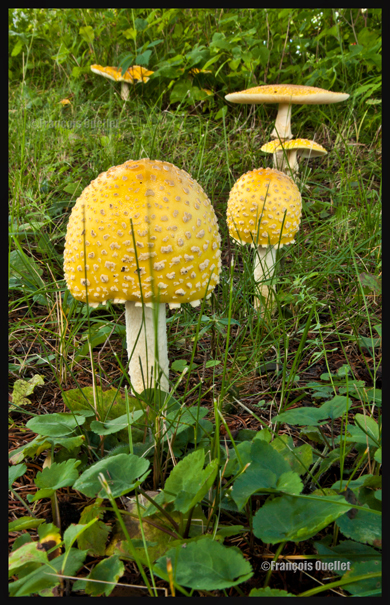
Let’s end this section with a mushroom picture. The same principles apply with regards to simplicity, settings and angles of views. I could have chosen to show only an oversize shot of a mushroom, or take only part of it, but I preferred an approach that would allow me to show the radically different shapes of the specimens found at the Laurentian Forestry Center in Québec.
Mushrooms around the Canadian Forestry Service building , Québec 2014.
Empress Hotel at dusk, Victoria Harbor, Canada 2014
1. Ensure you bring : tripod, remote cable, flashlight and timer.
2. Use of RAW (.TIFF) is highly recommended. There is a greater potential for corrections afterward, if something is not according to your taste.
3. Noise reduction activated on the camera.
4. If the winds are calm: ISO between 50 and 200.
5. If there are strong winds: ISO 400 might be useful to avoid a blurred picture caused by the continual small vibrations of the tripod due to a long exposure. That is why a heavy tripod is always preferable.
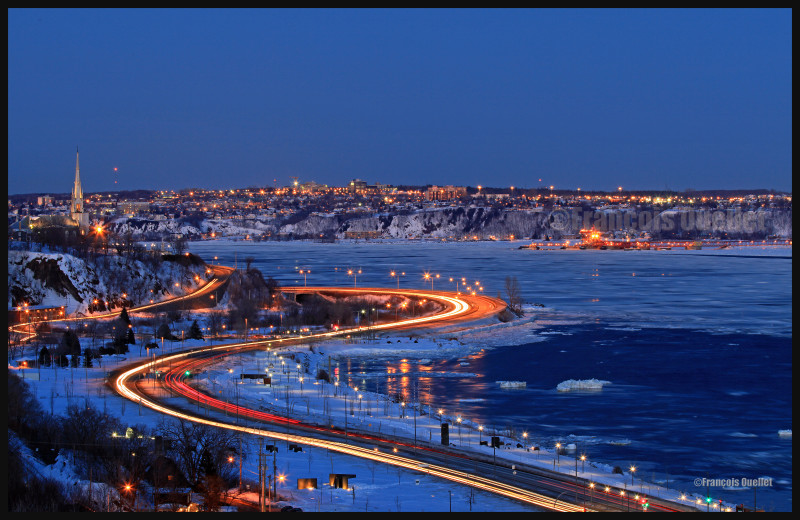
Trailing lights on boulevard Champlain, Quebec City
6. If you wish to take a picture of people moving at a normal pace, and you have access to quality lenses, it will often be necessary to use ISO 800 to get a clear shot. This setting could allow the shutter speed to be adjusted at about 1/200 which is plenty to obtain a picture that is not blurred; that is unless you are not using a long focal like 200mm or more.
7. For people shots, it is better to have your back to the remaining light on the horizon, unless your goal is to capture a silhouette.
8. For extended exposure, use the autofocus “one shot” setting until it stops working due to insufficient light. Then use manual focus. Or use manual focus all along, with Liveview, if you prefer it that way, for extra precision.
9. Mirror lock-up function must be activated to avoid vibrations caused by the shutter action.
10. Use a remote cable when taking the picture to avoid useless vibrations.
Old Québec at dusk.
11. If you wish, you might think of selecting a specific AF point to ensure a better focus if there is a small area that matters the most to you in the picture.
12. Do not use the FULL AUTO mode during night photography.
13. The three most important modes are 1. Aperture (taking care of slightly overexposing for surrounding lights) 2. Speed 3. Manual. There is one more reason to overexpose a bit if you work with the RAW format: there is more data information in light than in shadow, so once the picture is taken you have access to more data to play with to adjust the dark sections of the picture.
14. If you expect an exposure longer than 30 seconds, use BULB mode.
15. Night pictures are best taken using the camera bracketing funtion (-1,0,+1) and this, every two minutes.
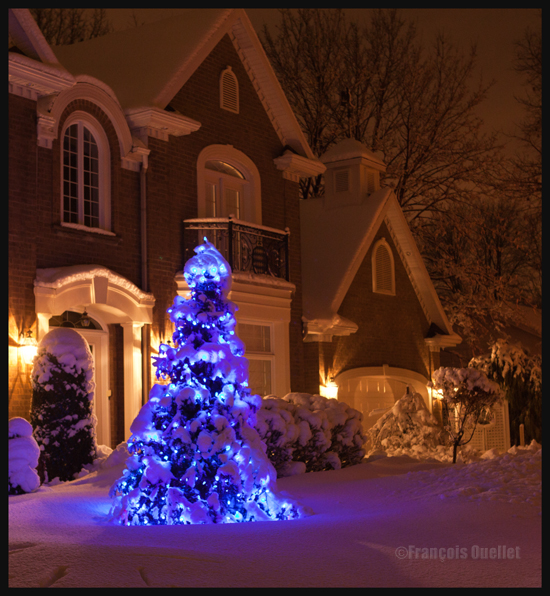
A Christmas tree in Sillery
16. The best period for night shots is 15 minutes after sunset, until official night time, which you can find on the internet. As this period is quite short, it is important that you know in advance what is of interest to you and where you will position yourself when comes the time for the picture.
17. Total darkness is not what is the most favourable in night photography. But you can certainly obtain interesting results using black and white.
18. Beware of surrounding light reflection in your lens.
19. Histogram has to be reviewed to ensure that there is no serious overexposure.
20. It is preferable to choose an aperture between F11 and F16 for maximum sharpness as well as an adequate depth-of-field.
21. If shooting a subject against the remaining light over the horizon, there might be quite a contrast in lighting between where you stand and where your subject is positioned. You might think of using grad filters (3-6-9-10) to help correct this huge light difference, or you can transform the standard photo session into an HDR one. Or both! There are also filters specifically designed for sunrise and sunset periods that can improve your shots.