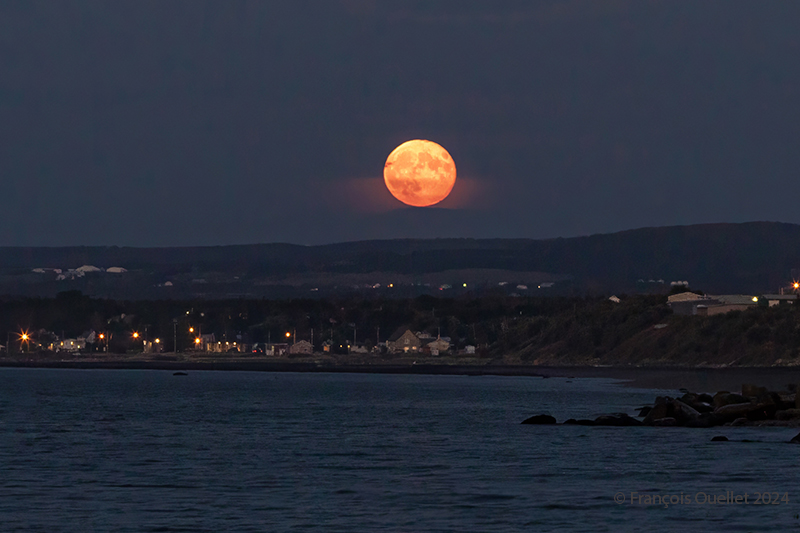
The full harvest moon rises in the Matane sky in September 2024.
The photo above was taken in Matane, Quebec, in September 2024. It’s more a matter of chance than planning. I was on the beach photographing the sunset, and when the sky got too dark, I turned around to see if there was anything interesting left to capture. And I came across this full harvest moon rising in the firmament.
Photographing a full moon is a good challenge. We often capture only an almost white, very bright disk, losing the nuances of colour and the details of the lunar geography.
The advice available on the Internet on how to successfully shoot a full moon with a normal camera goes in all directions. But one thing’s for sure: to improve your chances of success, it’s best not to wait until nightfall, because then the very high luminosity of the star becomes impossible to attenuate while still retaining a view of the planetary topography.
Most of the time, the choice is between an excellent photo of a full moon, but a very dark surrounding earth relief where nothing is discernible, or a visible earth relief of acceptable quality, but a moon that represents nothing more than a large, white circle of light.
The method that works for the photo above is as follows: you have to be on the spot at the right time, i.e., during the blue hour and not the whole night. So, in my case, I was lucky because it wasn’t planned.
You need a tripod and an extension cable. There are two reasons to avoid long exposures: firstly, the moon is a moving object. The longer the exposure, the more the disk moves. You end up with an oval rather than a round moon. A long exposure also picks up more light, and the moon’s disk turns completely white.
Full harvest moon rising in Matane, Québec 2024
Compromises become necessary. Trying to get a perfect moon and foreground at exactly the right brightness is quite a challenge. By the time every attempt has been made to achieve a flawless result, the moon is already too high in the sky. We have to act quickly.
We’re advised to lower the ISO to 200, but if I do that, I’m increasing the exposure time and introducing too much light into the camera. Instead, I use a higher ISO to reduce exposure, and use all the camera functions likely to reduce the amount of light entering the camera: higher shutter speed, if necessary, strong negative exposure compensation, and so on.
By not overdoing the settings and using RAW files, there’s still enough flexibility to bring out the foreground, in this case the houses lining Matane’s beaches and the surrounding lights.
In short, shoot during the blue hour, act quickly, accept compromises, limit exposure time in every way possible and use RAW files to facilitate post-production work.
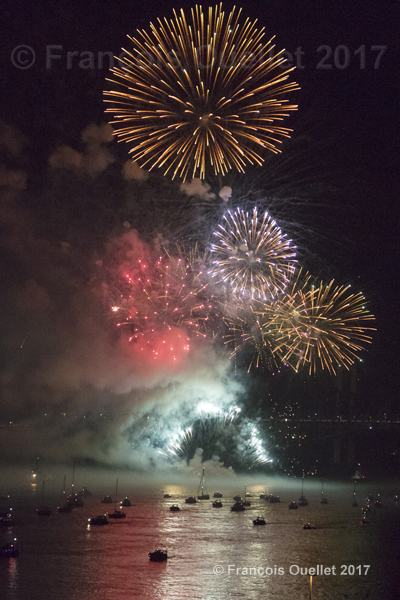
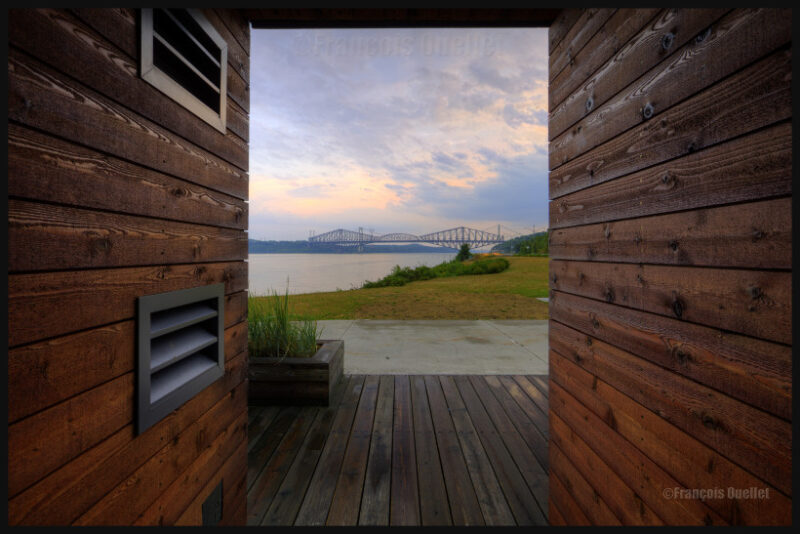
The Quebec Bridge, the longest cantilever type bridge in the world, celebrated its 100th anniversary in 2017. For the occasion, several activities were organized in Quebec on September 23rd 2017, culminating with fireworks near the bridge.
Reflections on the St. Lawrence Seaway. The 100th anniversary of the Quebec Bridge was celebrated with fireworks.
Several workers lost their live while attempting to build the bridge. A Wikipedia article resumes its history: The Quebec Bridge
In 2017, the safety issue was brought back in the news. This time it was about the lack of maintenance that favored an increasing amount of rust on the metallic structure.
The funds that would allow to paint the bridge on a regular basis seems hard to find. The bridge owner, the Canadian National Railway Company, and the different levels of government are attempting to find a solution that would be acceptable for all. This discussion has been going on for years. While the bridge holds on, everything is fine.
September 23rd 2017 celebration for the 100th anniversary of the Quebec Bridge.
About the photography
During the fireworks several boats equipped with an additional lighting system approached the bridge.
It was impossible to get really sharp shots of the boats since they were constantly moving due to the strong current of the St. Lawrence Seaway.
The fireworks lasted about thirty minutes and attracted a huge crowd, both along the St.Lawrence Seaway and on the higher grounds of bothLévis and Quebec City.
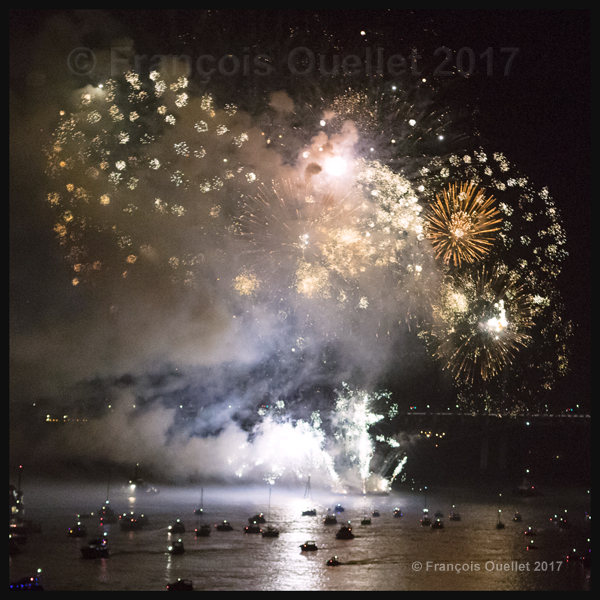
Fireworks for the 100th anniversary of the Quebec Bridge
Frequent adjustments of the camera’s aperture and ISO were needed since it is always very demanding for a camera to deal with sudden burst of lights appearing in the darkness. It was necessary to limit the exposure time in order to avoid an accumulation of blurred light trails.
The Quebec Bridge is 100 years old in 2017
The pictures were taken with a Canon 5DSR full frame camera mounted on a tripod. A Canon EF 24-70mm f/2.8L USM was used to capture the fireworks.
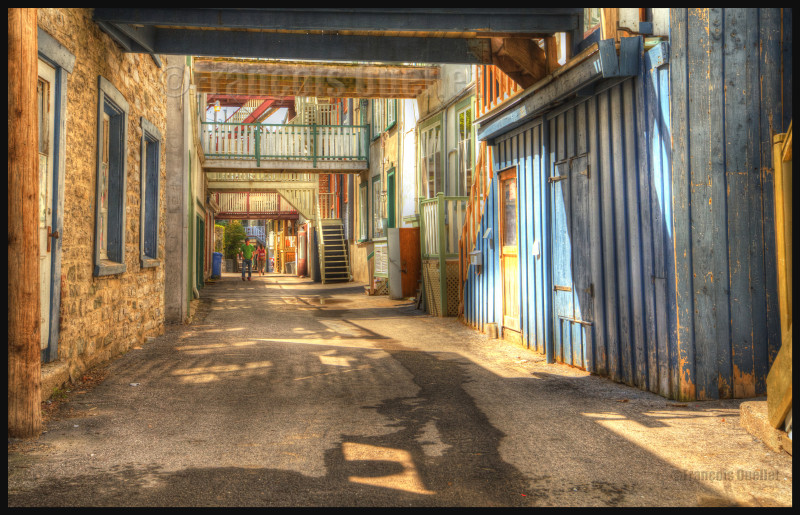
The Queen Mary 2 comes twice a year in the Quebec Harbour during the autumn. It obviously always attracts a lot of onlookers. The vessel carries 2620 passengers who are prompt to visit Old Quebec upon arrival.
In order to take a picture of this superb ship and the architecture of Old Quebec’s houses, it was worth waiting until evening, when the colours were more subtle. I could have chosen to do a close-up of the Queen Mary 2, but by doing so the photo would have lost some of its dynamism since the quartier Petit-Champlain’s alleys and its pedestrians would have been absent from the scene.
There is only a small portion of the sky visible in the picture and this is voluntarily since it does not present any interesting details, especially when compared with the rest of the scenery. The front of the Queen Mary 2 has wilfully been located in the superior right corner of the photo since it is toward this part of the image that the eye ends its initial inspection.
There were quite a number of viewers installed on the Dufferin Terrace, most with a portable camera, trying to capture the scene. All those onlookers and photographers constantly moving on the wooden terrace were nevertheless creating vibrations: a tripod, usually the perfect tool to prevent any shaking of the camera, was only useful here providing that there was a shorter exposure time. The ISO had to be increased accordingly to respect the shorter exposure and avoid a blurred picture at low speed.
Still, the photo taken with a Canon 5DSR full-frame camera successfully portrays the mood in Old Quebec on that evening of autumn 2016.
For other ship photos posted on my website, click on the following link:
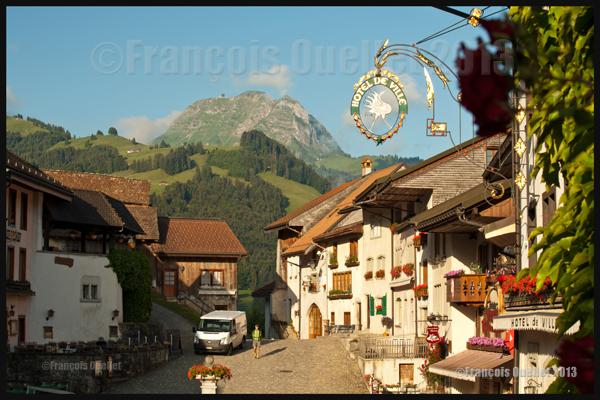
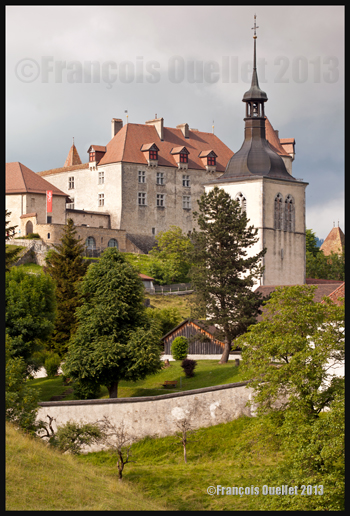
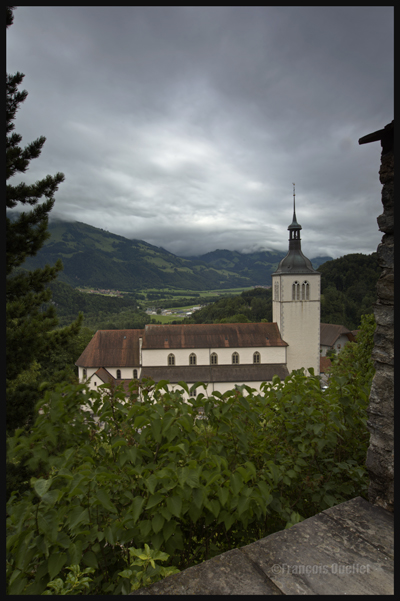
Gruyères and the Moleson in the background, Switzerland 2013
The city of Gruyères is located in the Prealps, in the Friburg County in Switzerland. It is a very charming small medieval town where cars are forbidden (the white van shown in the picture above is only used for morning delivery). In the city, one can visit the Gruyères Castle (Château de Gruyères), the H.R.Giger Museum (creator of the “Alien” in the movie Alien), the Tibet Museum, a cheese factory and boutiques. There are also some restaurants.
In the picture above, shot with a Canon 5D MKII, it is possible to see the Moléson in the background, a mountain that rises only 512 metres above the surrounding terrain but is still at more than 2000 meters above sea level. It is a tourist attraction that should not be neglected since it is very well equipped for all types of visitors, with a funicular and cable car. The visitors also have access to very interesting walking paths, for all ages and experiences.
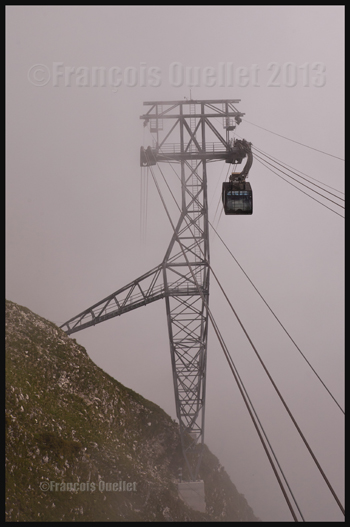
Moleson cable car, in the Gruyeres region, Switzerland 2013
When you use a cable car and do not see where it is leading due to the presence of clouds, you have to trust human engineering. But we are in Switzerland, so it should be all right!
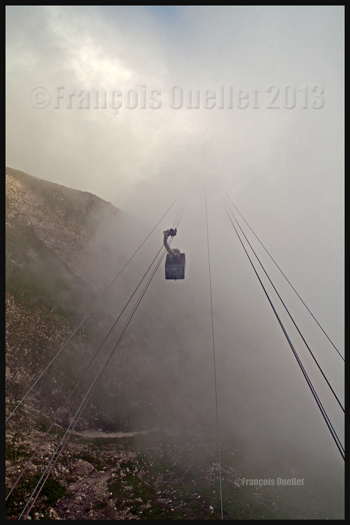
The Moleson cable car, Switzerland 2013
The Moléson summit offers superb views. The small cumuliform clouds visible in the morning around the mountain progressively lift up due to daytime heating and eventually become beautiful cumulus clouds that add life to any pictures.
Moleson summit in the clouds, Switzerland 2013
Once on top of the Moléson, it is possible to use a modern metal stairway to gain even more height and access a platform allowing an unobstructed panoramic view. The picture above was taken with a Canon EF 16-35mm f2.8L II USM wide-angle zoom lens equipped with a polarizing filter.
Metal stairs leading to an observation post on top of the Moleson, Gruyeres region, Switzerland 2013
When ready to go down the mountain, the visitor has two choices: travel with the cable car and funicular he used when coming up, or slowly walk along an easily accessible path through beautiful green landscapes. The more experienced trekkers might decide to walk along the crests of surrounding mountains. We chose to walk on paths covered with flowers.
Path on the Moleson, Switzerland 2013
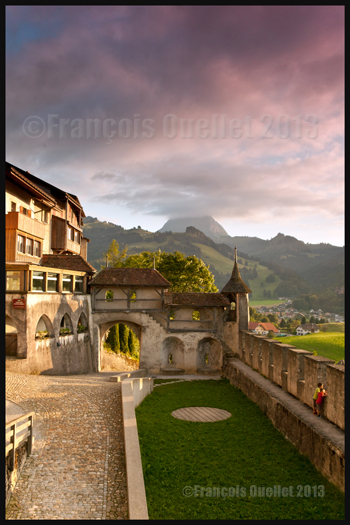
Back to Gruyères, a visit of the Château de Gruyères and both museums is a must, as well as a tour of the cheese factory. You might want to spend some time in the boutiques too and try the local restaurants. It is also the moment to take a few pictures…
Inside the Gruyeres medieval city, Switzerland, 2013
The old architecture of the buildings in Gruyères as well as the neighbouring countryside allow for very interesting photographic compositions. A well-known photography technique consists in using an opening in a building and using it as a second frame (a frame within a frame). I made sure that the background was clear enough to improve the visual effect. An aperture around 16 allowed for an appropriate depth-of-field.
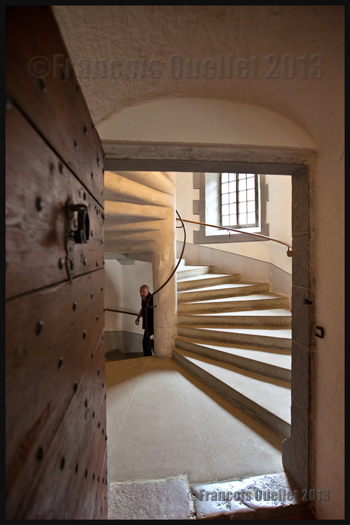
Spiraling stairs in the Gruyeres Castle, Switzerland 2013
The picture above shows a spiraling staircase inside the Château de Gruyères. I can barely imagine what the results would have been if I had had access to the new Canon 11-24mm wide-angle lens. But nonetheless, the Canon EF 16-35mm f2.8L II USM zoom lens did a good job.
The beauty of the full frame sensor mounted on the Canon 5D MKII DSLR is that a wide-angle shot taken at a 16mm focal will stay at 16mm while with a smaller sensor, like the APS-C, the photographer is facing a conversion factor of 1.5 or 1.6X, which transforms the 16-35mm wide-angle into a 24-52mm, in the best of cases. The APS-C sensor is interesting when used with a telephoto lens but a bit less when comes the time to take wide-angle shots.
The picture below presents the Château de Gruyères seen from a neighbouring field.
Gruyeres old architecture, Switzerland 2013
As the sun was setting down, I tried a shot from inside the castle. It was interesting to see the two little boys standing up alongside the wall and admiring the sunset. At the same time, it was possible to see the Moléson in the distance, its summit hidden in the clouds.
Due to the strong light contrasts, it was necessary to use a Hi-Tech ND graduated filter installed on my Canon 16-35mm wide-angle zoom lens. The Digital SLR Photography magazine, in one of its recent editions, made a comparison between ND grad filters and indicated that the Hi-Tech filter had a slight magenta coloration instead of a neutral grey. I think it is easily visible in the picture below. The photo could have been corrected with Photoshop but I thought of keeping it as it was since the scenery looked somewhat unreal already.
View from the Gruyeres Castle and the Moleson, Switzerland 2013
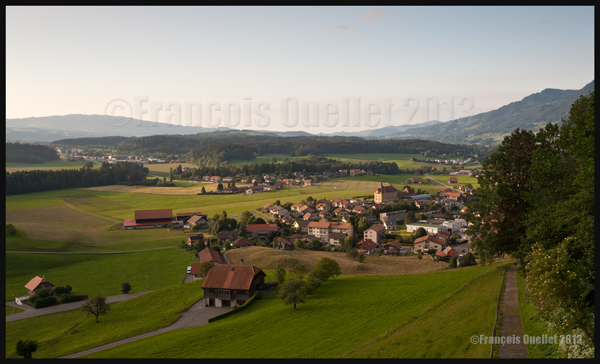
Once the sun was below the horizon, the more subtle colours gave a totally new look to the countryside. On the picture below, it is possible to see on the right a small path that a visitor can take to head down to the nearby village.
Gruyeres region in the sunset, Switzerland 2013
All the sceneries are not that easy to capture and it is sometimes necessary to use HDR photography to extend the dynamic range and take care of extreme light contrasts. The photo below needed five different exposures that were subsequently processed with the Photomatix image editing software. Useless to say, it was necessary to use the mirror lock-up function, a tripod and a remote control release.
View from the Gruyères Castle, Switzerland, in HDR 2013
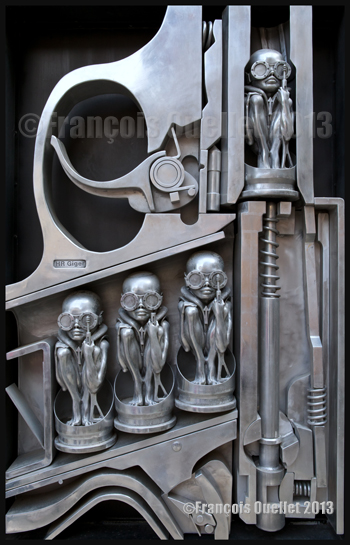
Here is, as the final picture, an idea of what is waiting for you at the H.R. Giger Museum. If there is a strange but very interesting museum, it is this one.
Artwork in front of the H R Giger Museum, Gruyeres, Switzerland 2013
Other pictures of Europe and around the world will be posted in the coming months…
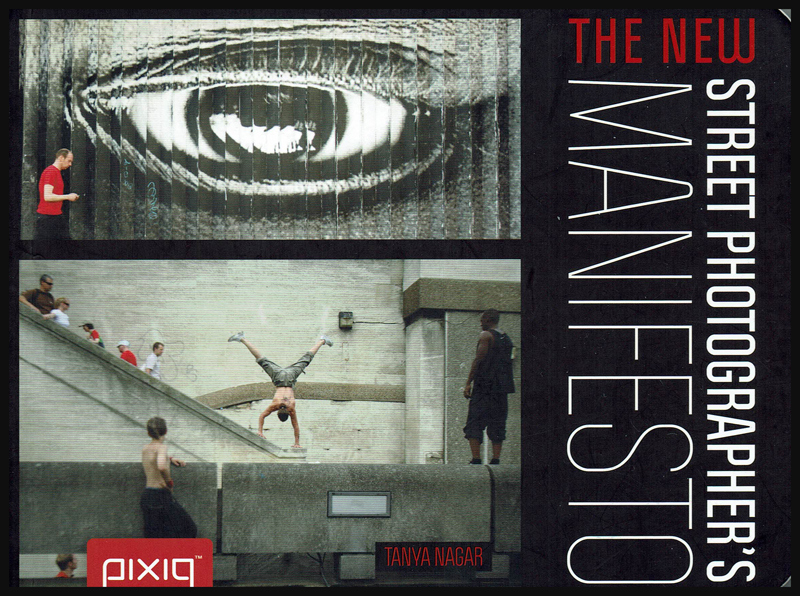
Livre de photographie: “The new street photographer’s manifesto” par Tanya Nagar
Tanya Nagar is an award-winning photographer from London. Her book, “The new street photographer’s manifesto” is perfect for those who aim to improve their street photography techniques. The present article is not a comprehensive critic of her book but an overview of what a reader will find. I also highlighted some tips in photography that will help to improve the street photographer’s performance.
Tanya’s manifesto not only contains technical advices helping a photographer to improve his shots but also some tips to avoid common mistakes. Subjects include: timing, composition, shooting portraits, framing and juxtaposition, perspective and angles, the choice between landscape and portrait, depth of field, shutter speed, exposure, night photography, rule of thirds, etc.
The book’s content is divided in six categories: 1. Street Photography 2. Where & What to Shoot 3. Seize the Moment 4. Equipment 5. Digital Processing 6. Showcase.
1. Street photography requires the ability to seize a life moment with precision and timing. It is about candid shots and does not have to include humans, as long as it fixes a moment in life. It certainly can include animals (in fact, animals are a very popular subject).
2. It is best if you use a light, discrete camera (even an I-Phone). Walking with a huge camera with big lenses makes you look like a professional photographer and people will see you coming. The trick is to avoid drawing attention. Coughing while clicking drowns out the sound of the camera. You might also think of “shooting from the hip” or “shooting blind”. Those techniques are explained in the book and can be mastered with a bit of practice.
3. It takes a bit of courage to photograph situations that include people since you never know what to expect when you raise your camera. Respect the different cultures and personal space and don’t be afraid to smile and explain what you are doing. If somebody refuses to be photographed, move on, don’t dwell on the situation.
4. In order to gain experience and a feeling of security at taking pictures of people on the street, start with protests or parades.
5. It is a good thing to know the laws pertaining to photography of the country you are visiting. Police officers in some countries might be tempted to order you to delete a shot while they actually don’t have the right to. Often, a misunderstanding by police or security guards of anti-terrorism legislation leads to different interpretations and subsequently to abuse towards a photographer. Just make sure you stay up to date with the country’s regulations.
6. You might think of shooting from within your vehicle to obtain interesting results (while respecting the country’s laws).
7. Use graffitis, signs, graphical billboards, text and advertising logos.
8. Use contrasts like big versus small, light versus dark, rich versus poor, etc.
9. Bear attention to details and look for second degree interpretation of a situation.
10. Look for amusing, funny and unusual captures.
11. Make sure you master your camera in order to be quick when the perfect opportunity comes. Set most of the parameters of the camera before actually arriving on a scene (you already have an idea of the light intensity in the area and the ISO setting that will be required to obtain the speed you desire).
12. Be cautious when it comes to taking pictures of children. Societies change and authorization from the child’s parents is required almost every time.
13. “The only way to avoid missing a moment is by carrying your camera at all times”. Therefore, get something small and light.
Endos du livre de photographie “The new street photographer’s manifesto”
The book holds a section dedicated to multiple types of cameras: rangefinders, SLR and DSLR, four thirds and micro four thirds, medium format, point-and-shoot compact cameras, camera phones, toy and pinhole cameras. Their advantages and disadvantages are clearly explained.
The reader will also find some information about lenses (the best for street photography and what to avoid) and the effects obtained through the use of different type of films (colored, black and white, expired).
The fifth section of the book relates to digital processing and the basic image editing techniques like cropping, rotating, the use of the “Curves” command, as well as dodging and burning.
The final section, “Showcase”, presents many well-known street photographers from around the world, including few photos taken by each of them to allow the reader to have an overview of each photographer’s personal style and creativity. Presented in order are: Antonio Navarro Wijkmark, Brian Quentin Webb, Charlotte Gonzalez, Claire Atkinson, Danny Santos II, Felix Lupa, Ferhat Çelik, Mustafa Abdulaziz, Ronya Galka, Seamus Travers and Severin Koller.
This is certainly a very interesting and practical photography book that will help you avoid costly mistakes (missed photo opportunities or buying the wrong photography equipment) while helping you to improve your knowledge on street photography as much as the quality of your shots.
Here is a link towards Tanya Nagar’s website: Tanya Nagar
1. A picture you would never have thought possible, because of extreme contrasts between brightness and darkness, is now accessible to you through HDR.
2. For a good HDR picture, you need at least 1) an interesting subject 2) an appropriate setting or background 3) the appropriate light and 4) a wide range in contrasts. That seems basic, but HDR will not save a picture that was not thought through.
3. You need a software like Photomatix, to transform several pictures taken at different exposures into one HDR picture. But this is only the first step. You will also need another editing software to improve the general result after Photomatix has been used.
4. A tripod is required to help Photomatix align the pictures and create the HDR effect.
5. As with your normal pictures, it is always better to try to use the lowest ISO as possible.
Gruyères, Switzerland, 2013.
6. It is safer to work with manual focus. This way, none of your shots will have been influenced by external objects without you noticing. It will always be the exact same focus throughout the HDR photo session. With automatic focus, you generally notice your blurred pictures when you’re back home and then it is too late (it will often happen under low light conditions).
7. The greater the contrast, the more exposures you need to take (up to nine) in order to match the dynamic range of your eyes.
8. The idea is to take each exposure at a different exposure setting. If you need seven exposures, an example of settings would be: -1, -2/3, -1/3, 0, +1/3, +2/3, +1. You might decide that three exposures only are necessary and go for -2, 0, +2 or -1, 0, +1. The choice is yours but you must take only the required number of exposures to avoid including too much noise in your shots.
Canon, 16-35mm, HDR format.
9. Throughout your HDR exposures of a specific scene, always keep the same aperture.
10. A scene is rarely perfectly balanced with light and shadows. If there are many shadow areas in the photo you want to take, then take more exposures over the recommended settings to ensure that you caught the whole dynamic range of the scene.
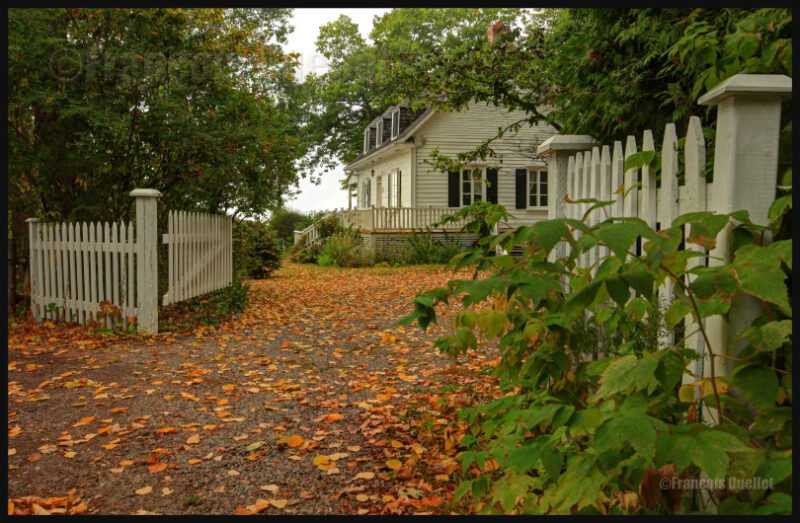
A house in Sainte-Pétronille, on Île d’Orléans, autumn 2012. HDR picture.
11. Inversely, if your scene has lots of highlight areas, take more exposures under the recommended settings.
12. Setting your camera to “automatic bracketing” is preferable because all the pictures are taken quickly thus avoiding to show any blurred picture in the final HDR picture. But if you want to show the movement of water in a creek, you don’t need bracketing: just take few shots with different time of exposure (in number of seconds). Just don’t overdo it otherwise it will give place to an uninteresting undefined white surface.
13. Check your LCD monitor so that none of the highlights are blown out. There would be a loss of details. For the same reason, you must avoid to block the shadows.
14. Always work with RAW files, it gives you better results. The RAW file already provides you with more f/stops then the JPEG file, and this before the transformation in HDR has even started).
15. Of all the lenses I’m using, the wide angle lens is my preferred one with it comes to HDR photography.
Spring light in the lower town of Quebec City
16. To improve the composition or enhance the general impact, crop the picture.
17. Not all pictures are appropriate for HDR transformation. If you want a dramatic silhouette as the final result, for example, HDR will not be appropriate. It will reveal too many details in the shadows and you will lose the high contrast effect that you were looking for. With practice, you will recognize where HDR is the most effective.
18. Whether you want a realistic picture or not, you can obtain surprising results with the combined effects of softwares like Photomatix, Topaz, Photoshop, Nik Software, Lightroom, Lucis Pro and so on. It’s only a matter of taking your time to experiment.
19. If you have only one picture on hand, like a shot you took years ago, and you would like to give it an HDR effect, you can use a software likeTopaz Adjust. There is an HDR effect section in that software that allows you to get a wide range of effects. But this is not going to be nearly as good as the real HDR resulting out of many pictures. The final editing step is, most of the time, done using Photoshop.
20. An unpretentious book about HDR is “Rick Sammon’s HDR Photography Secrets for Digital Photographers”. It is simple, colorful, well written and loaded with practical informations.
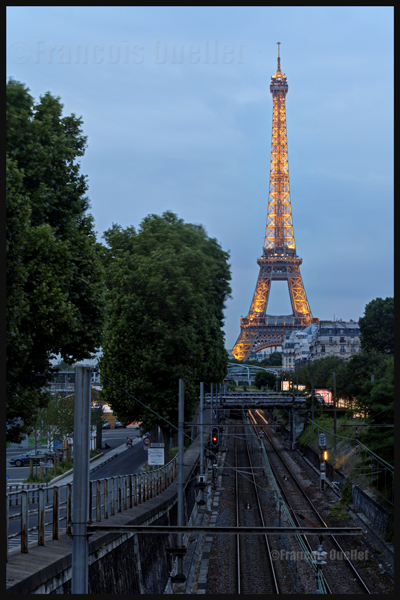
Eiffel Tower at night with HDR effect
Note: All the photos were taken with a Canon 5D MKII