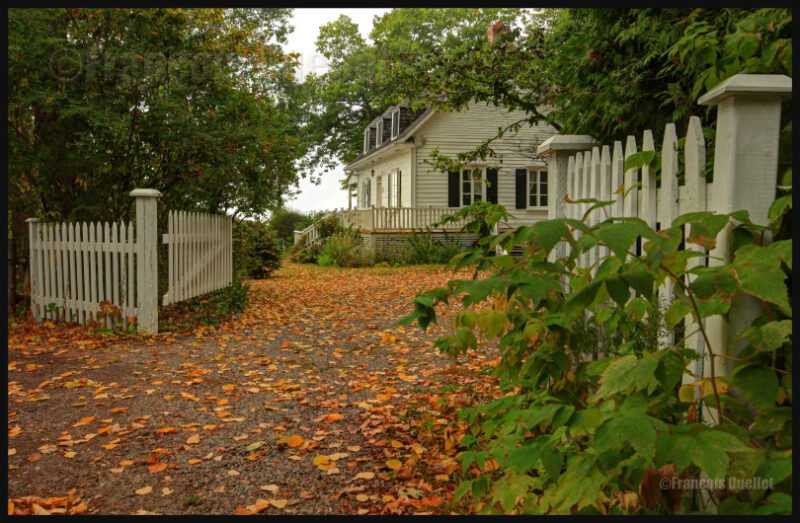
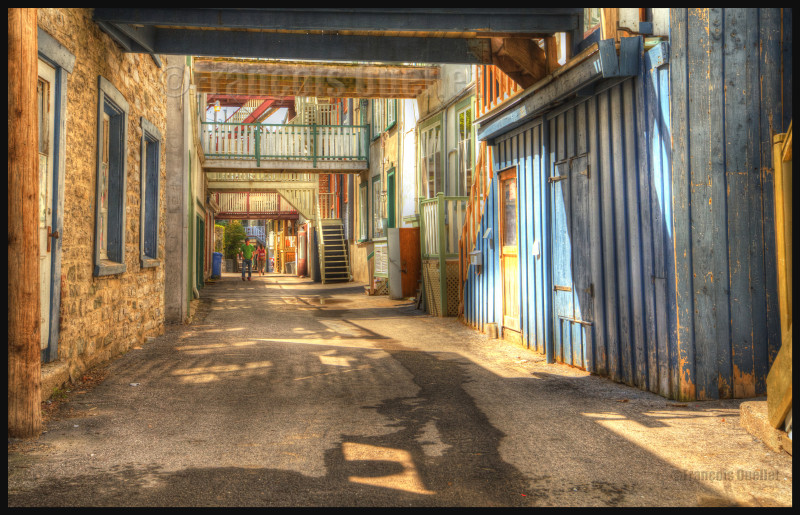
HDR (High Dynamic Range) Photography
1. A picture you would never have thought possible, because of extreme contrasts between brightness and darkness, is now accessible to you through HDR.
2. For a good HDR picture, you need at least 1) an interesting subject 2) an appropriate setting or background 3) the appropriate light and 4) a wide range in contrasts. That seems basic, but HDR will not save a picture that was not thought through.
3. You need a software like Photomatix, to transform several pictures taken at different exposures into one HDR picture. But this is only the first step. You will also need another editing software to improve the general result after Photomatix has been used.
4. A tripod is required to help Photomatix align the pictures and create the HDR effect.
5. As with your normal pictures, it is always better to try to use the lowest ISO as possible.
6. It is safer to work with manual focus. This way, none of your shots will have been influenced by external objects without you noticing. It will always be the exact same focus throughout the HDR photo session. With automatic focus, you generally notice your out-of-focus shots when you’re back home and then it is too late (it will often happen under low light conditions).
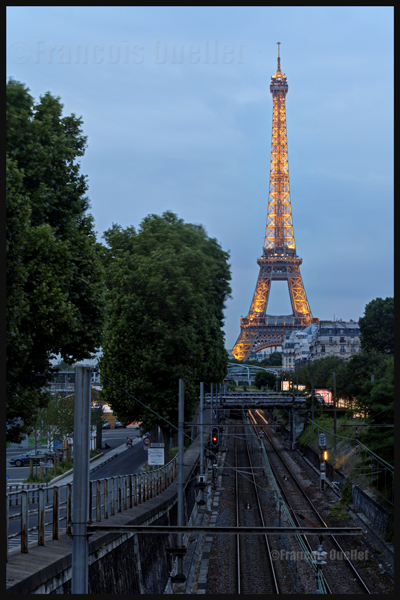
7. The greater the contrast, the more exposures you need to take (up to nine) in order to match the dynamic range of your eyes.
8. The idea is to take each exposure at a different exposure setting. If you need seven exposures, an example of settings would be: -1, -2/3, -1/3, 0, +1/3, +2/3, +1. You might decide that three exposures only are necessary and go for -2, 0, +2 or -1, 0, +1. The choice is yours but you must take only the required number of exposures to avoid including too much noise in your shots.
9. Throughout your HDR exposures of a specific scene, always keep the same aperture.
10. A scene is rarely perfectly balanced with light and shadows. If there are many shadow areas in the photo you want to take, then take more exposures over the recommended settings to ensure that you caught the whole dynamic range of the scene.
11. Inversely, if your scene has lots of highlight areas, take more exposures under the recommended settings.
12. Setting your camera to “automatic bracketing” is preferable because all the pictures are taken quickly thus avoiding to show any blurred picture in the final HDR picture. But if you want to show the movement of water in a creek, you don’t need bracketing: just take few shots with different time of exposure (in number of seconds). Just don’t overdo it otherwise it will give place to an uninteresting undefined white surface.
13. Check your LCD monitor so that none of the highlights are blown out. There would be a loss of details. For the same reason, you must avoid to block the shadows.
14. Always work with RAW files, it gives you better results. The RAW file already provides you with more f/stops then the JPEG file, and this before the transformation in HDR has even started).
15. Of all the lenses I’m using, the wide angle lens is my preferred one with it comes to HDR photography.
16. To improve the composition or enhance the general impact, crop the picture.
17. Not all pictures are appropriate for HDR transformation. If you want a dramatic silhouette as the final result, for example, HDR will not be appropriate. It will reveal too many details in the shadows and you will lose the high contrast effect that you were looking for. With practice, you will recognize where HDR is the most effective.
18. Whether you want a realistic picture or not, you can obtain surprising results with the combined effects of softwares like Photomatix, Topaz, Photoshop, Nik Software, Lightroom, Lucis Pro and so on. It’s only a matter of taking your time to experiment.
19. If you have only one picture on hand, like a shot you took years ago, and you would like to give it an HDR effect, you can use a software likeTopaz Adjust. There is an HDR effect section in that software that allows you to get a wide range of effects. But this is not going to be nearly as good as the real HDR resulting out of many pictures. The final editing step is, most of the time, done using Photoshop.
20. An unpretentious book about HDR is “Rick Sammon’s HDR Photography Secrets for Digital Photographers”. It is simple, colorful, well written and loaded with practical informations.