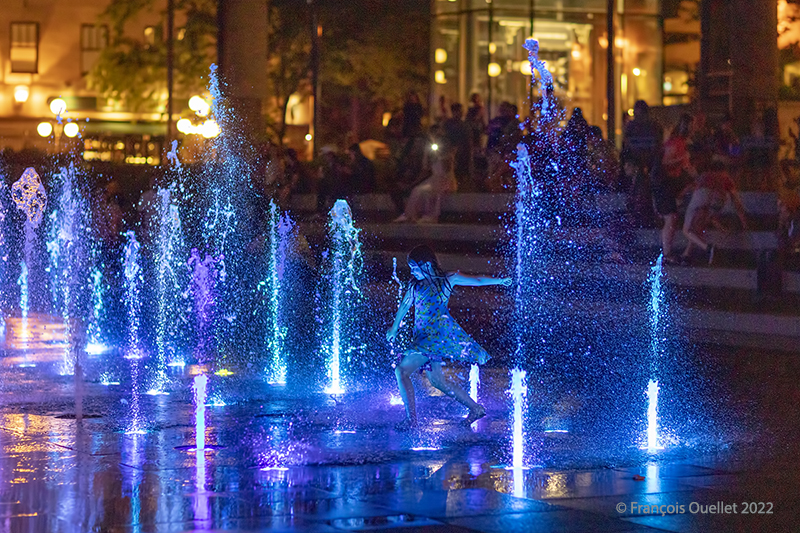
A young girl dances through the water jets near Quebec City’s city hall.
The water fountains near the Quebec City’s City Hall Gardens attract crowds during the summer season. The changing colors of the lights offer many opportunities for night photography.
Patience becomes the first rule when it comes to capturing the scene that will stand out. Usually, children run indiscriminately left and right. But there are exceptions, like that evening when a young girl started dancing through the programmable fountains. She moved quickly, adding more dynamism to the scene. I had to take a chance with a night photo.
As far as the photography technique is concerned, the challenge was interesting. I wanted to capture the feeling of movement in her dance. But this demanded a high shutter speed to avoid too much motion blur. On the other hand, the low ambient light called for a slow shutter speed. Those two requirements were completely opposite.
A Canon EF 85mm f/1.2L II USM lens mounted on a Canon 5DSR camera was part of the solution. A recycling garbage can positioned near the scene also served as a support for the portable tripod. Both Canon lens and tripod allowed for more light to be captured while avoiding unnecessary vibrations.
However, those two actions would not have been enough to allow the scene to stand out. There were still too many contrasts between light and shadow. A digital image processing software facilitated the use of the essential data included in the RAW file of the photo, revitalizing the background while diminishing the foreground’s highlights of the water jets.
Some purists lose sleep over the idea that contemporary photographers use digital processing software to get a better picture. When a RAW file contains 50 million megapixels and you refuse to use its data on principle, it’s a bit like Charles Leclerc deciding to drive his Formula 1 car using only the settings of the ’60s, for nostalgia’s sake.
Click on the link for more night photos on my blog.
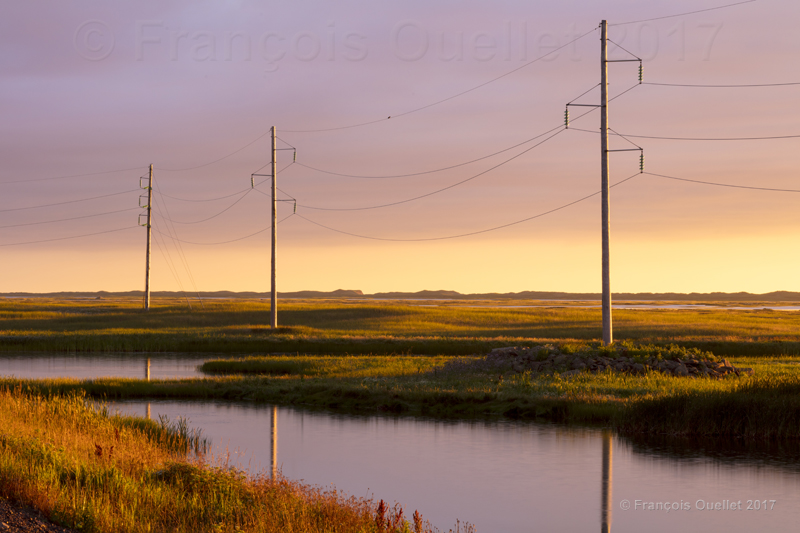
The Magdalen Islands, in the Province of Quebec, are recognized for the magnificent sunsets. The picture above was taken while I was coming back from Havre Aubert with my family during summer 2017. The ponds are located between Havre Aubert and Cap-aux-Meules, immediately alongside the main road.
The day had been cloudy and there was no indication that the evening would offer a possibility to get an interesting picture. But around 8 PM, while the sun was still relatively high above the horizon, a few sunrays were able to pierce through the cloud deck. The stratocumulus being well defined, it became obvious that when the sun would be close enough to the horizon, it would light the cloud deck from below as well as light up the ponds. It was important to act rapidly in order to capture the beautiful atmosphere.
When the winds are calm and you must stand still close to ponds in order to do photographic adjustments, one must accept to lose some blood to swarming moskitos. That night, I must have lost a pint of blood!
The absence of wind allowed for a good reflection of the electric poles in the foreground.
The picture was taken with a Canon 5DSR full frame camera equipped with a Canon 70-200 f2.8L IS II USM telephoto lens and a graduated filter used to avoid the underexposure that would be caused by the highlights in the horizon. I used aperture priority and set it at F18 to get a proper depth of field. The ISO was set at 200 and the focal length at 135 mm.
For other photos on the province of Quebec and also Quebec City, click on the following links from my blog:
The photography book « Full Frame », by David Noton, was written in 2010 but the content is still totally pertinent today. It’s possibly the best photography book I’ve ever read. The images are fantastic and the text is loaded with practical and accessible information.
Photography book “Full Frame” by David Noton
The author is known as one of the best landscape photographer in the world. Every page of his book is divided in three sections: before, during, after. This means that you read about everything that the author had to deal with as he travelled around the world with his wife to capture landscapes: the preparation, technique, priorities, obstacles, successes, etc.
All along the book, I had the feeling that a friend was writing me since the text is written with a light and humoristic approach in mind, and certainly without pretend. Here are some of his remarks and advices:
“Luck is where preparation and opportunity combine.” (p.38) This certainly applies to everything we do in life.
“Stick with the full frame quality and crop as when required, keeping all the [sensor’s megapixels] information in reserve”.
“Sometimes a new lens or format will serve as a catalyst for a whole new way of looking. It’s all part of the evolutionary process.” (p.64)
Sharpen all digital images. Pictures are made of square pixels and need microadjustments.
To choose among your interesting similar photos which one is the best, start with a very good one and compare it with each other photo, one at a time, throwing away the ones that are inferior. You will save a lot of time.
A bit of blinking in the highlights is not terrible since RAW files can easily be adjusted. Don’t forget that the camera’s monitor shows an histogram adjusted for JPEG files.
Use a grad filter to control the contrasts only, not to add mood or create an artificial contrast.
There is no need to always show the tops of mountains.
“The best pictures are the simplest. Composition is the art of knowing what to leave out.” (p.71)
“Be flexible and strive to extract the most from seemingly adverse conditions.” (p.77)
“For wide angle views on the world, a full-frame sensor is imperative.” (p.93)
Back cover of the photography book “Full Frame” by David Noton
“Scout the location, analyse the options in different lighting situations, previsualize the image, plan the shoot then keep returning until it’s nailed.” (p.113)
“Location finding is everything; the photography is the easy bit.” (p.125)
“Don’t be afraid of “blinkies” in the brightest part of the sky where the sun shines through […]. We don’t expect to see detail there.” (p.138)
“Using movement is an essential technique in a photographer’s repertoire.” (p.143)
“The classic, golden rule of thirds is a good starting point, but it’s only a guideline to ignore at will.” (p.149)
“A camera’s sensor is not a linear device so the right half of the histogram contains far more information than the left. Those apparently overexposed images, when processed with the brightness brought back to the desired density, will have richer tones and less noise than a frame exposed to the left.” (p.153)
“We photographers can only continue to improve if we keep pushing ourselves.” (p.187)
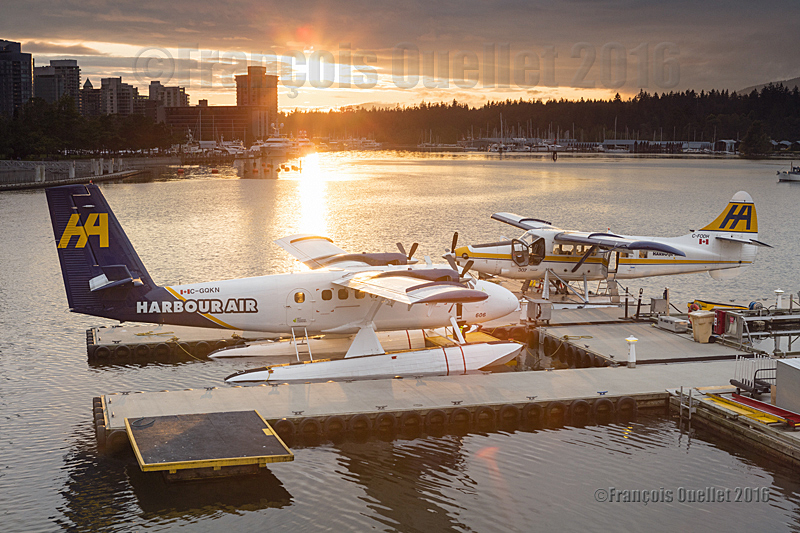
Harbour Air Twin Otter floatplane C-GQKN and Turbo Otter floatplane C-FODH in the sunset in the Port of Vancouver during summer 2016
The picture above has been taken with a Canon 5DSR full-frame camera in the Port of Vancouver, in British Columbia, during summer 2016. Following a very busy day of take-offs and landings, everything is now peaceful. The Harbour Air Twin Otter floatplane C-GQKN and Turbo Otter floatplane C-FODH are now parked for the night.
Pictures taken at dusk or dawn benefit from a unique light. Nonetheless, taking pictures of aircrafts against the light, with the last sunrays still visible, requires a special attention with regards to blown out highlights.
When contrasts are too important, it is possible to correct the situation by taking several pictures with different exposures and merging them using an image editing software like Photomatix (HDR photography). This is done in a few minutes only. Nonetheless, with floatplane aircrafts that are still slightly moving even when tied for the night, there is an increased risk of a blurred picture. The best way to proceed is to use a ND grad filter and to place it exactly where the light is the strongest. Naturally, there will still be some blown out highlights.
This being said, you still have a good margin of manoeuver, since there is no problem in showing a limited amount of over-exposed highlights in the brighter part of the sunrays, as there is not much details to lose there anyway. While purists would argue otherwise and spend hours in front of their computer trying to correct everything, you are making the best of another day of photographic exploration.
If the picture was taken using RAW files (or RAW with JPEG), it is possible to improve the scene even more by correcting some aspects like the contrasts, the brightness, the colours, the saturation and ambient light, etc. This also requires very limited time in front of the computer once you understand the basic principles of an image editing software.
1. A picture you would never have thought possible, because of extreme contrasts between brightness and darkness, is now accessible to you through HDR.
2. For a good HDR picture, you need at least 1) an interesting subject 2) an appropriate setting or background 3) the appropriate light and 4) a wide range in contrasts. That seems basic, but HDR will not save a picture that was not thought through.
3. You need a software like Photomatix, to transform several pictures taken at different exposures into one HDR picture. But this is only the first step. You will also need another editing software to improve the general result after Photomatix has been used.
4. A tripod is required to help Photomatix align the pictures and create the HDR effect.
5. As with your normal pictures, it is always better to try to use the lowest ISO as possible.
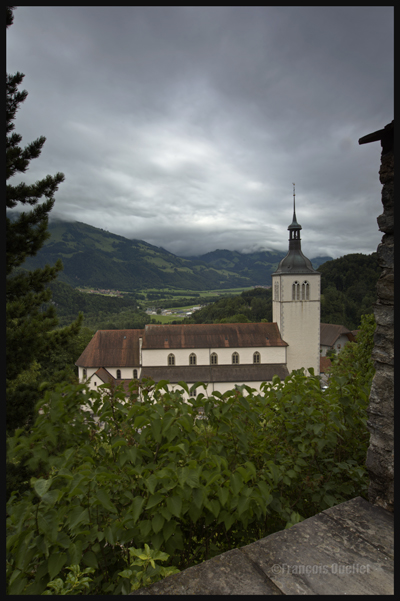
Gruyères, Switzerland, 2013.
6. It is safer to work with manual focus. This way, none of your shots will have been influenced by external objects without you noticing. It will always be the exact same focus throughout the HDR photo session. With automatic focus, you generally notice your blurred pictures when you’re back home and then it is too late (it will often happen under low light conditions).
7. The greater the contrast, the more exposures you need to take (up to nine) in order to match the dynamic range of your eyes.
8. The idea is to take each exposure at a different exposure setting. If you need seven exposures, an example of settings would be: -1, -2/3, -1/3, 0, +1/3, +2/3, +1. You might decide that three exposures only are necessary and go for -2, 0, +2 or -1, 0, +1. The choice is yours but you must take only the required number of exposures to avoid including too much noise in your shots.
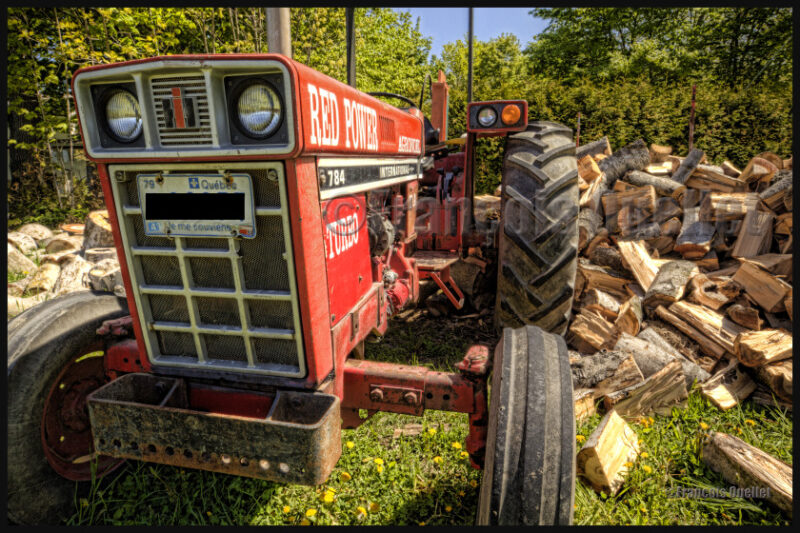
Canon, 16-35mm, HDR format.
9. Throughout your HDR exposures of a specific scene, always keep the same aperture.
10. A scene is rarely perfectly balanced with light and shadows. If there are many shadow areas in the photo you want to take, then take more exposures over the recommended settings to ensure that you caught the whole dynamic range of the scene.
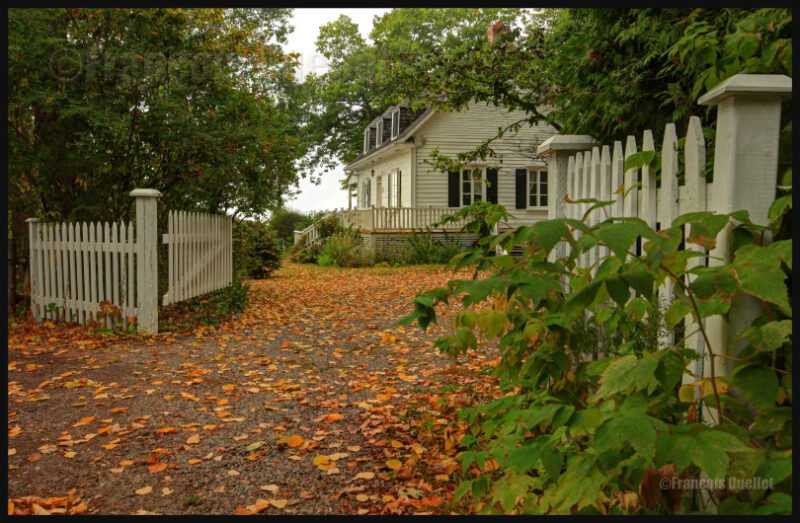
A house in Sainte-Pétronille, on Île d’Orléans, autumn 2012. HDR picture.
11. Inversely, if your scene has lots of highlight areas, take more exposures under the recommended settings.
12. Setting your camera to “automatic bracketing” is preferable because all the pictures are taken quickly thus avoiding to show any blurred picture in the final HDR picture. But if you want to show the movement of water in a creek, you don’t need bracketing: just take few shots with different time of exposure (in number of seconds). Just don’t overdo it otherwise it will give place to an uninteresting undefined white surface.
13. Check your LCD monitor so that none of the highlights are blown out. There would be a loss of details. For the same reason, you must avoid to block the shadows.
14. Always work with RAW files, it gives you better results. The RAW file already provides you with more f/stops then the JPEG file, and this before the transformation in HDR has even started).
15. Of all the lenses I’m using, the wide angle lens is my preferred one with it comes to HDR photography.
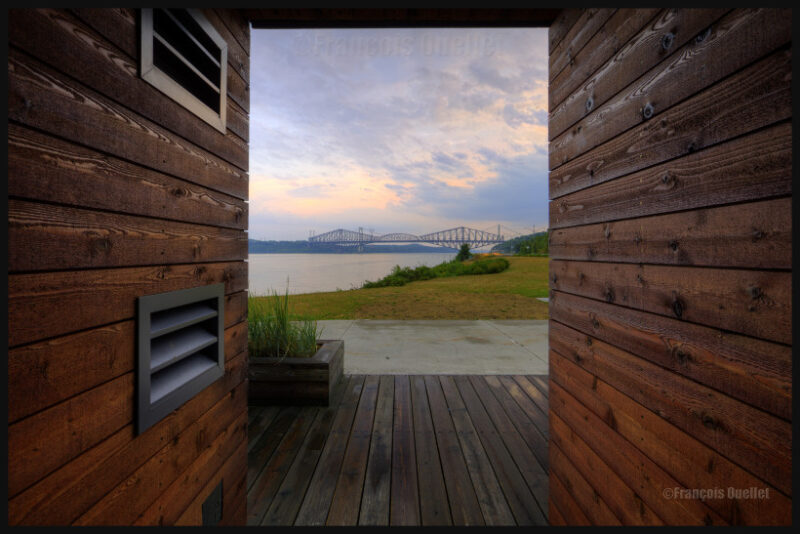
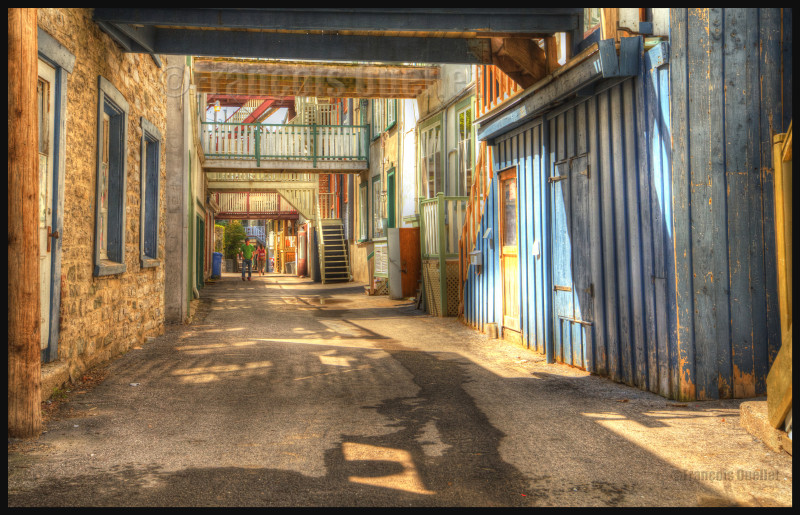
Spring light in the lower town of Quebec City
16. To improve the composition or enhance the general impact, crop the picture.
17. Not all pictures are appropriate for HDR transformation. If you want a dramatic silhouette as the final result, for example, HDR will not be appropriate. It will reveal too many details in the shadows and you will lose the high contrast effect that you were looking for. With practice, you will recognize where HDR is the most effective.
18. Whether you want a realistic picture or not, you can obtain surprising results with the combined effects of softwares like Photomatix, Topaz, Photoshop, Nik Software, Lightroom, Lucis Pro and so on. It’s only a matter of taking your time to experiment.
19. If you have only one picture on hand, like a shot you took years ago, and you would like to give it an HDR effect, you can use a software likeTopaz Adjust. There is an HDR effect section in that software that allows you to get a wide range of effects. But this is not going to be nearly as good as the real HDR resulting out of many pictures. The final editing step is, most of the time, done using Photoshop.
20. An unpretentious book about HDR is “Rick Sammon’s HDR Photography Secrets for Digital Photographers”. It is simple, colorful, well written and loaded with practical informations.
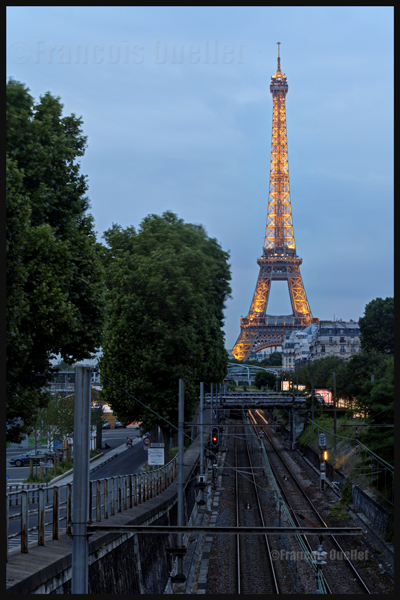
Eiffel Tower at night with HDR effect
Note: All the photos were taken with a Canon 5D MKII