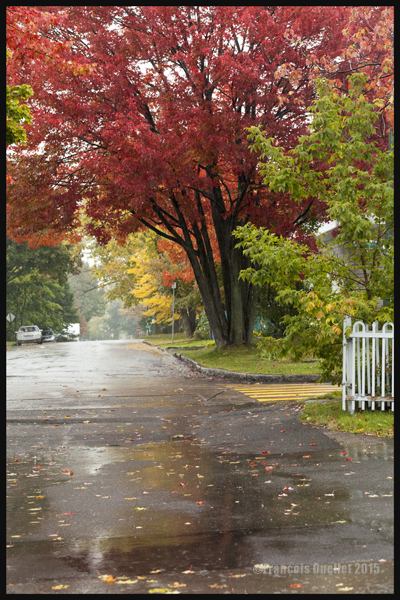
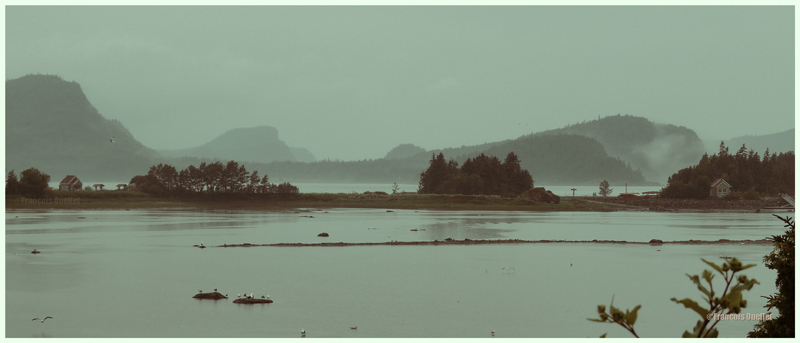
Here are few photos taken two days ago in Québec with a Canon 5D MK II camera . The first picture is the exception, having been taken in St-Antoine-de-Tilly.
St-Antoine-de-Tilly, Québec 2015
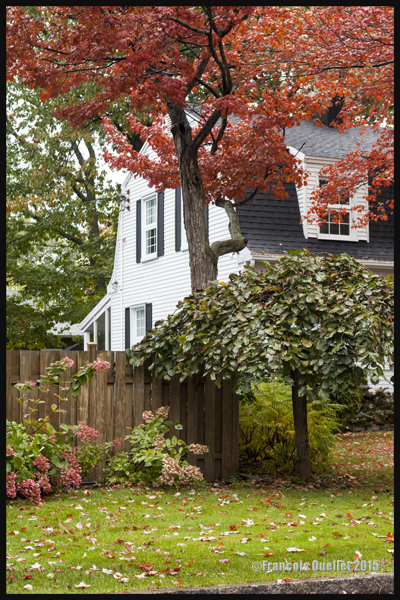
It was raining when the two following pictures were taken in Sillery. But this normally allows for good results since the colors are more interesting:
Sillery, Québec 2015
Sillery, Québec 2015
The Park Bois-de-Coulonge always means interesting surprises, year after year. There is always something original to shoot, providing the photographer takes his time. One can see the Sillery Marina from the top of the cliff. A row of aligned trees and the numerous masts of the sailboats taken out of the water before the cold season offered an interesting view:
Sillery Marina, Québec 2015
The wind was blowing moderately, which allowed for the following picture:
Parc du Bois-de-Coulonge, Québec 2015
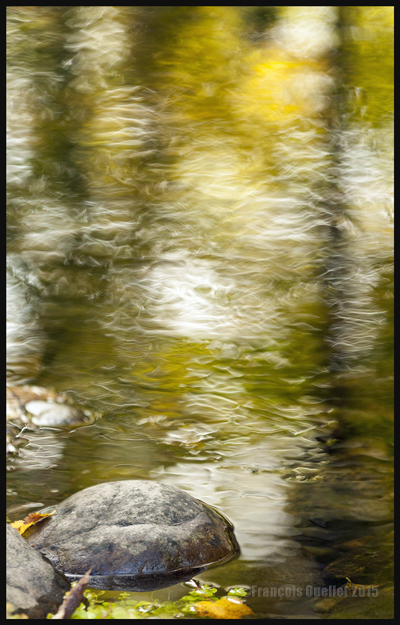
Near a little creek, I tried different shutter speeds on two similar shots:
Parc du Bois-de-Coulonge, Québec 2015
Parc du Bois-de-Coulonge 2015
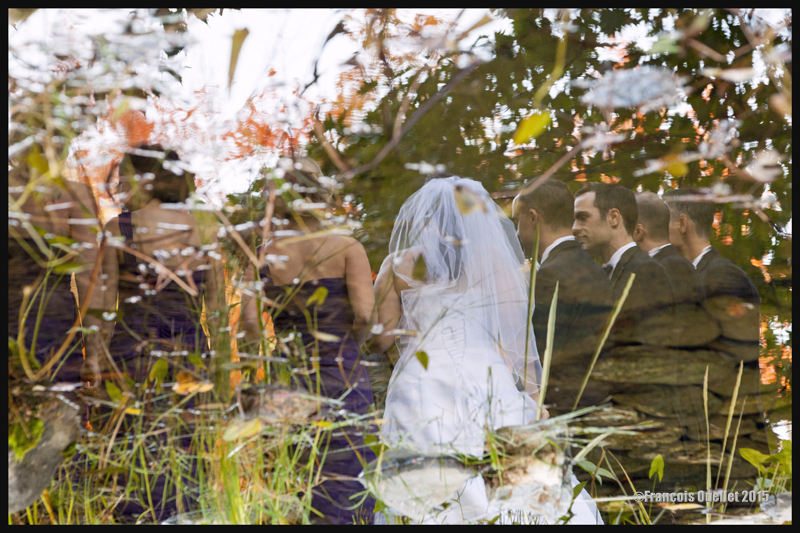
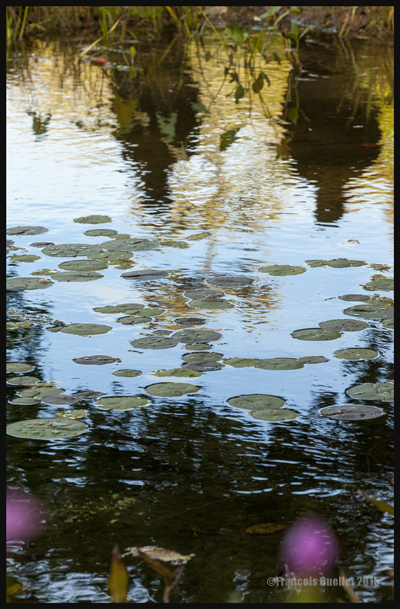
As I was ready to leave the park, I saw a newly wed and her entourage arriving for a photo shoot session with a professional photographer. I delayed my departure and used the pond to capture the following image, which was then inverted:
Wedding at the Bois-de-Coulonge Park 2015
Two men who were present for the wedding were standing close to the pond, staying at a distance for the photo session. I took the opportunity to discretely add the shadows to my photo:
Parc du Bois-de-Coulonge, Québec 2015
For other photos on the province of Quebec and also Quebec City, click on the following links from my blog:
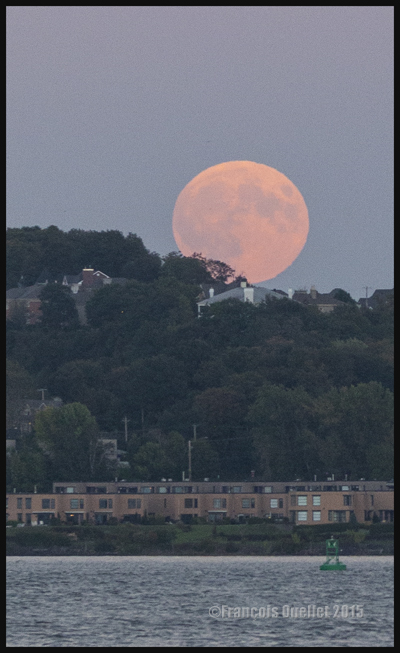
A quick look on internet provided the exact location and time where the moon would rise in the Quebec City region. On September 27th 2015, one had to look towards 089 degrees and be ready for 18:25 PM.
September 27th 2015. Blood Moon photo taken from Promenade Champlain, Quebec City, with a Canon 5D MKII.
Imagine being able to connect your camera to a modern personal telescope. That would make for fantastic shots. But since I deal with a Canon 70-200 f2.8L IS II USM coupled with an extender, I cannot expect the same results. Nonetheless, it is not a reason to stay at home…
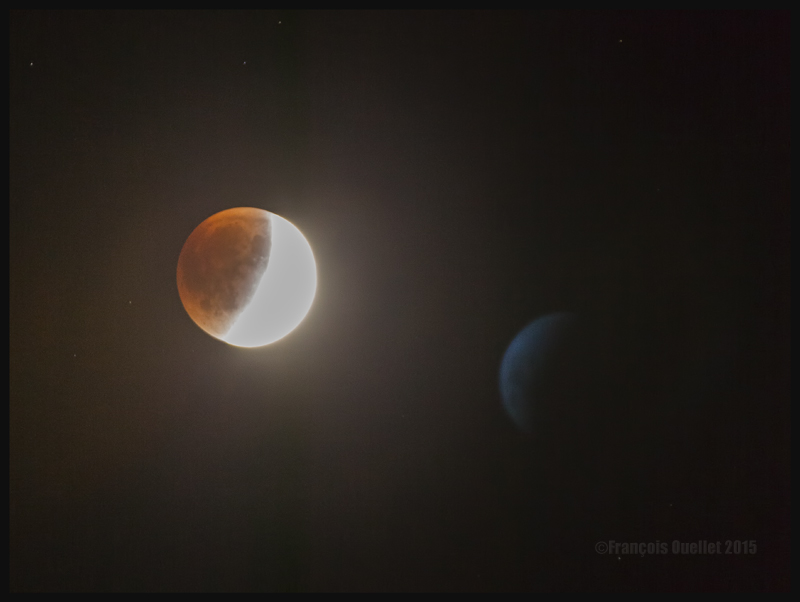
September 27th 2015 Blood Moon Eclipse. As for the blue object to the right of the screen, your explanations are welcomed.
The most interesting effect happened during late evening. I caught the above shot around 22:15. Cranking the ISO, I saw a blue planet or something that looks like it in the frame. The shot was not taken through a window so there was no glass reflection. I was kind of surprised to see this addition to the Blood Moon Eclipse. I wrote to a local astronomy club, asking them what it could be. They answered that unless I took the shot through a window, causing a reflection, they did not know what it was.
I know nothing yet about astronomy. If it is the reflection of the moon, I don’t know how it got there since I was taking the photo outside, without a polarizer. According to a recent comment sent by Mario Cloutier (see the comments) who points the reader to another blog looking at this question, it is possible that the picture of this ghost moon is the result of an overexposed shot combined with the atmosphere’s specific characteristics of temperature and moisture which would increase the reflexion and refraction. That is a logical explanation. The last shot was taken around 22:35:
September 27th 2015 Blood Moon Eclipse. Camera adjusted on BULB priority, with ISO 100 and 2.8 aperture.
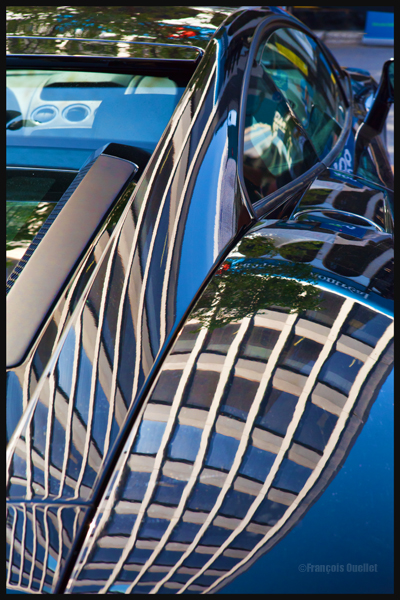
Reflections of buildings and sky on a Black Lamborghini
I took this picture using a Canon 5d MKII with a Canon 14 mm 2.8L lens while walking on Crescent Street in Montreal, just few days before the Canadian Formula 1 Grand Prix 2015. All kind of festivities had been organized on Crescent and Peel streets to celebrate the 2015 edition of the Grand Prix.
Montreal’s buildings are reflecting on a black Lamborghini. I know that the car looks blue, but that color is only the result of the sky’s reflection. This intense reflection was a personal choice available through the use of a polarizer.
The only remaining aspect was the composition: I had to position the camera in such a way that the buildings followed the Lamborghini’s curves, down to the inferior limit of the photo. I tried few shots that were not satisfactory until, finally, the buildings seemed to follow the car lines. Obviously, we are quite far away from a standard Lamborghini shot: here, Montreal’s buildings are getting more attention than the car!
For other photos on the province of Quebec and also Quebec City, click on the following links from my blog:
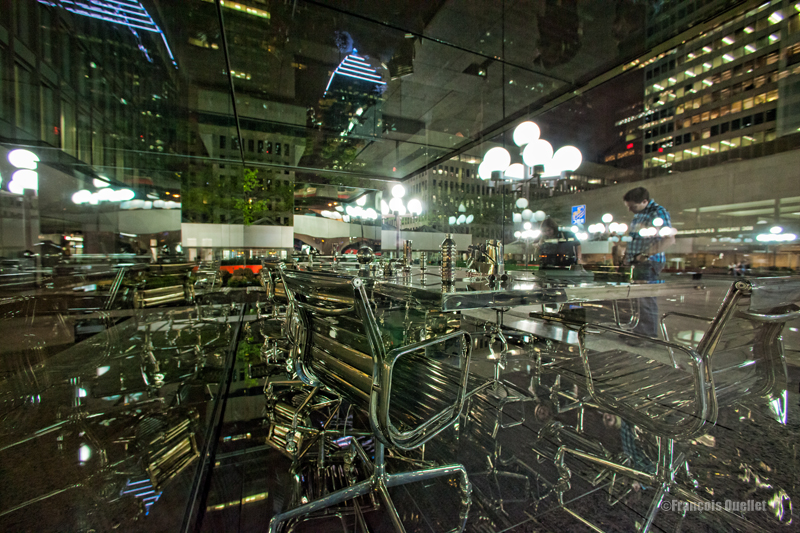
In the middle of a public place in Montreal, I saw a chromed office furniture installation inside a plexiglass box. As interesting as it was, I thought that the scene would be more attractive if I waited for nightime.
Street Photography: Montreal night reflections
Darkness meant that nearby lamposts would be lit. The additional white light would contrast with the night and also help to improve the reflections caused by the chrome and plexiglass.
I only then needed a bystander to add a human presence to the scene. I waited for the moment he would stand still before taking the shot, since I was working with quite a slow speed.
We rapidly recognize three elements: the chair, the person and the rounded white lights. The rest comes after a brief moment of observation. The man attracts our interest as he makes us wonder what he is actually doing: he seems to be looking at the installation, yet he might also be reading some explanations about what he sees.
The viewing angle is wider, thanks to a Canon 14mm 2.8L lens. I did not need any tripod for this photo since the Canon 5D MKII was stabilized by being in contact with the plexiglass box. The only remaining aspect to take care of was to find a good angle to take the shot.
For other photos on the province of Quebec and also Quebec City, click on the following links from my blog:
Street photography: parallel universe in Quebec City
This photo was taken in May 2015 in Quebec City, in Old Quebec, with a Canon 5D MKII. The store decorator has chosen a striking subject with this weird humanoid floating in silence in the presence of a green glass bottle in the foreground.
But a shot taken from the street would have only offered a simple picture with a weird subject. In choosing the side window to take the photo, many other dimensions could be integrated in order to increase the final impact.
1. From the side window, the photographer can add people’s reaction to the humanoid. But there is a bit of waiting involved until the appropriate persons pass by.
2. You can see multiple reflections from the front and side windows that are now visible in the sky.
3. The old architecture on the other side of the street offers a surprising contrast with the modernity of the main subject.
4. The eye naturally moving from left to right, the humanoid’s head has been positioned in the upper right corner of the picture. Once the viewer sees the head, he then follows the blue poneytail to witness the reaction of the two persons on the sidewalk. The loop then starts again.
5. The orange element facing the humanoid offers a strong orange-blue complementary color contrast that should not be neglected to increase the visual effect.
6. Finally, the converging lines help to add depth and increase the visual impact.
This is a photo that could have been much more standard if taken from the sidewalk. The fixed lens used was a Canon 14mm 2.8L.
For other street photography pictures posted on my site, click on the following link:
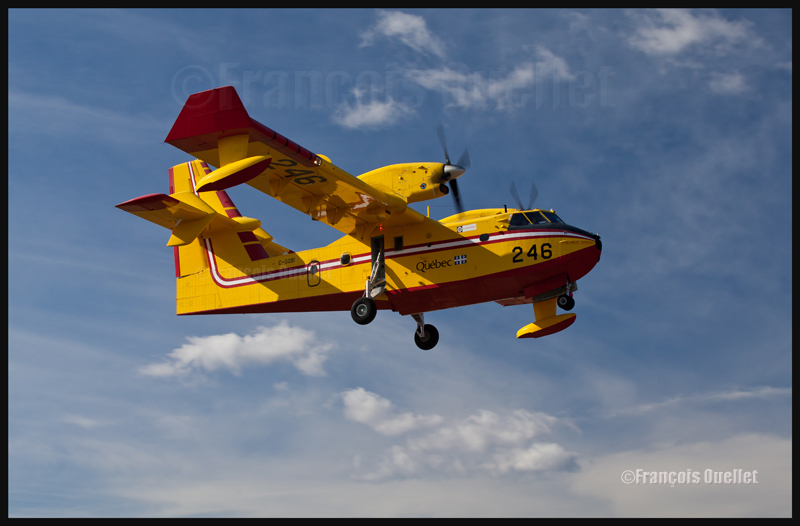
The CL-415 is on final for runway 11 at the Québec Jean-Lesage international airport. Each Spring, the Canadair Cl-215 and 415 pilots go through annual training before being deployed across Quebec territory in preparation for the next forest fires season. This picture was taken with a Canon 5D MKII. The speed was 1/320, aperture 8.0 and ISO 250 and a polarizing filter was installed on the lens. The photo was taken using a Canon 70-200 f2.8L IS II USM.
For other articles on aviation and photography, click on the following link: Aviation photography
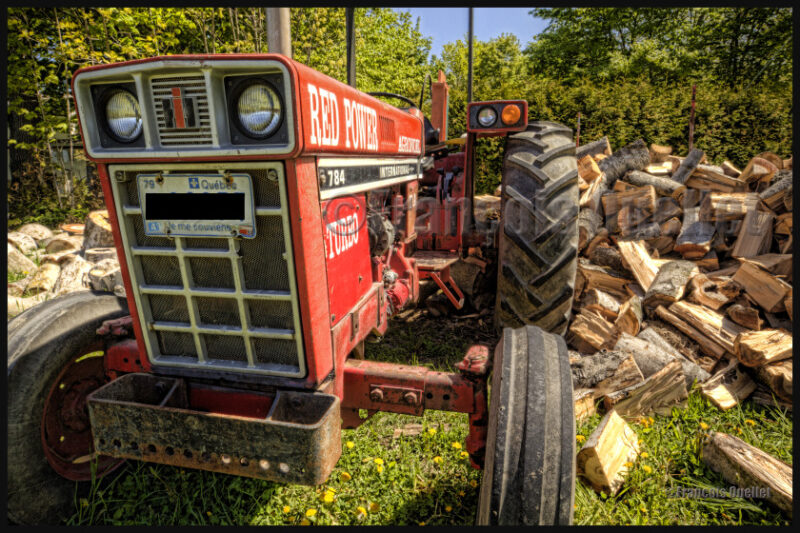
1. A picture you would never have thought possible, because of extreme contrasts between brightness and darkness, is now accessible to you through HDR.
2. For a good HDR picture, you need at least 1) an interesting subject 2) an appropriate setting or background 3) the appropriate light and 4) a wide range in contrasts. That seems basic, but HDR will not save a picture that was not thought through.
3. You need a software like Photomatix, to transform several pictures taken at different exposures into one HDR picture. But this is only the first step. You will also need another editing software to improve the general result after Photomatix has been used.
4. A tripod is required to help Photomatix align the pictures and create the HDR effect.
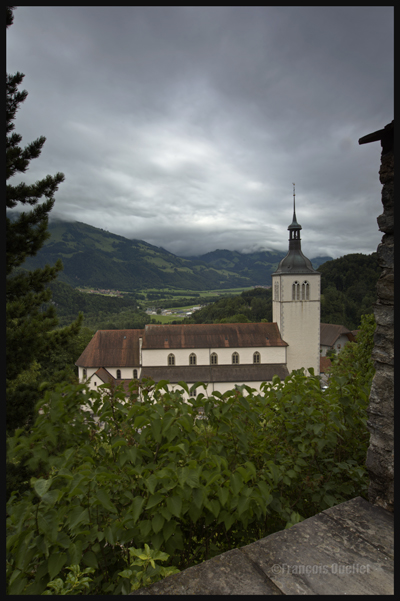
5. As with your normal pictures, it is always better to try to use the lowest ISO as possible.
Gruyères, Switzerland, 2013.
6. It is safer to work with manual focus. This way, none of your shots will have been influenced by external objects without you noticing. It will always be the exact same focus throughout the HDR photo session. With automatic focus, you generally notice your blurred pictures when you’re back home and then it is too late (it will often happen under low light conditions).
7. The greater the contrast, the more exposures you need to take (up to nine) in order to match the dynamic range of your eyes.
8. The idea is to take each exposure at a different exposure setting. If you need seven exposures, an example of settings would be: -1, -2/3, -1/3, 0, +1/3, +2/3, +1. You might decide that three exposures only are necessary and go for -2, 0, +2 or -1, 0, +1. The choice is yours but you must take only the required number of exposures to avoid including too much noise in your shots.
Canon, 16-35mm, HDR format.
9. Throughout your HDR exposures of a specific scene, always keep the same aperture.
10. A scene is rarely perfectly balanced with light and shadows. If there are many shadow areas in the photo you want to take, then take more exposures over the recommended settings to ensure that you caught the whole dynamic range of the scene.
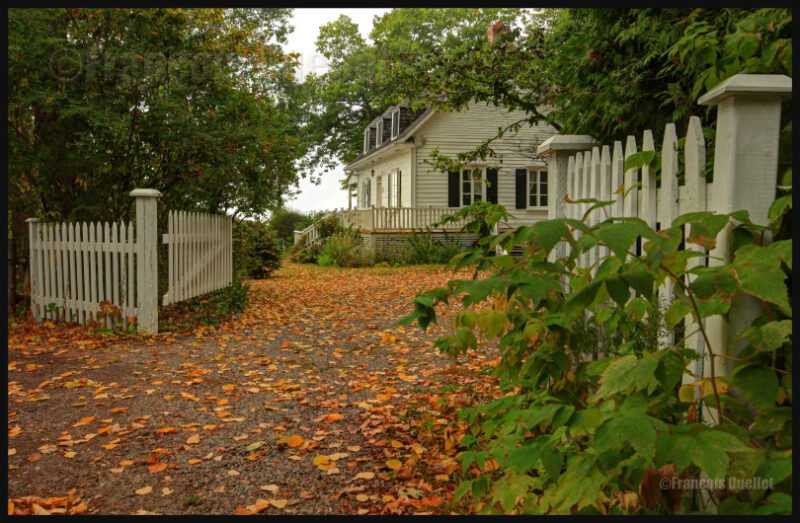
A house in Sainte-Pétronille, on Île d’Orléans, autumn 2012. HDR picture.
11. Inversely, if your scene has lots of highlight areas, take more exposures under the recommended settings.
12. Setting your camera to “automatic bracketing” is preferable because all the pictures are taken quickly thus avoiding to show any blurred picture in the final HDR picture. But if you want to show the movement of water in a creek, you don’t need bracketing: just take few shots with different time of exposure (in number of seconds). Just don’t overdo it otherwise it will give place to an uninteresting undefined white surface.
13. Check your LCD monitor so that none of the highlights are blown out. There would be a loss of details. For the same reason, you must avoid to block the shadows.
14. Always work with RAW files, it gives you better results. The RAW file already provides you with more f/stops then the JPEG file, and this before the transformation in HDR has even started).
15. Of all the lenses I’m using, the wide angle lens is my preferred one with it comes to HDR photography.
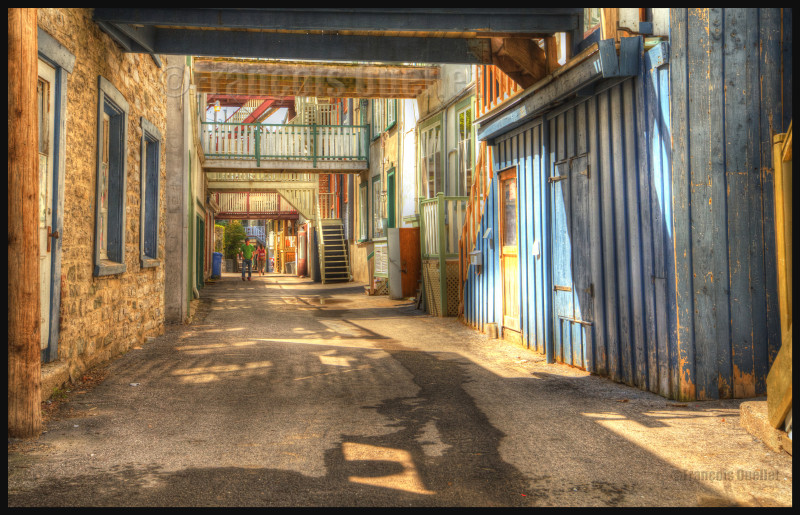
Spring light in the lower town of Quebec City
16. To improve the composition or enhance the general impact, crop the picture.
17. Not all pictures are appropriate for HDR transformation. If you want a dramatic silhouette as the final result, for example, HDR will not be appropriate. It will reveal too many details in the shadows and you will lose the high contrast effect that you were looking for. With practice, you will recognize where HDR is the most effective.
18. Whether you want a realistic picture or not, you can obtain surprising results with the combined effects of softwares like Photomatix, Topaz, Photoshop, Nik Software, Lightroom, Lucis Pro and so on. It’s only a matter of taking your time to experiment.
19. If you have only one picture on hand, like a shot you took years ago, and you would like to give it an HDR effect, you can use a software likeTopaz Adjust. There is an HDR effect section in that software that allows you to get a wide range of effects. But this is not going to be nearly as good as the real HDR resulting out of many pictures. The final editing step is, most of the time, done using Photoshop.
20. An unpretentious book about HDR is “Rick Sammon’s HDR Photography Secrets for Digital Photographers”. It is simple, colorful, well written and loaded with practical informations.
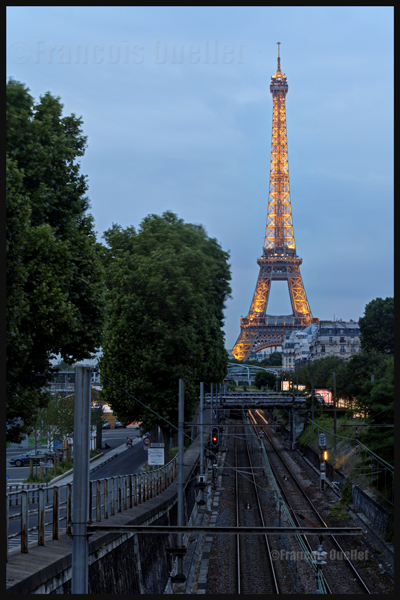
Eiffel Tower at night with HDR effect
Note: All the photos were taken with a Canon 5D MKII
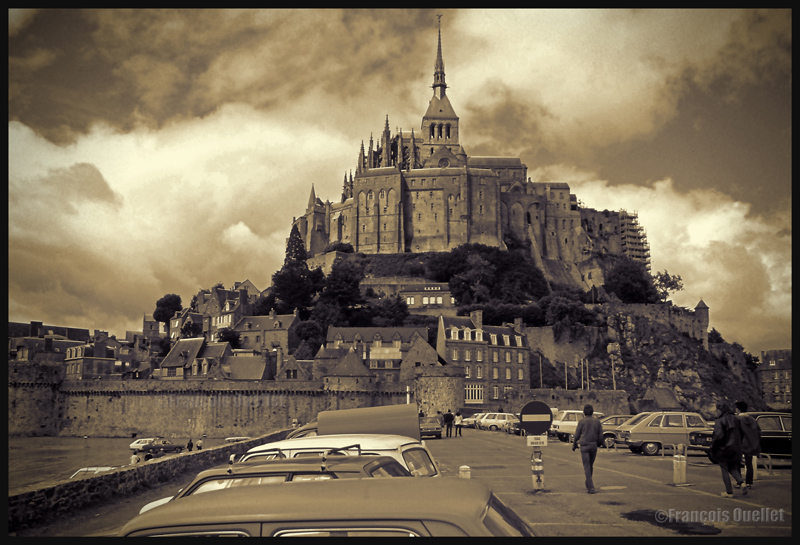
Cumuliform clouds add energy to any photo. Even photos in black and white benefit from them largely, whether it is for a normal or an HDR photo.
Cumuliform clouds add dynamism to this Abbaye du Mont St-Michel scenery. France (1978)
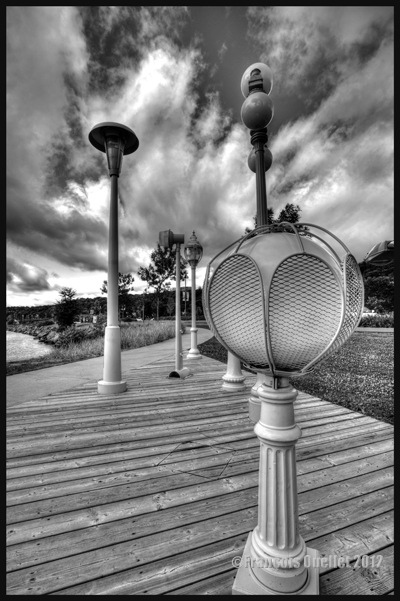
Black and white HDR picture of lamp posts installed along the St-Lawrence, Quebec City 2012.
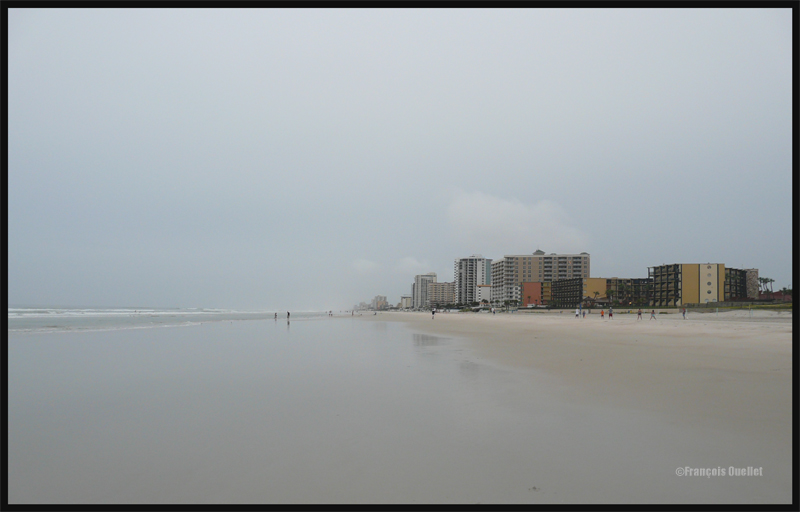
The stratiform clouds add to the tranquillity and the stability of a photo.
Daytona Beach under stratus clouds in 2011. The end of the afternoon allows the fresh air from the sea to move over the heated land, which helps create few cumulus fractus, visible near the buildings.
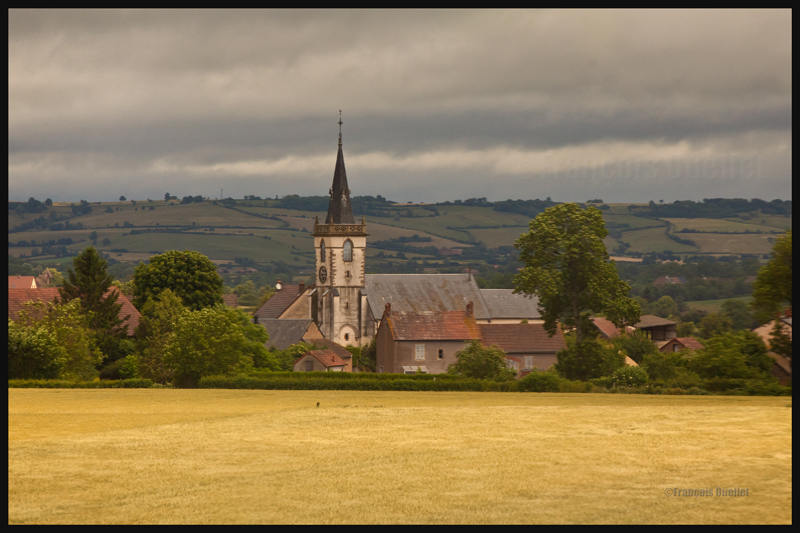
Clouds including a stratiform and cumuliform components (stratocumulus) produce an effect that is more energizing than the simple stratus, while avoiding the explosion of energy of the cumuliform clouds.
A stratocumulus adds to this otherwise peaceful scenery captured on board the Lyria train between Paris and Geneva in 2013.
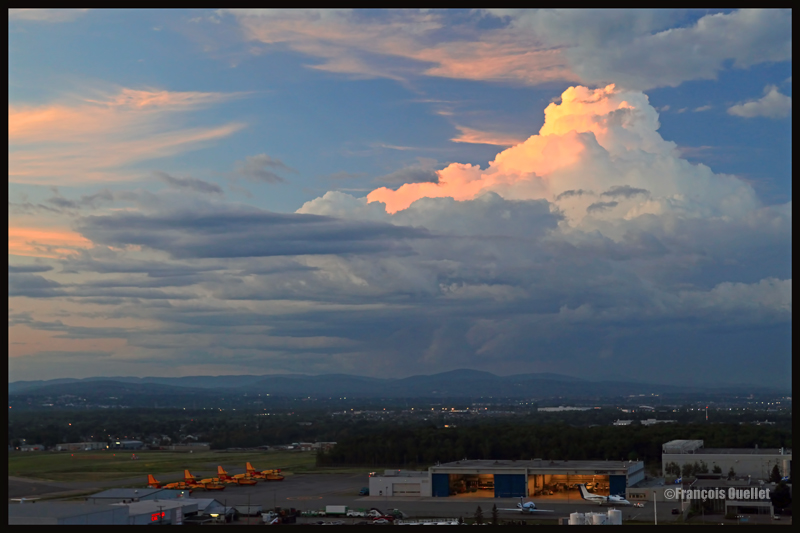
The cold front
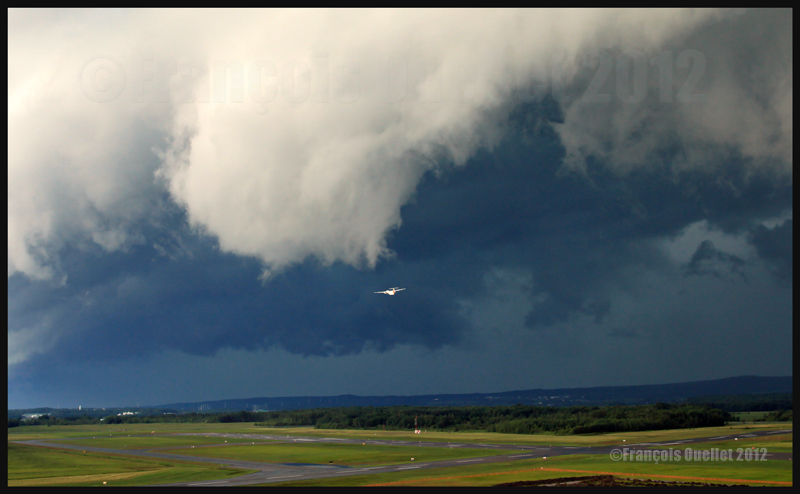
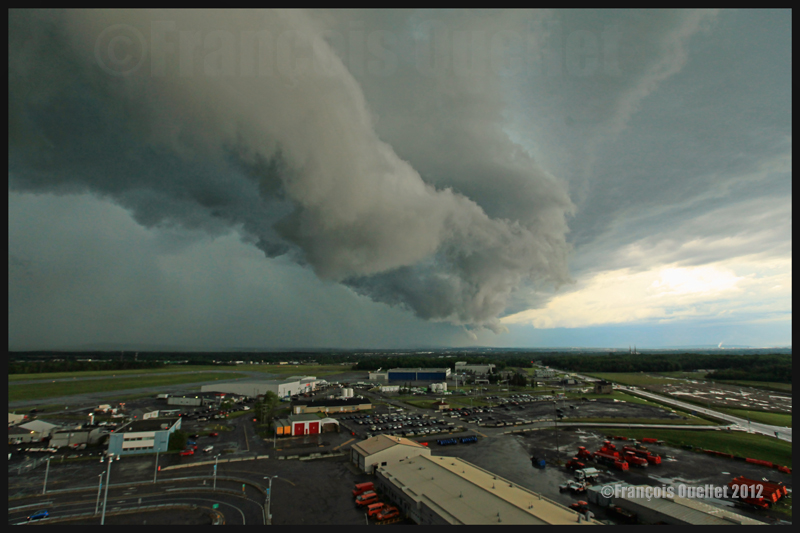
The approach of a cold front enhances the possibility of interesting photos. If it is a fast moving cold front of moist and unstable air, the photos will probably be more spectacular, as some thunderstorms will be associated with the system. A dew point of more than 15 C indicates the presence of a lot of water vapor which can be transformed into precipitation, thus releasing a lot of energy. When these conditions are combined with a really strong contrast between the new air mass which approaches and the one which goes away, the produced meteorological phenomena will certainly be intense.
In the photos below, the meteorological system approaching the Quebec Jean-Lesage international airport also had to cross a small mountain range.
A roll arcus cloud in development ahead of a thunderstorm approaching the Quebec Jean-Lesage airport in 2012.
A roll arcus cloud in development ahead of a thunderstorm approaching the Quebec Jean-Lesage airport in 2012.
View under a developing arcus cloud at the Quebec Jean-Lesage international airport (2012)
An arcus cloud ahead of a thunderstorm approaching the Quebec Jean-Lesage airport in 2012
A roll arcus cloud ahead of a thunderstorm heading for Quebec City in 2012
The morning fog
The morning fog offers many opportunities for interesting photos. You can choose an isolated tree and capture the combined effects of the morning sun and fog. Or you may choose a cluster of trees, for a completely different effect. Both photos below were taken in Domaine Cataraqui, Quebec City.
Trees in fog at Domaine Cataraqui, Quebec City 2009
Sun and fog provide for a special atmosphere at the Domaine Cataraqui, Quebec City 2009
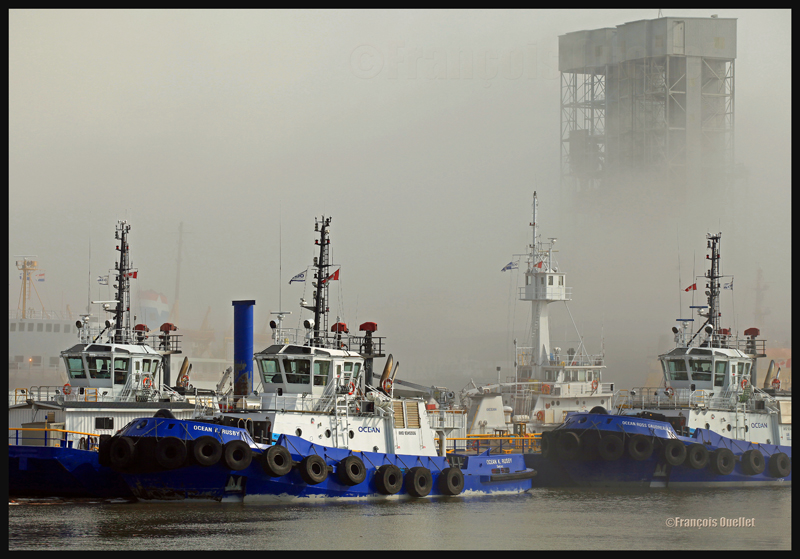
A morning fog resulting from a cold cloudless night will persist for hours if there is no wind. The cold morning air, motionless over a slightly hotter stretch of water, creates a fog that will finally disappear just before noon, when the atmosphere has been heated enough. If there had been an overcast sky during the night, chances are that the air over the water would have remained at a higher temperature, preventing the formation of fog.
The opportunities for more interesting photos arise when you witness the first holes in the fog layer.
The Ocean tugboats during a dense fog in the Bassin Louise in Quebec (2012).
We can take into account the season to estimate the speed of the diurnal reheating of the lower atmosphere. A morning fog will need more time to dissipate from late autumn to early spring: that leaves more time for the photographer to prepare. The forecasts can announce the disappearance of fog while it will not be the case if, over your sector, there is an invading layer of stratocumulus preventing the morning sun from reaching the ground.
To determine if the fog is going to dissipate as expected or will remain and possibly intensify, watch the difference between the temperature and the dew point on the hourly meteorological observations issued by weather stations near your place of residence. If the temperature and dew point spread increases, the fog is going to lift. If the difference between those two decreases, the fog is going to persist and possibly intensify.
The mist
The mist can be qualified as such when the visibility is superior to ½ mile, but do not exceed 6 miles for an observer on the ground. If the visibility is of ½ mile or less, it is called fog. This photo of the Bic National Park, near Rimouski, shows the interesting effect that the mist adds to a beautiful landscape.
Mist in the Bic National Park, Province of Quebec (2009)
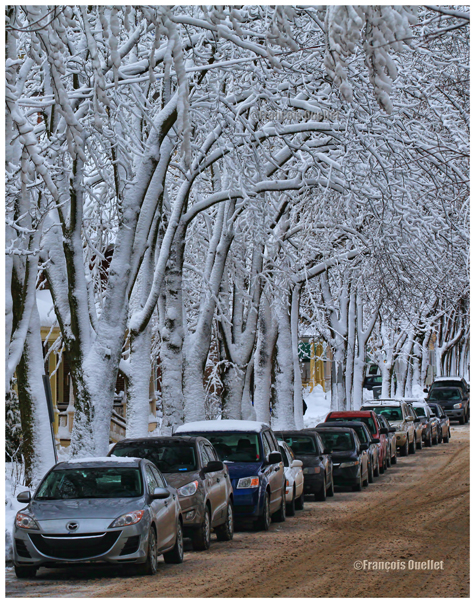
Hot and unstable air in winter
When there is a warm and unstable air advection (about 0 degrees) while winter has already settled, there are good opportunities for photos. A moderately developed cumulus produces significant snow showers and this snow sticks on all the surrounding objects. All that snow would have begun to melt on contact of objects if the latter had had a temperature superior to zero degree. But, the winter being already settled, the snow persists. It gives enough time to capture some souvenirs.
A Quebec City street after a snow shower
The local effects
A photographer might benefit from learning about the meteorological local effects influencing the regions he intends to visit. The local effects are often simple to understand and they repeat themselves regularly, according to wind and season changes. The knowledge of these effects allows the photographer to be ready and position himself even before the phenomenon occurs. It limits the comments like: “If I had known that it would occur, I would have settled down here one hour earlier!“
The local terrain as well as large size bodies of water produce predictable meteorological phenomenon that can be used by a well prepared photographer. It can consist of persistent fog, repetitive snowstorms over a small sector, strong winds, cumuliform clouds alongside the mountain summits, etc. By being positioned at the right place, at the right time, the desired photo can be realized.
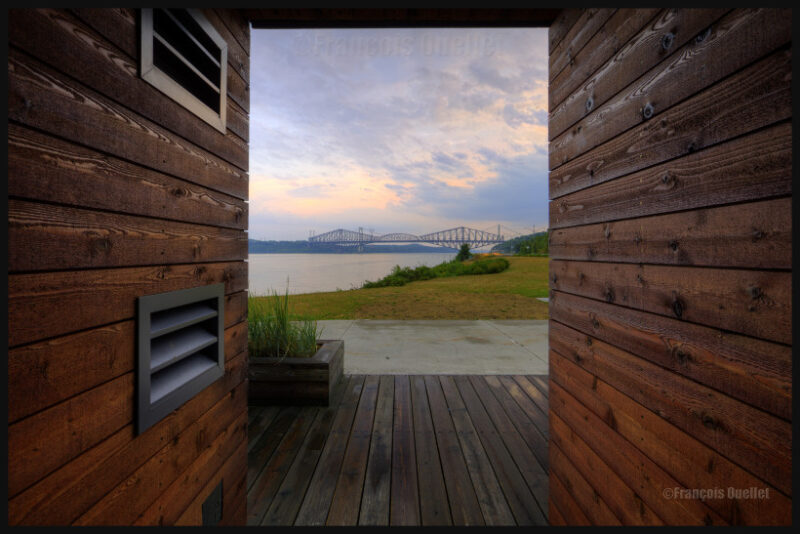
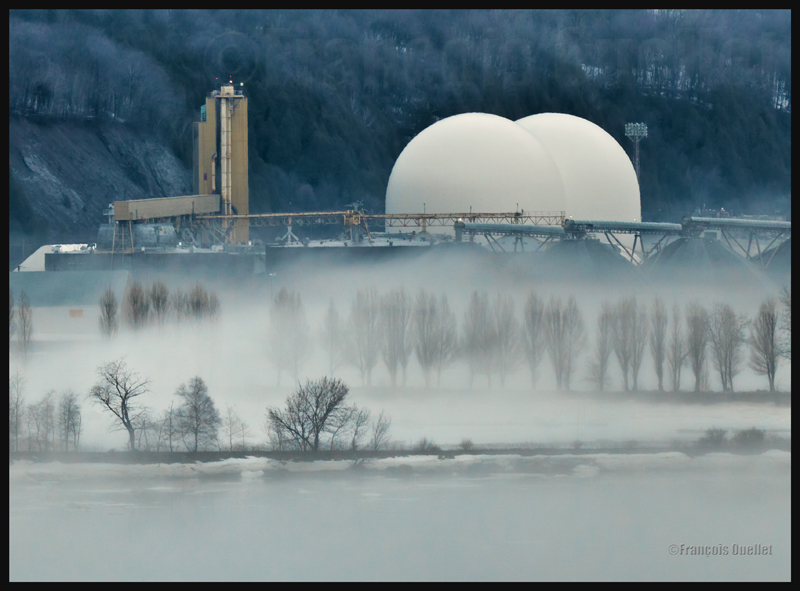
A change in the wind direction
A change in the wind direction suddenly increases the opportunities of interesting photos. It might announce the approach of a cold front, a warm front, a sea or land breeze, etc. In the photo below, a bit of fresher air suddenly began crossing the St-Lawrence seaway at the end of the day, thanks to the approach of a weak cold front. The water was still relatively warm and the moisture which was present over the surface became visible due to the cool air supply. The conditions were now ideal for a short-term thin fog, as long as the wind speed would not increase. Just in time for a photo.
The new wood pellets silos in Anse au Foulon in Quebec City en 2014
Familiarization with weather radars
It can be useful to get acquainted with weather radars which, for the needs of photography, remain simple to interpret. Multiple echoes of small dimension with a steep gradient of various colors indicate precipitation resulting from cumuliform clouds. The showers associated with these clouds are often moderated or strong and will be the result of approaching towering cumulus or cumulonimbus (thunderstorms). A towering cumulus presents a dark base and a white summit to the photographer. At sunset, their vertical development can be used to emphasize the last rays of light.
The side of a towering cumulus (TCU) is benefiting from the remaining sunlight over Quebec
Large echo areas of similar colors of low intensity indicate a relatively stable air generally producing steady light rain or drizzle. This should be understood as a possibility of increased humidity limiting the visibility through mist or fog.
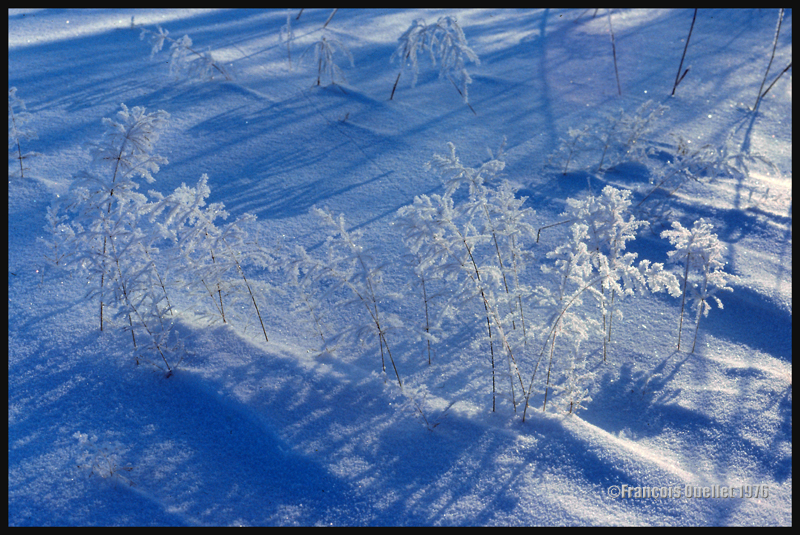
Hoar frost
Hoar frost is a short-term phenomenon. It is thus necessary to capture the scene before the sun melts everything. The photo below shows some small twigs on which hoar frost has settled. It was taken at the beginning of the seventies. Although the quality of the photo is not exceptional, the meteorological phenomenon is well demonstrated.
A combination of snow and hoar frost observed on a Quebec field in 1976.
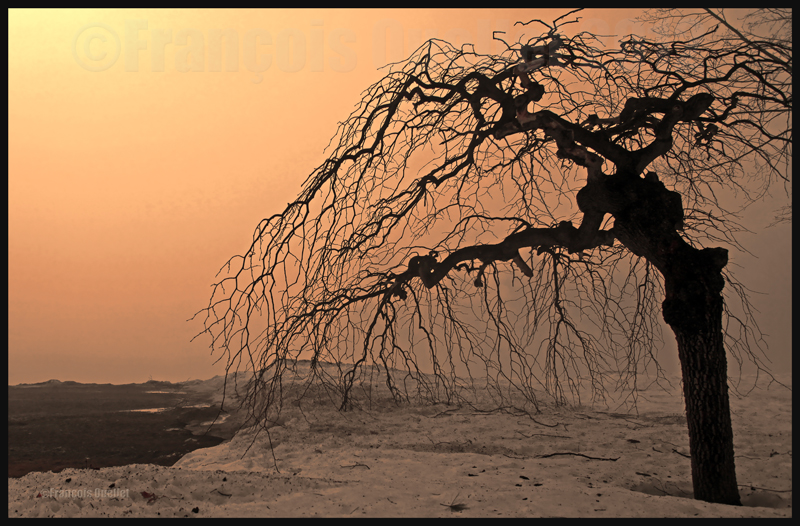
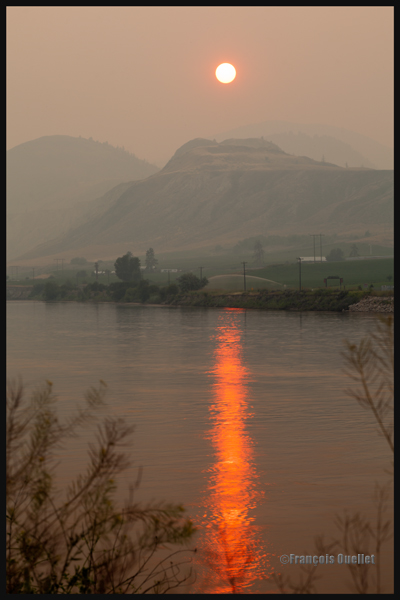
Forest fires
Wishing to make photos of western Canada during summer 2014, I came up against a season where hundreds of forest fires were raging. The smoke was covering some parts of Alberta and British Columbia. Some fires were important enough to require the closure of the sole highway connecting Lake Louise to Jasper. I thus decided to include the effects of those fires in the holiday souvenirs.
A visibility reduced in forest fire smoke allows a photographer to obtain, without special editing, sunsets with interesting colors.
Sunset and smoke from forest fires in Kamloops in 2014
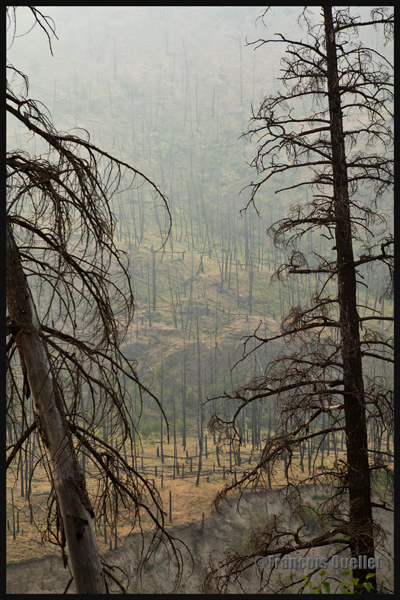
The smoke also produces an effect similar as fog, but a fog which would be impossible to obtain at the end of a summer afternoon while the sun shines and there is a 38 degrees Celsius temperature.
An area near Kamloops, Canada, that was touched by forest fires in 2014
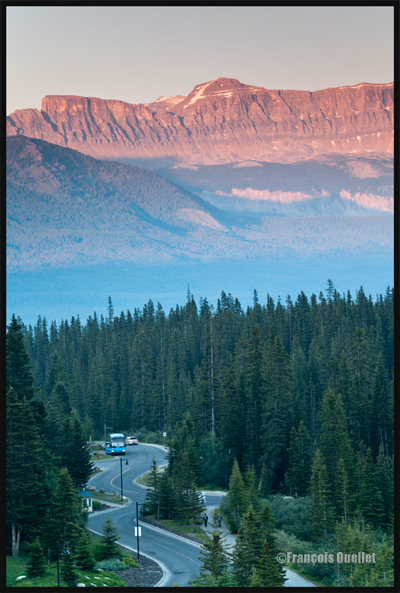
At dusk, the residual smoke is visible near tree tops while the setting sun strikes the mountain side. The effect is of two horizontal lines of complementary colors, blue and orange.
Forest fire smoke and sunset combined in Lake Louise, Alberta en 2014
The Quebec Harbor is an excellent site to find interesting ideas when it comes to photography. Fog, ice, tugboats and other ships constantly provide new opportunities. In March 2015, during a beautiful day, I was able to capture this scene with the Coriolis II in the Bassin Louise. The use of a Canon 14mm 2.8L fixed lens was necessary to avoid any alterations in the quality of the picture of this wide angle shot. The camera used was a Canon 5D MKII.
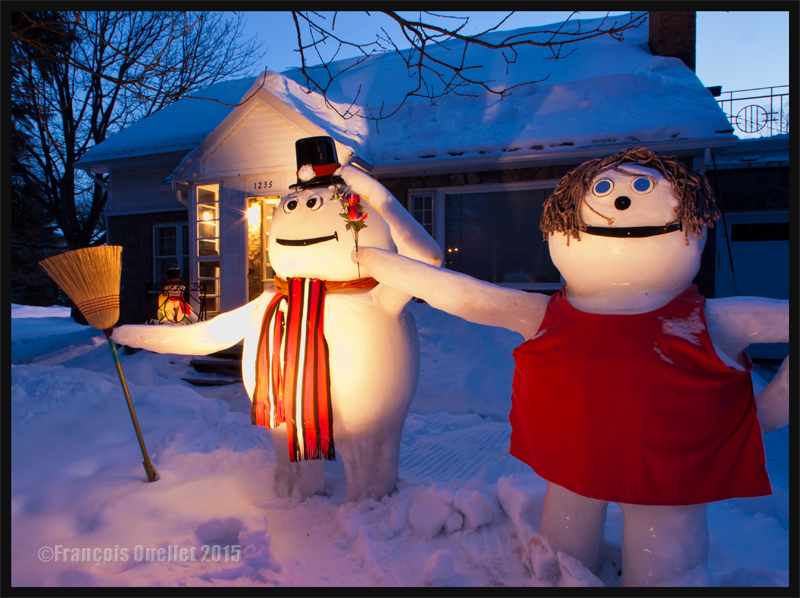
Snow, ice and wood creation made by a Sillery citizen in Quebec City in 2015.
A retired couple in Sillery, Quebec, decided to add life and color in front of their house. Initially, the intention was to make a big snowman. But the project was progressively modified and a couple was eventually created. It is made of snow, ice and a bit of wood to ensure that the most fragile parts will be able to sustain the whole winter. A projector has been installed and is turned on as soon as night approaches. It is again a proof that there is no limit to imagination, and that it is not age related.
If there is a photographer out there wandering what are the picture specs, here it is: Canon 5D MKII, F22, ISO320, Canon14mm 2.8L lens, tripod and cable.
For other photos on the province of Quebec and also Quebec City, click on the following links from my blog: