An excellent way of keeping warm…but not keeping your feet.
Street photography sometimes means having to take risks. But this time, it was not me who was at risk. During the Quebec Carnival 2018, I saw this young tourist who had found an original way of keeping her feet warm. With this method, it is never necessary to bother warming up your feet a second time!
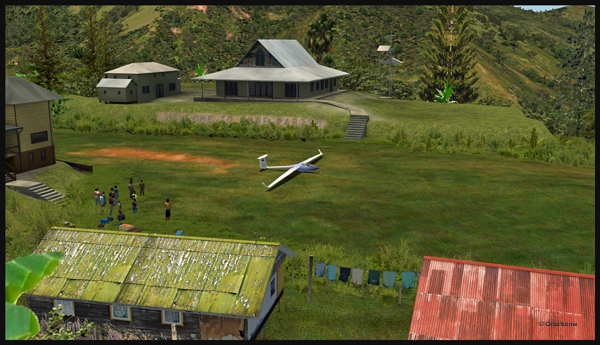
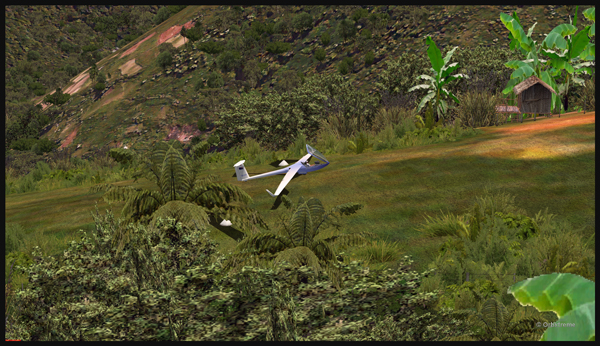
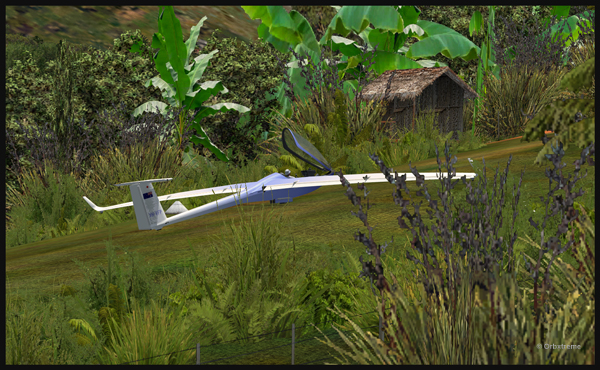
Well, that is it! The first glider just arrived at the Fane Parish airport in Papua New Guinea…
Glider on the Fane Parish short grass runway in Papua New Guinea.
Before it is officially offered as a tourist attraction for the region, some attempts at taking-off and landing must be done. The first trial attracts a few people!
Aircraft and glider on the Fane Parish mountain airfield.
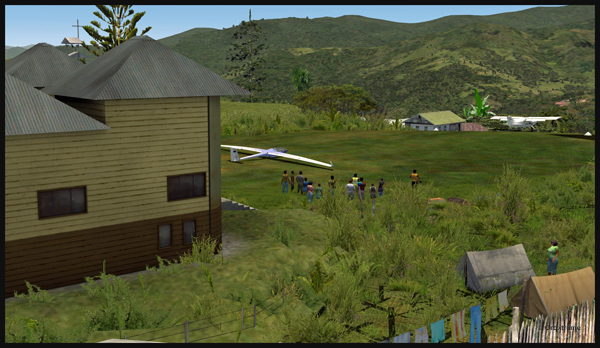
The descent along the twelve degree sloped runway is a bit rough for the glider’s low wings, as there are some bushes that will have to be trimmed!
An aircraft pulls a glider after the take-off from the Fane Parish sloped runway in Papua New Guinea.
The weather is nice and very warm. The only potential problem is the mountain ahead.
Glider being towed by an aircraft after the take-off from the Fane Parish mountain airfield.
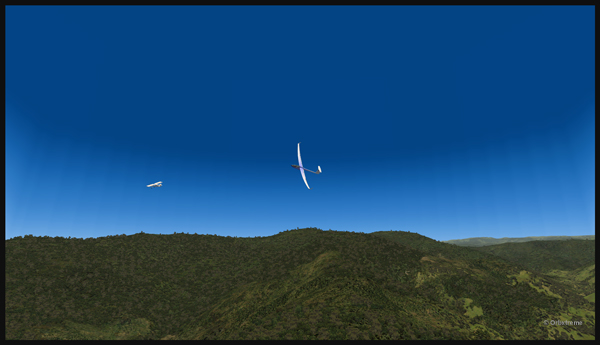
Finally, the pilot cuts the link. He is free to go!
The link is cut between the plane and the glider after the take-off from Fane Parish.
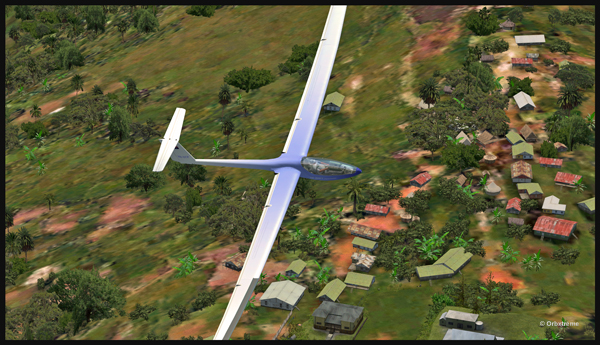
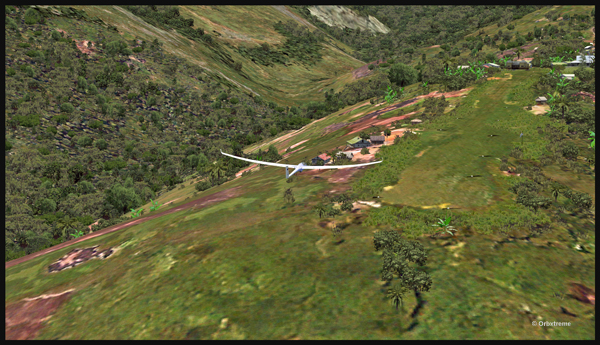
The glider flies silently over the lush area of Papua New Guinea.
Virtually gliding over the Papua New Guinea territory (FSX).
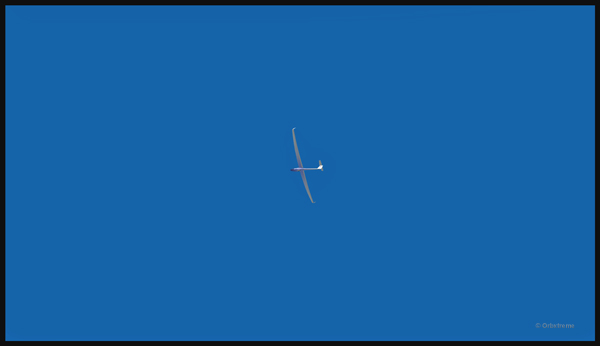
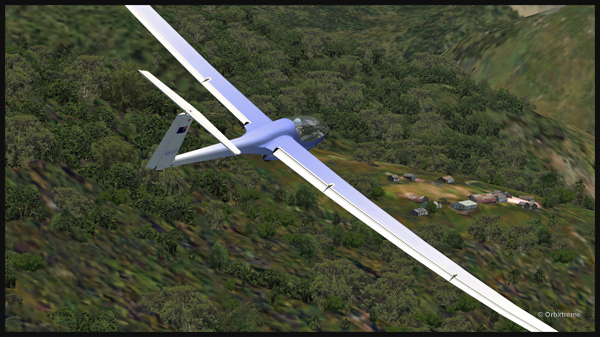
Using the rising warm air currents, the glider gains altitude.
The glider gains altitude.
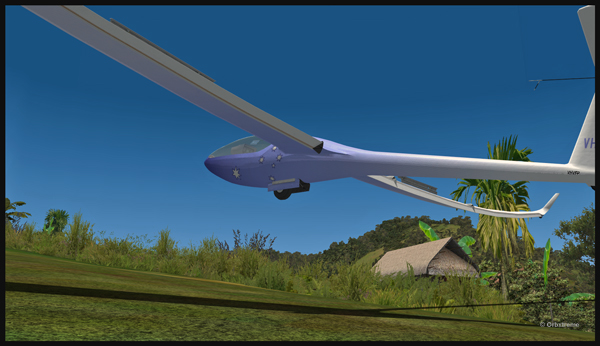
Why not a pass over Fane?
Gliding over the Fane Parish village.
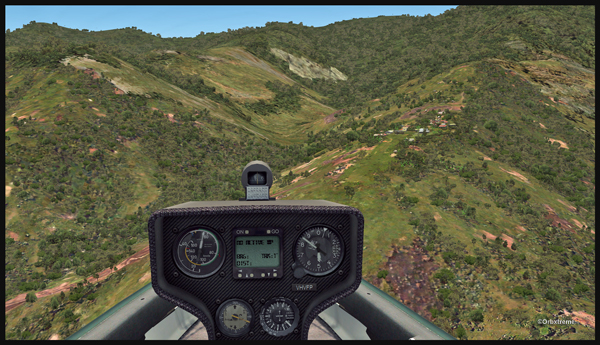
Here is another isolated village alongside a mountain.
Flight with a virtual glider over an isolated village of Papua New Guinea.
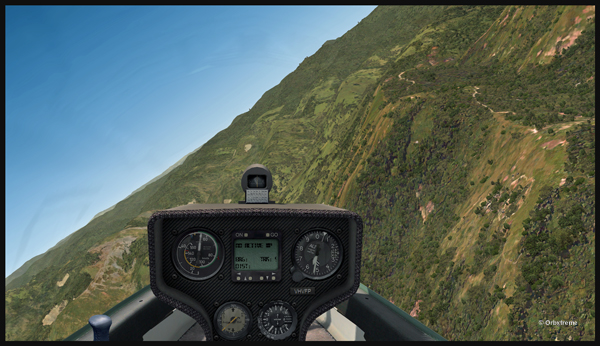
A last steep turn in order to realign for the approach at Fane Parish.
Last steep turn for a short landing on the Fane Parish mountain sloped runway.
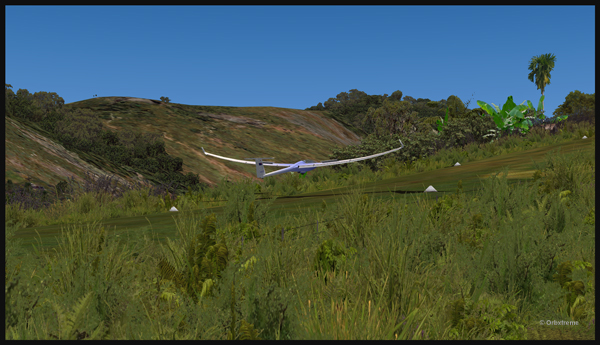
The airbrakes are out and the speed reasonable. The sloped runway is just ahead, on top of the mountain to the right.
Approach of a glider on the elevated airfield at Fane Parish in Papua New Guinea. The speed and angle of approach are right on target.
Keeping just enough altitude on the approach to be safe.
Glider approaching the 12 degree sloped runway of the Fane Parish aerodrome.
Now that the landing is a sure thing, it is time to use the airbrakes again to slow down as much as possible.
Virtual glider arriving over the Fane Parish runway in Papua New Guinea. The airbrakes are being used.
Keeping in mind that this mountain airfield as a good slope, it is better to have a bit of extra speed. Nobody likes to stall a few feet over a runway!
Virtual glider with airbrakes over the Fane Parish runway
What an experience it was! But I’ll need some help to pull the glider up the slope!
Glider on the Fane Parish runway
The virtual flight was great, the view was worth every penny, and I think that this could become a new touristic attraction for the region and the more wealthy visitors…
The glider has landed on the runway at the Fane Parish airport in Papua New Guinea.
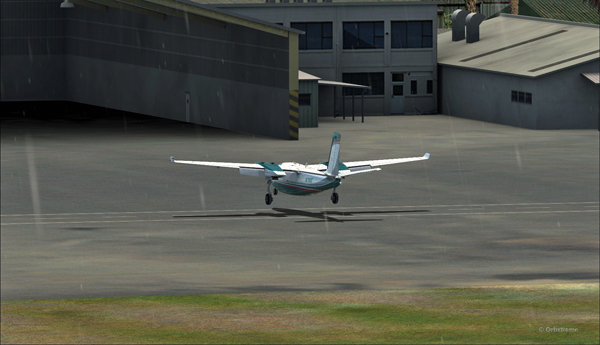
There is no aircraft in the sky around the Port Moresby Jacksons (AYPY) virtual airport today. No aircraft in the sky but one, a medevac flight.
Arrival of the Medevac towards the Port Moresby Jacksons (AYPY) airport. The winds forbid a normal landing.
The winds blow from 240 degree at 50G60 kts and the runways are oriented 14/32. It is way above the maximum crosswind authorized for any aircraft.
But the Shrike Commander’s crew cannot wait until the wind calms down. They must land in the next few minutes in order to save a patient’s life.
The Port Moresby Jacksons (AYPY) is in sight in the center top of the screen capture.
As there is no traffic around, the captain has told ATC he intends to do a safe, efficient but non-standard approach.
The aircraft is gradually positioned to arrive in a straight line for the AYPY hangar.
The aircraft aligns itself to face the wind blowing across the runways.
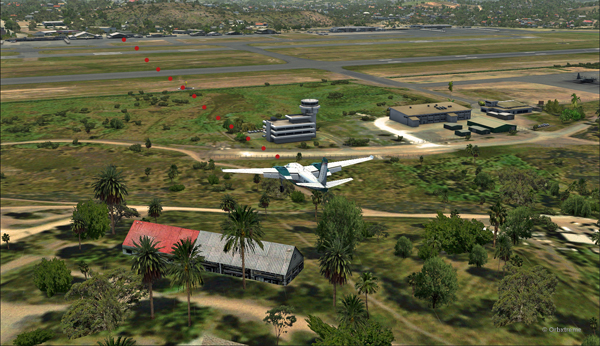
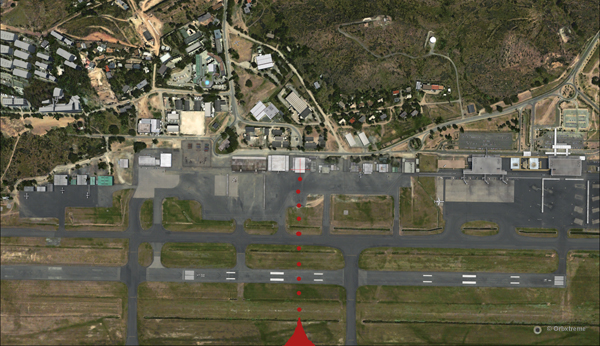
Arriving straight across the runways, facing the wind, the crew intends to land the aircraft a few feet short of a hangar. The captain requests that someone opens the hangar doors right away. The captain will terminate the approach in the hangar, protected from the wind.
Trajectory of the Shrike Commander 500S towards the hangar at the Port Moresby Jacksons airport. The hangar door has been open for the arrival.
It is safer to arrive facing the wind and immediately enter the hangar, straight ahead. No taxiing with a 60 knots crosswind.
Useless to say, ATC has already refused the request. But the pilot is the only one who decides of the best landing surface, for the safety of the passengers and himself. He proceeds with the approach after having clearly indicated which path will be followed.
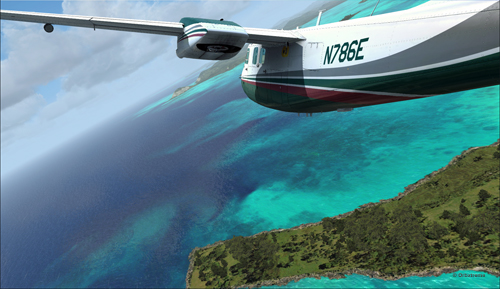
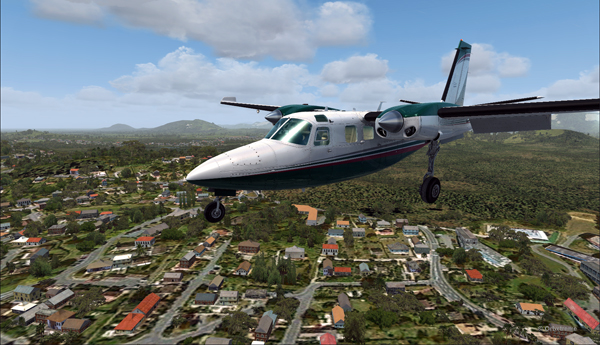
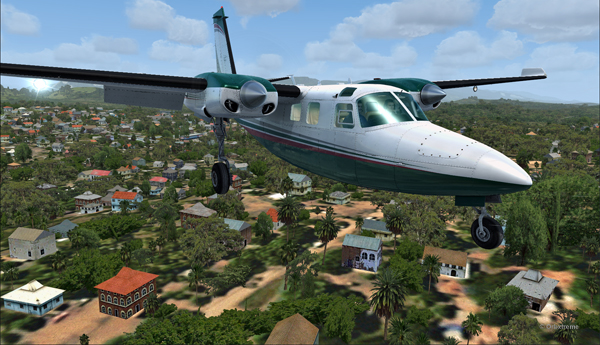
The Shrike Commander 500S over the houses near the Port Moresby Jacksons airport.
The main problem for the approach is the low level mechanical turbulence caused by the gusty 60 kts winds.
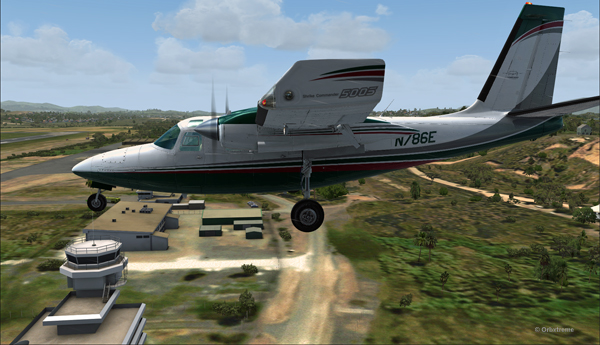
If ATC wants to file a complaint, now is a good time to take a picture of the aircraft and its registration to support the case.
Flying by the AYPY control tower.
The actual ground speed of the airplane is around 20 kts.
The Shrike Commander 500S approaching across the runways at the Port Moresby Jacksons airport. The winds blow from 240 degree at 50G60.
The steady high wind speed is actually safer for the crew than if the winds were 240 at 35G60.
Ground speed of about 20 knots for the Shrike Commander 500S on final for the Port Moresby Jacksons hangar (AYPY).
Still a bit above the runway and with a 10-20 knots ground speed. The airspeed indicator shows the strength of the wind itself plus the ground speed.
Indicated airspeed 70 knots.
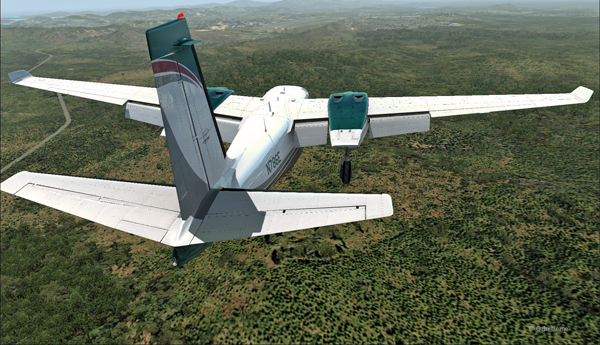
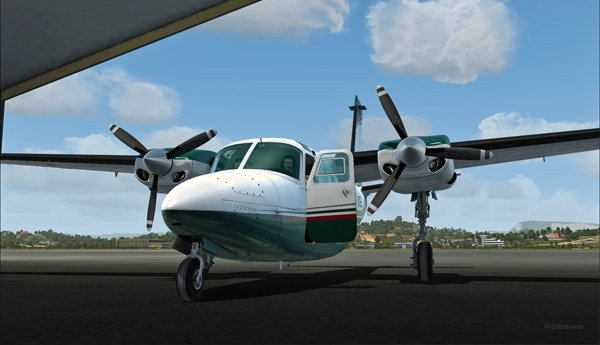
Frontal view of the Shrike Commander 500S about to land in front of the hangar at AYPY.
Floating like a hot air balloon or almost!
Side view of the Shrike Commander 500S on final for the Port Moresby Jacksons airport’s hangar.
The Shrike Commander will soon land in Port Moresby Jacksons.
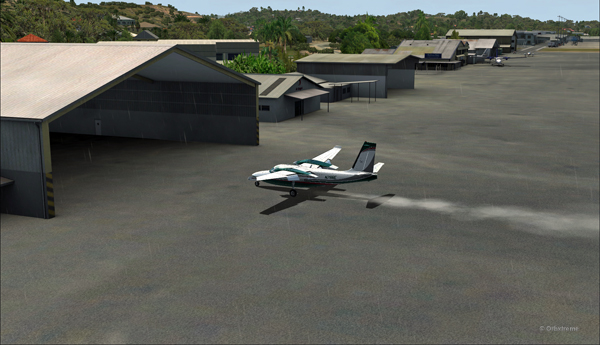
As the aircraft touches the ground, it stops almost immediately. It is necessary to apply power to reach the hangar, as you can see with the white trail on the ground behind the aircraft.
In real life, the touch-down would have had to be as soon as the asphalt start since the presence of the hangar lowers the wind speed a bit.
The Shrike Commander lands a few feet before the hangar. Additional power is mandatory to reach the hangar.
A few seconds after the touch-down, the aircraft is in the hangar, protected from the wind, and both doctor and patient can quickly head out to the hospital.
The Shrike Commander 500S in the hangar at Port Moresby (AYPY).
Once in the hangar, the winds were adjusted to zero, which is kind of logical, unless the opposite wall is missing!
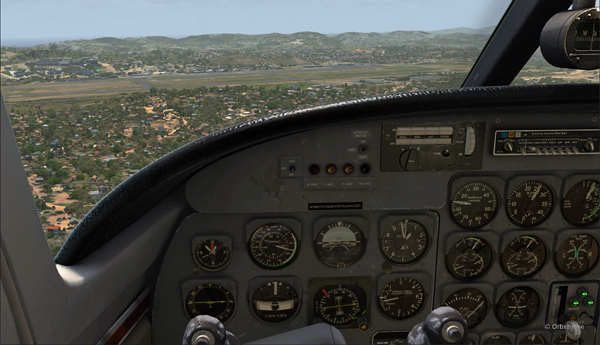
View of the Port Moresby Jacksons (AYPY)
It was now time to brace for another storm, which was the inquiry that would possibly follow the landing!
(P.S.: Tim Harris and Ken Hall were the creators of this virtual Port Moresby Jacksons international airport) and it is sold by ORBX. The aircraft is sold by Carenado).
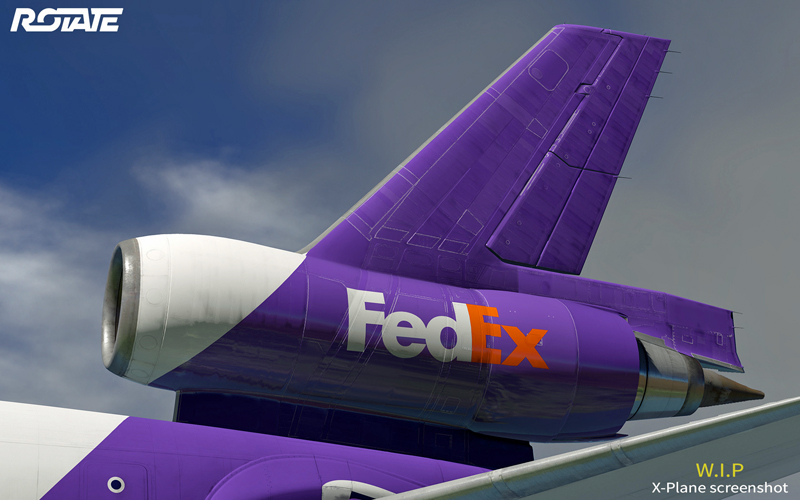
The virtual MD-11 being created by the Rotate company for the X-Plane flight simulation platform.
Good news for flight simulation enthousiasts! Those who had stopped looking for a virtual MD-11 will have an opportunity to fly this legendary aircraft.
The Rotate company, which makes virtual aircrafts for the X-Plane flight simulation platform, has decided to make a virtual MD-11. It is quite a challenge but the progress is steady.
A few years ago, another company, PMDG, created a virtual MD-11 but decided to drop the product and let down the customers who had bought their excellent aircraft. They stopped providing updates and eventually erased the MD-11 from their list of products.
Since then, many flight simmers have been wondering if they could one day learn to fly the MD-11. Numerous crashes of MD-11s have happened in real life since its creation by Mc Donnell Douglas. They were mostly due to pilots unable to master the aircraft, except in the case of Swissair 111.
The Rotate’s staff have recently published a new photo (see above) on their WEB page to show that the virtual aircraft is slowly taking shape. The graphic quality is really superb.
In an interview given to PC Pilot in the March/April edition, Rotate said that they want to achieve a high level of simulation with the MD-11, but that they still have a long way to go. They stated that the MD-11 is much bigger and much more complex than the MD-80 (that they are already offering) and that they want the MD-11 to reflect those characteristics.
Those who fly using FSX will now be able to add X-Plane as another flight simulator to their computer and thus use the MD-11 when it will be ready (probably around the end of 2019).
The beauty with X-plane is that the 64 bits platform uses all six cores of the new CPUs on the market. The FPS (frame per second) number is thus very high, which will allow users of the MD-11 to fly around huge virtual airports when the weather is complex without having to compromise.
Another positive aspect is that ORBX now offers products for X-Plane, which will greatly increase the choice of quality virtual sceneries.
Tom White designing Easter eggs in Old Quebec (2016)
While I was walking in Old Quebec, I stopped to watch Tom White, a local artist, work on his hand-made Easter eggs. We talked for a few minutes and he agreed to let me take a picture of him at work.
For other photos on the province of Quebec and also Quebec City, click on the following links from my blog:
The pictures below were taken in Vancouver and Victoria, in British Columbia. They were all taken with a Canon 5DSR full frame camera.
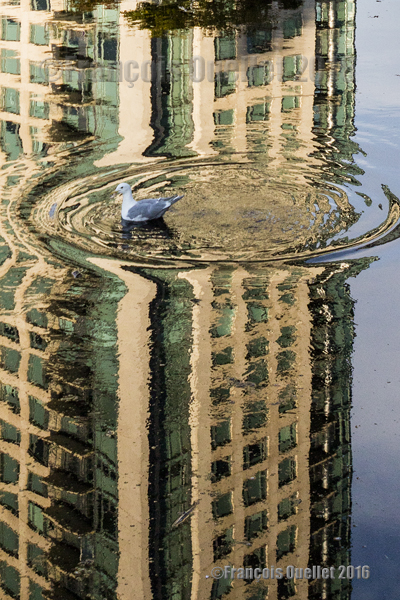
In the Vancouver harbour, several condo towers have been built in the last few years. Many condos in those towers can now be rented by travellers through Airbnb, thus entering in direct competition with the hotels located nearby. I was trying to use the water reflections in the harbor to show one of the towers when this seagull appeared in the viewfinder, adding a touch of life to the scenery.
Another way of showing the Vancouver Harbour architecture (2016)
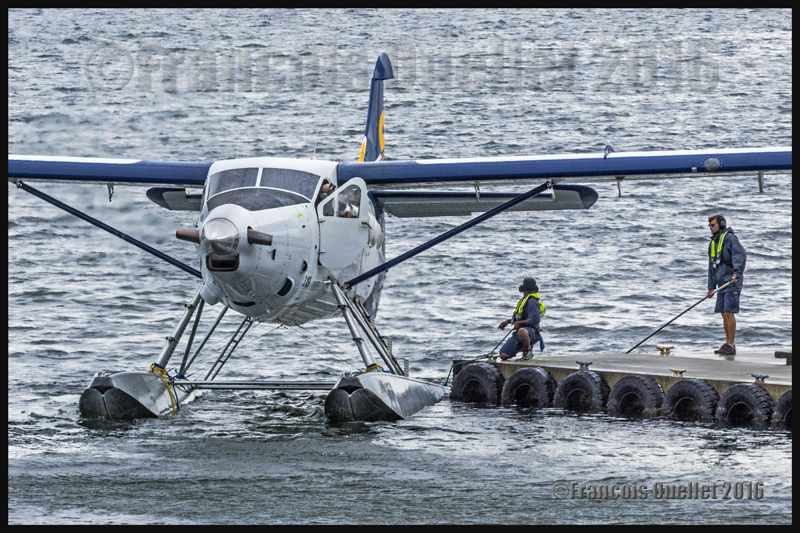
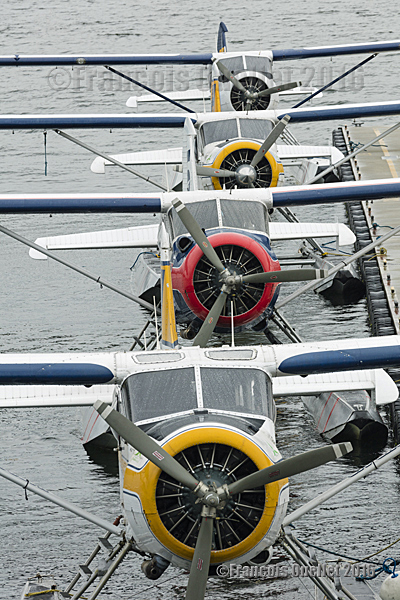
Floatplanes of all types constantly maneuver in the Vancouver harbour. The two photos below show a Saltspring Air Turbo Otter as it is being helped to park. You can also see a row of Harbour Air Beavers (DHC-2) parked after a day of uninterrupted flights.
Saltspring Air Turbo Otter C-FLAP in Vancouver Harbour 2016
Harbour Air DHC-2 Beaver floatplanes in Vancouver, British-Columbia (2016)
In the Willows Beach’s Park, in Victoria, I was able to photograph this Cooper’s Hawk using a Canon 70-200 f2.8L IS II USM telephoto lens. The full frame sensor 50 megapixels allowed for some serious cropping to bring the bird closer. The hawk clearly annoyed all the crows that considered themselves as the owners of the territory.
Cooper’s Hawk in a Victoria’s public park (2016)
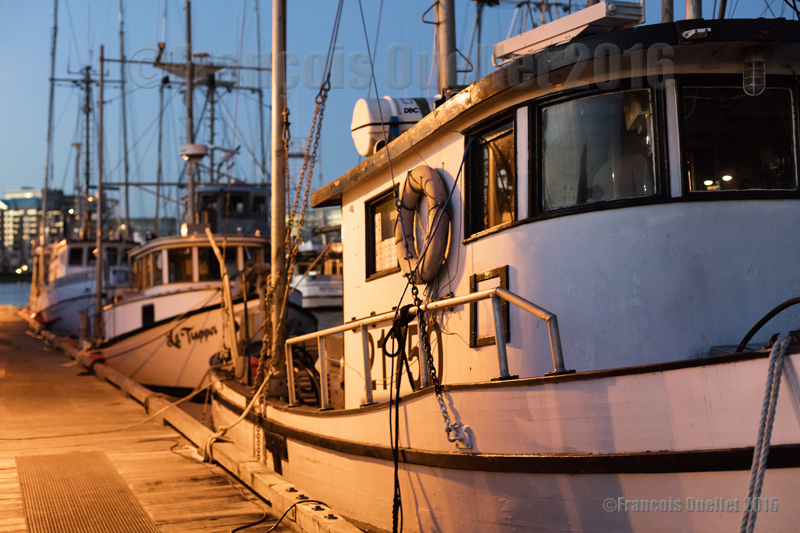
In the evening, the fishing boats come back to the Victoria Fisherman’s Wharf. Since I was standing on a moving platform, the use of a tripod would have been useless because of vibrations impossible to eliminate. The solution was to use a lens requiring little light, like the Canon EF 50mm 1.4 USM. By increasing the aperture and the ISO, the picture could be taken with a high enough shutter speed to avoid a blurred photo.
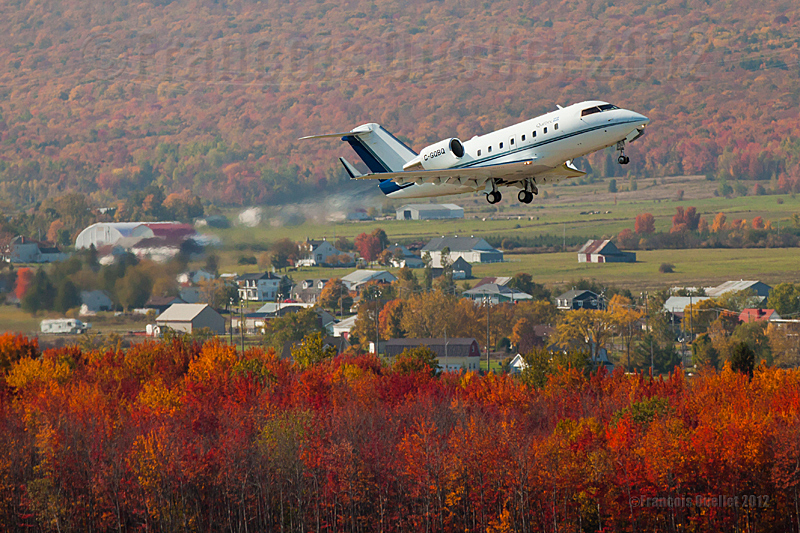
Government of Quebec Challenger CL-600 C-GQBQ airborne from the Québec Jean-Lesage international airport
I return in the past with this photo of the Governement of Quebec Challenger 600 C-GQBQ. It is seen here after the take-off from the Quebec Jean-Lesage international airport. The picture was taken during fall 2012 with a Canon 5D MKII full frame camera, from the stairway surrounding the Quebec control tower.
With regards to photographic composition, the rule of thirds can be detected in the two wooden zones in the background, one at the top and the other at the bottom of the photo. The aircraft’s position in the frame happens to also meet the same rule of thirds.
I used the spectacular colors of fall to add some interest to the scene.
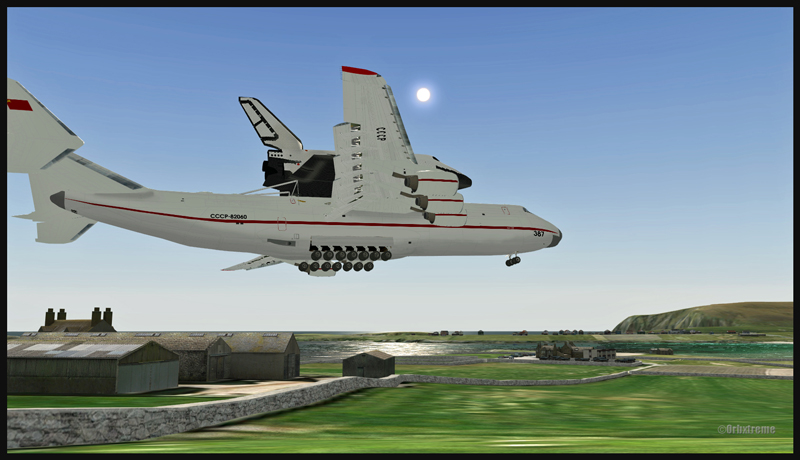
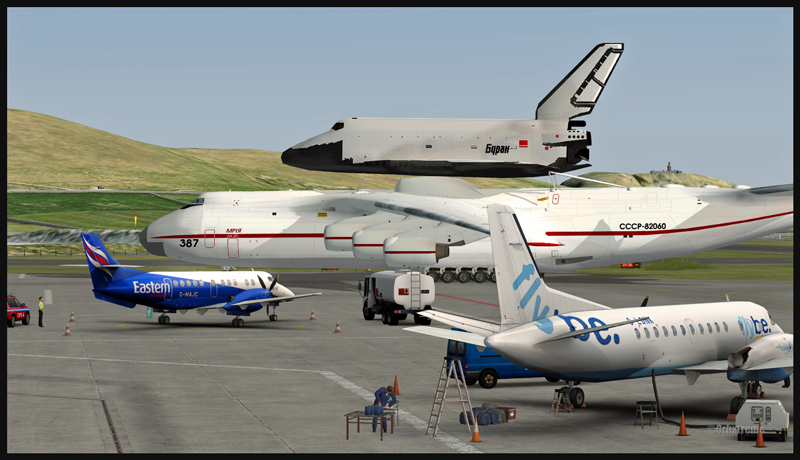
Antonov 225 with the Russian shuttle Bourane inbound for Sumburgh, Scotland (FSX)
Antonov 225 with the Bourane shuttle on final approach to Sumburgh, Scotland (FSX)
I know, Sumburgh is not an airport meant to receive the Antonov 225, even less with the Russian space shuttle Buran as cargo. In fact, this aircraft and Sumburgh exclude each other mutually. But if you want to try an almost impossible virtual flight , now is the opportunity.
Antonov 225 with the Bourane shuttle on short final approach to Sumburgh, Scotland (FSX)
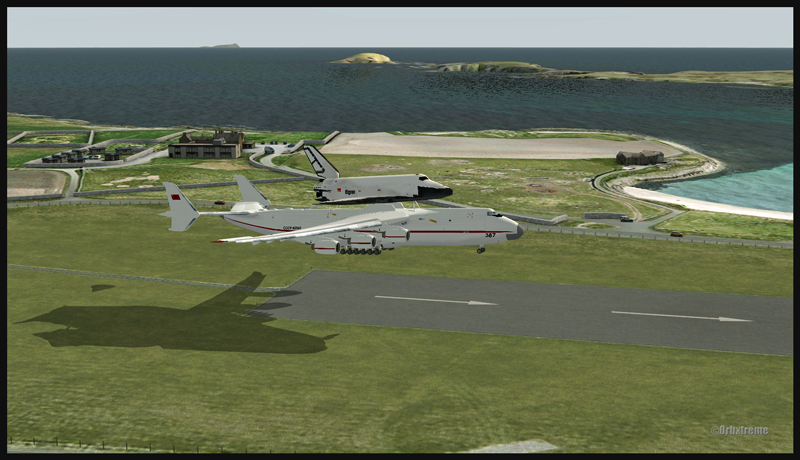
You must forget about the weight of the aircraft on the runway, the limited space to taxy and park, and the required distance for an eventual take-off. It is probable that once in Sumburgh, this aircraft will stay there forever.
Antonov 225 with the Russian shuttle Bourane over the runway in Sumburgh, Scotland (FSX)
It is interesting, though, to remember the exceptional performances of the Antonov 225. While flying over the Bourget for a demonstration, it was able to maintain a 45 degree turn with the 62 tons Russian shuttle mounted on top.
Speed 126 kts on the Sumburgh runway, Scotland, with the Antonov 225 and the Russian shuttle Bourane (FSX)
Antonov 225 taxiing in Sumburgh, Scotland (FSX)
The approach can be made at a surprisingly slow speed for an aircraft of that weight and the breaking performance is known to be excellent. In Sumburgh, you have the choice between two runways (4700 to 4900 feet). Forget about a safe final approach, you must fly it like a daredevil. It is possible to download the Antonov 225 and the shuttle for free. As for the Sumburgh airport, it is a creation of ORBX and is available for a very reasonable fee.
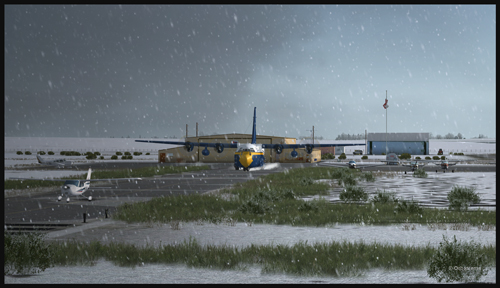
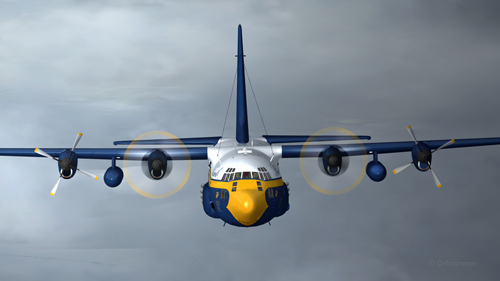
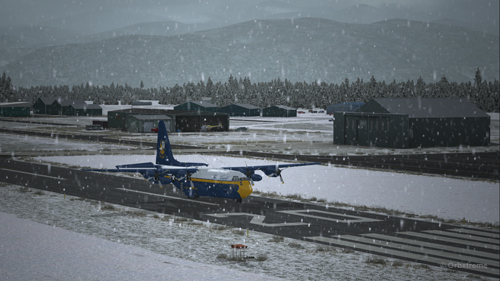
A virtual C-130 belonging to the Blue Angels is taxiing at the High River airport, in Alberta.
Wanting to add an almost impossible flight in the “unhinged virtual flights” section of my web site, I tried a flight with the Blue Angels C-130 Hercules (Captain Sim) where the aircraft gradually lost all of its engines.
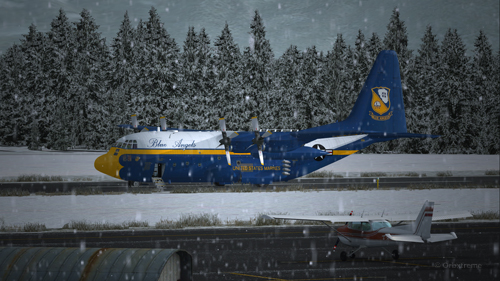
The Blue Angels C-130 Hercules waiting in line behind a single engine aircraft at the High River airport.
I am aware that the Blue Angels mechanics are real professionals, so I assumed that the engine failures were caused by an unknown reason.
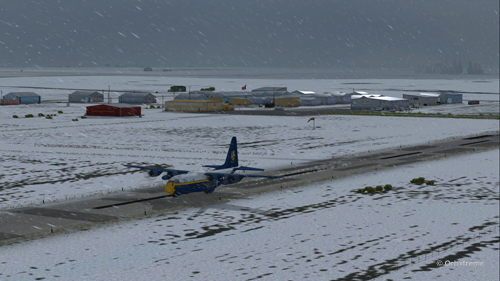
A virtual Blue Angels Lockheed C-130 Hercules takes-off from the High River (CEN4) Canadian airport in Alberta.
The take-off was made without problem from the Canadian High River (CEN4) airport. This free airport was designed by Vlad Maly and is available through ORBX. The aircraft leaves the 4150 feet runway heading to the Coeur d’Alène airport (KCOE) in United States.
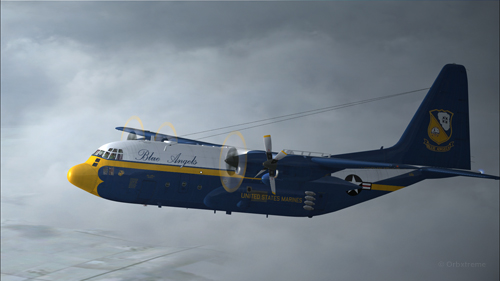
Eventually, the first engine stops. This does not cause a problem. The propeller is feathered and the gradual climbing continues.
The C-130 Hercules loses its first engine.
The second engine stops. The pilot must forget the initial destination. Bonners Ferry (65S) becomes the alternate airport since the 4000×75 feet runway is good enough for the C-130.
The second engine has just stopped on this C-130 Hercules.
Double engine failure for this virtual Blue Angles C-130 Hercules.
The third engines gives way. A slow descent starts. Bonners Ferry is not very far. The airport is at an altitude of 2337 ft asl.
The aircraft is volontarily flown at a higher altitude than what would normally be requested for a normal approach, just in case the fourth engine stops. When three engines stop after the same refueling, the pilot has the right to think that what feeds the fourth engine can also cause problems.
Three engine failures on this virtual Blue Angels C-130 Hercules.
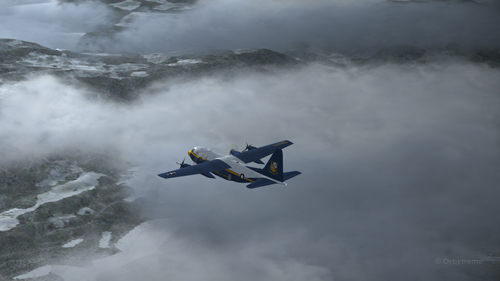
The highest mountains are now behind the aircraft.
Virtual C-130 Hercules aircraft with three engine failures enroute to the Bonners Ferry airport.
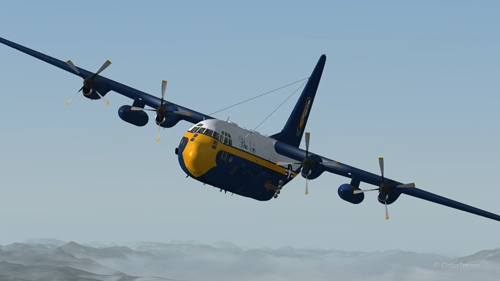
The Bonners Ferry (65S) runway is in sight.
Virtual C-130 Hercules aircraft with three engine failures, by the Bonners Ferry’s runway.
The fourth engine stops. The flaps will not be functional for the landing.
From now on, the pilot should save the virtual flight a few times since it is possible that several trials will be necessary to glide sucessfully to the airport. This is the fun of virtual flight.
The four engines have now failed on that virtual C-130 aircraft.
The C-130 Hercules has become a big glider. When the speed is maintained, the aircraft loses more 1000 feet per minute. It is easier to feel the aircraft’s inertia.
The wheels will be brought out only when necessary since the gear adds a lot of drag.
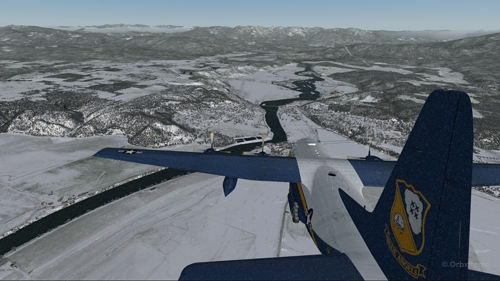
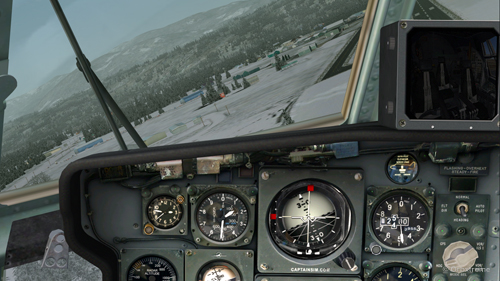
From the position indicated in the picture below, it is impossible to arrive to the airport in a straight line: the aircraft will glide over the airport. In the picture, the aircraft seems to be on a good path for landing, but it is an illusion caused by the wide-angle format chosen for the screen capture.
The aircraft is definitely too high. It is impossible to use the flaps to increase the rate of descent.
Lockheed C-130 Hercules virtual aircraft with four engine failures on the approach to the Bonners Ferry’s virtual airport (65S).
One must choose between 1) sideslips 2) a 360 degree turn to lose altitude or 3) multiple steep turns perpendicular to the runway to increase to distance to the airport.
What would you choose?
There is no universal method. The 360 degree turn is riskier but can prove efficient. An Airbus A330-200 flown by Quebecer Robert Piché that had lost all of its engines landed successfully in the Açores in 2001 after attempting a last minute 360 degree turn to lose altitude. But here, I did not believe there was enough altitude to safely complete the turn and reach the runway.
A few steep turns were made to extend to ride to the airport. Why steep turns? In order to avoid getting closer to the airport before an acceptable altitude was reached. This method helped keep an eye on the runway at all times to verify if the slope to the airport was still acceptable.
Fourty degree turn to the right on the approach to the Bonners Ferry’s airport.
Steep turn to the left to extend the distance to the Bonners Ferry airport.
I tried the three methods, always starting from the same saved flight (photo 10). After several sideslips, the aircraft was always approaching the airport too quickly. There was not enough time to lose altitude. The final speed always happened to be too high to stop a C-130 without flaps or thrust reversers.
The 360 degree turn, be it right or left, with different angles and a reasonable speed, always incurred a loss of altitude that brought the aircraft 200 to 300 feet short of the threshold.
Finally, after a few steep turns, the aircraft was positioned on final with the appropriate speed and altitude.
View of the Lockheed C-130 Hercules with four engine failures, on the approach for Bonners Ferry (65S).
A few last seconds adjustments, to reposition the aircraft in the center of the runway.
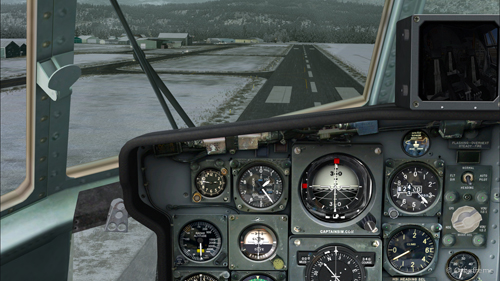
Speed 150 knots. End of the turn for the Bonners Ferry’s airport.
At 140 kts, but without any reverse thrust, the whole runway should be necessary to stop the aircraft.
Speed 140 knots, aligned with the Bonners Ferry’s runway.
The landing was smooth and the aircraft stopped short of the threshold.
For an unknown reason, the anemometer was still indicating a 10 kts airspeed, even when the aircraft had stopped.
C-130 cargo aircraft on the Bonners Ferry’s runway.
Lockheed C-130 Hercules virtual aircraft after landing at the Bonners Ferry (65S) airport.
C-130 Hercules aircraft in Bonners Ferry.
Try such a flight in the virtual mode. The worst that can happen is that you have fun!
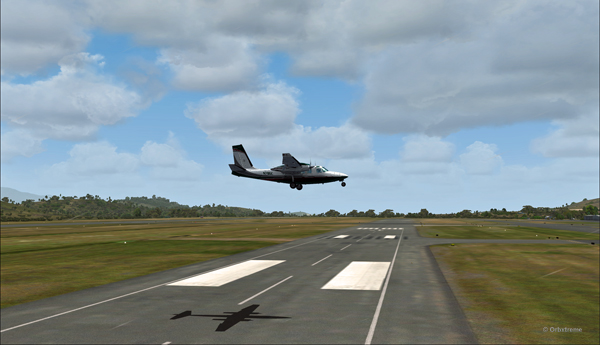
The virtual flight below was made with the FSX flight simulation platform. The last time I flew at Limberlost Ranch, I used a Cessna C-207 ( The Cessna C-207 in Limberlost Ranch ).
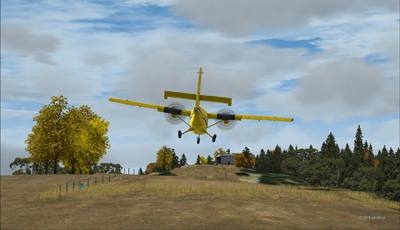
This time, I tried the sloped and laterally uneven runway with a Twin Otter. This one is painted with the real colours of the Province of Ontario Ministry of natural resources (C-FOPG). The only problem I expected was regarding the larger wings of the Twin Otter once close to the hangar.
On final for the Limberlost Ranch runway
Twin Otter C-FOPG approaching the Limberlost Ranch short runway
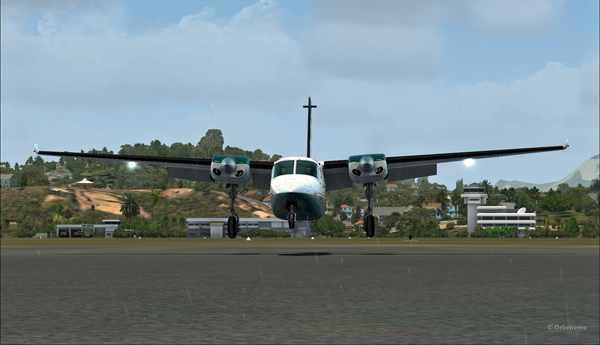
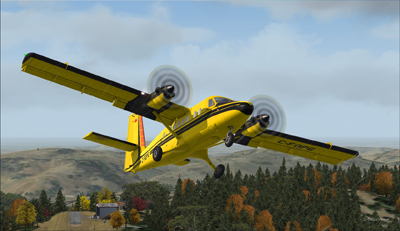
Finally, everything went well. The only difficulty was to manoeuver near the hangar to reposition the aircraft for take-off. With several ajustments to the propeller’s pitch, I was eventually able to turn around.
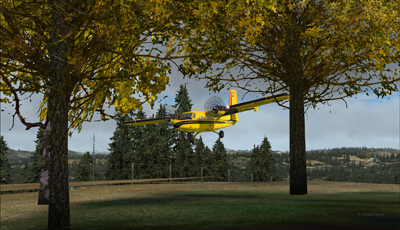
Arrival at Limberlost Ranch of the Twin Otter C-FOPG
Virtual aircraft belonging to the Ontario provincial government turning around on the Limberlost Ranch runway.
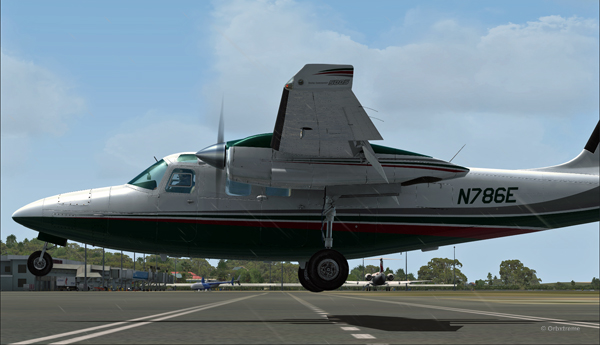
Since the fence is low enough, it is not a problem for the aircraft’s wings.
Virtual aircraft C-FOPG rolling on the Limberlost Ranch (CA21) runway.
Near the grass runway’s threshold are a few tall trees that require, for safety measures, a slight banking. Just in case…
Limberlost Ranch is a fun challenge. It is part of a package called Blue-Canyon Nyack and sold by Orbx. If this is not challenging enough for the flight simulation buff, it is always possible to add strong direct crosswinds and that should do it!