Here are a few recent photos taken during the month of May 2016 using a Canon 5DSR camera equipped with a Canon 70-200 f2.8L IS II USM telephoto lens. I was on île d’Orléans for the photo session, near the Horatio Walker promenade in Sainte-Pétronille.
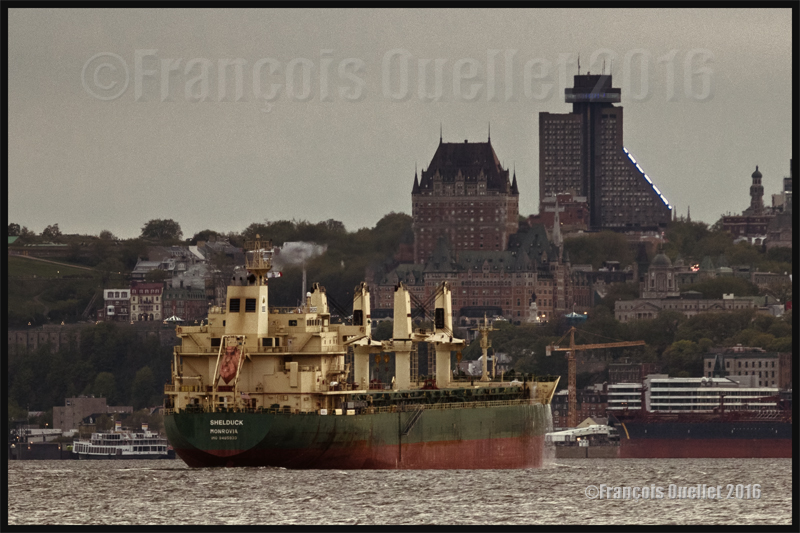
The vessel Shelduck (Monrovia) in front of Quebec City in 2016. The photo was taken with a Canon 5DSR
The picture above shows the vessel Shelduck flying the Liberian flag. It just crossed the narrow channel between île d’Orléans and Levis. This ship, built in 2012, is a bulk carrier. In the background it is possible to see Quebec City, with the Château Frontenac and the Hotel Le Concorde Quebec.
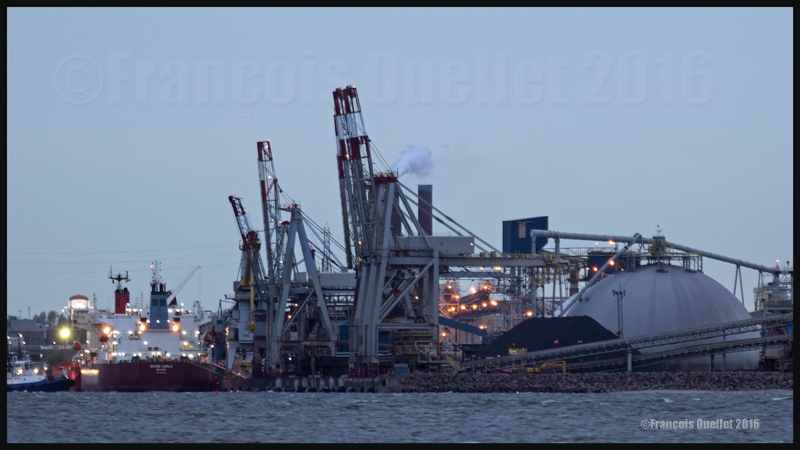
The photo below shows the Silver Carla (Majuro), a tanker used to carry oil and chemical products. It is moored at the Quebec harbour installations. The ship was built in 2014 and sails using the Marshall Islands flag of convenience.
The vessel Silver Carla (Majuro) and some of the Quebec harbour installations in May 2016
In the picture below, the tanker Cap Jean, property of Euronav, is approaching île d’Orléans. This tanker was initially supposed to be named St. Jean but the name’s religious connotation could have caused problems in some parts of world. The name Cap Jean was thus chosen.
The vessel Cap Jean, property of Euronav, in front of Quebec City in 2016
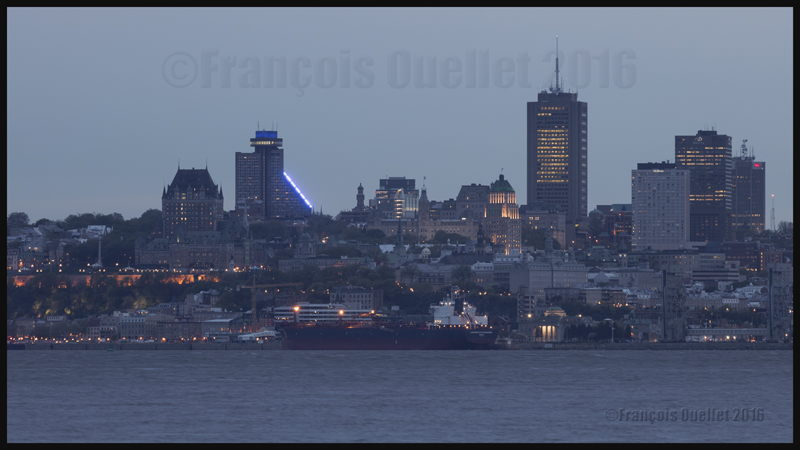
The photo below, also taken from île d’Orléans, offers an interesting view of Quebec City just before nightime. The Hotel Le Concorde Quebec’s new lighting system is visible in the distance. In the foreground, you can see the ship Laurentia Desgagnés.
The vessel Laurentia Desgagnés moored in front of Quebec City during a May 2016 evening.
Below, the ship Nilufer Sultan is heading towards Quebec harbour. Built in 2008, this oil tanker also uses the Marshall Islands flag of convenience.
The vessel Nilufer Sultan in front of Quebec City in 2016. Also visible are the Château Frontenac and the Hôtel Le Concorde Quebec.
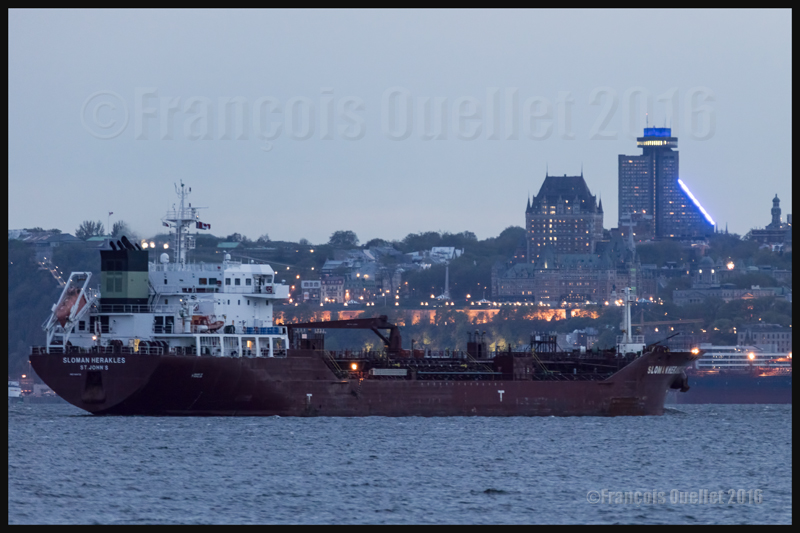
The photo below shows the tanker Sloman Herakles, normally based in St. John’s, Canada. It sails under the Antigua and Barbuda flag and is heading to Sarnia, Ontario.
The vessel Sloman Herakles (St. John’s) in front of Quebec City in 2016
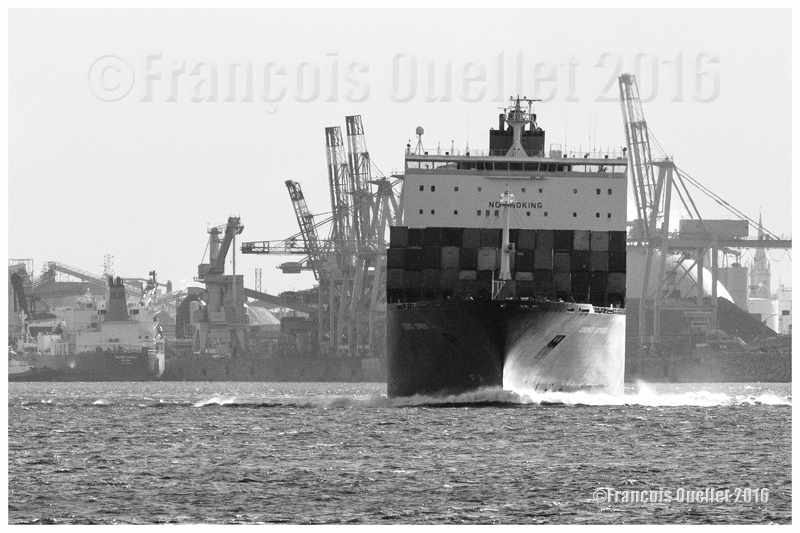
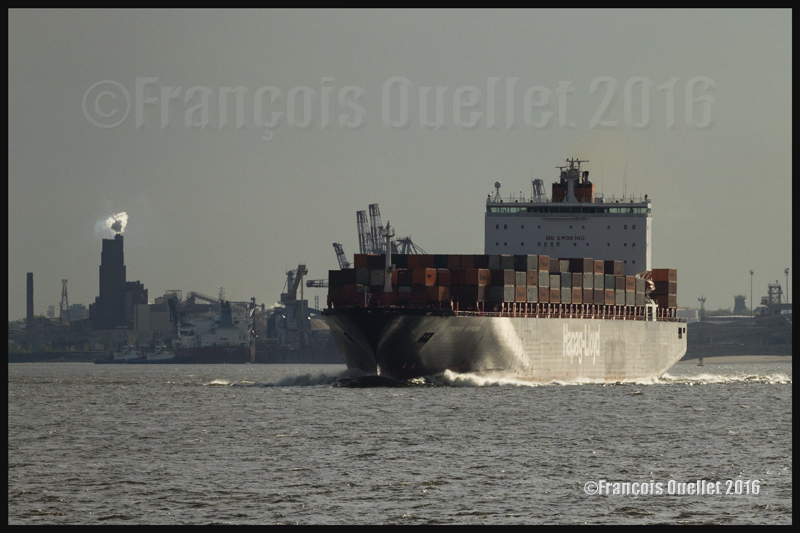
The two photos below show the container ship Toronto Express, property of the Hapag Lloyd Company. I chose to transform the first picture in black and white since the ship did not contrast enough with the background in the colored picture. It is actually slightly inclined since it is turning towards the right while approaching île d’Orléans. On the next picture, we can see in the background the smoking chimney of the Papiers White Birch Company, formerly called Daïshowa and later Stadacona.
Black and white photo of Hapag Lloyd’s Toronto Express in front of the Quebec harbour installations in May 2016
The Vessel Hapag Lloyd Toronto Express near the Quebec City Harbour in 2016. Photo taken with a Canon 5DSR full-frame camera
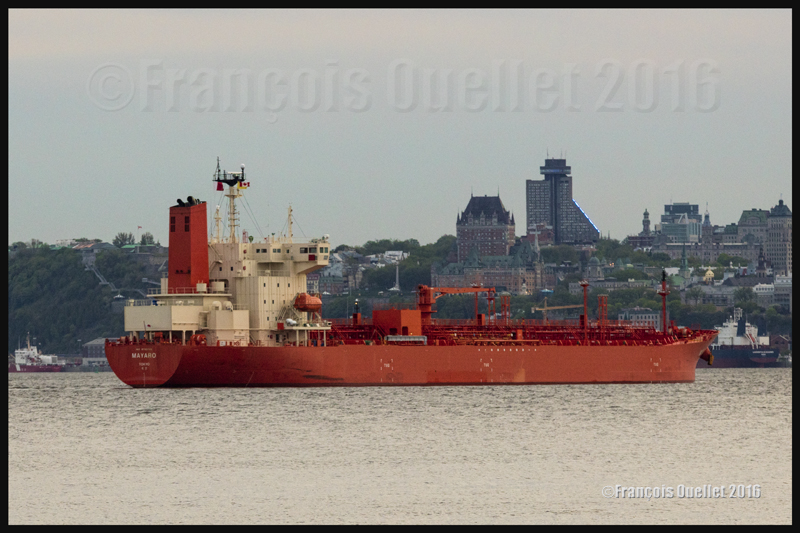
Below is the chemical tanker Mayaro (Japan) arriving near Quebec City in May 2016.
The vessel Mayaro (Tokyo) and Quebec Château Frontenac in the background. The picture was taken in 2016 with a Canon 5DSR
Taking pictures in the evening
Trying to take pictures of moving ships in the evening, using the smallest possible ISO, forces a photographer to use a tripod, a remote trigger and the camera’s mirror lock-up function to reduce vibrations. Ideally, it is best to find a spot where the tripod will be protected from the wind while ensuring that the camera’s strap is not moving at all. There is no need to use a polarizing filter at this time of the day: that would only be detrimental to the photo.
The Canon 5DSR DSLR full frame camera allows the photographer to take a picture in two steps, reducing even more the possibility of secondary vibrations. First, the mirror is lifted up. Then, two seconds later, the photo is finally taken. For a sharper image, it is best to use the Liveview function with a 16X enlargement and do a manual focus adjustment.
Risks associated with photography!
On île d’Orléans, many visitors use the surroundings banks to let their dog roam freely. This can cause a problem as the animal sometimes perceives the photographer and his photographic equipment as a potential threat to a master that it must protect… You will have been advised!
For other ship photos posted on my website, click on the following link:
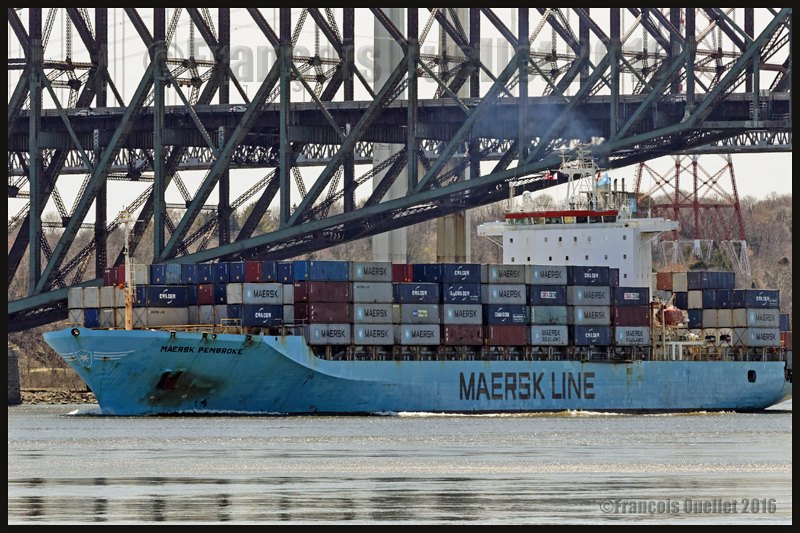
The container ship Maersk Pembroke under the Quebec Bridge, May 2016
Choosing what is important in a camera
Since there is actually no camera that has everything, whatever the brand, the buyer of a new camera must make choices: the type of sensor, the number of megapixels, the weight and size of the camera, the automatic focus’s speed and ability to follow a subject, the number of images per second, the performance under low light, the possibility to greatly enlarge a picture while maintaining its quality, advanced video functions, electronic communications with other devices, an extensive choice of lenses, etc. The list can be quite long…
The Canon 5DS(R): a specialized camera
A photographer happy with the Canon 5DS or 5DSR is one who needs a specialized camera offering both sharp images and the possibility of greatly enlarging the pictures it takes while maintaining the initial quality. This camera allows for more creativity as the possibility of extreme cropping beats, for now, everything that is on the market in the DSLR format.
Testing the potential of the Canon 5DSR when it comes to enlarging a picture
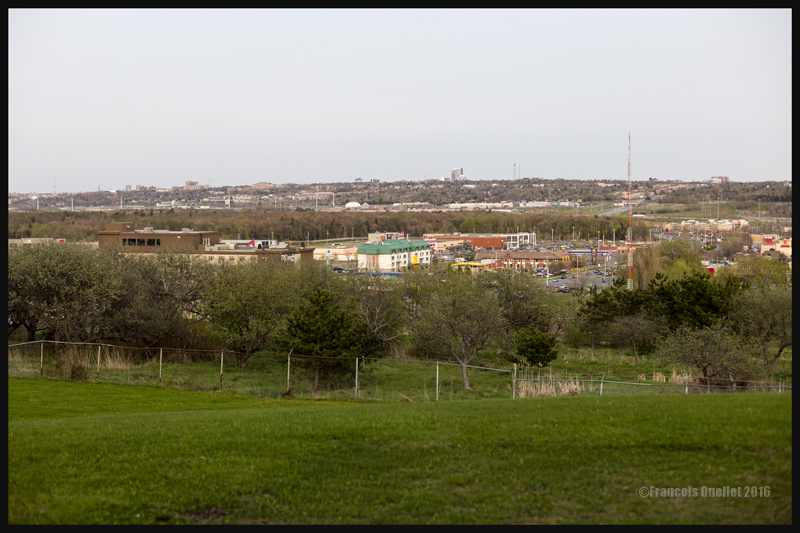
Here is an example of what this means: the photo below shows the yellow M of the McDonald’s restaurant photographed with a 50mm lens. Not easily visible…
Mc Donald’s restaurant’s yellow M captured with a 50 mm lens. Hard to see, of course!
Then the next photo was taken with a Canon EF 70-200mm f/2.8L IS II USM telephoto lens set at a 200mm focal length.
Testing the Canon 5DSR: the Mc Donald’s restaurant’s yellow M enlarged through a Canon EF 70-200mm f/2.8L IS II USM telephoto lens. Focal length used: 200mm.
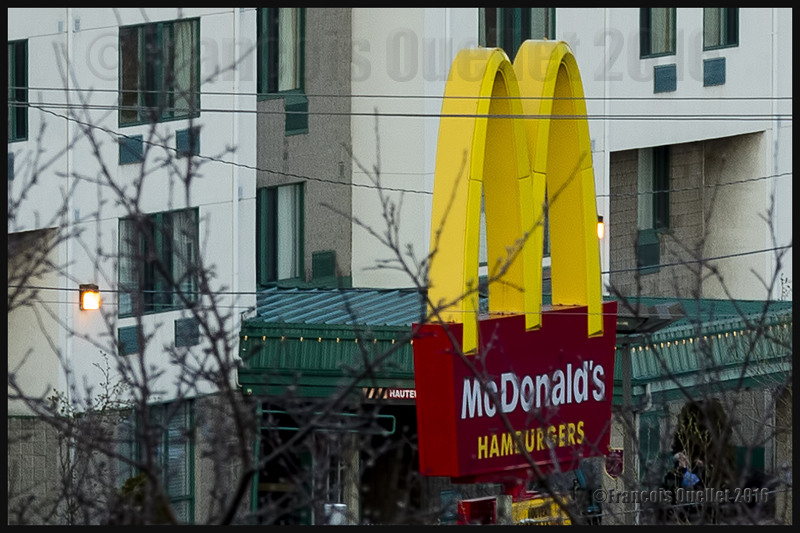
But the picture can be enlarged a lot more using the amazing resolution of the Canon 5DSR. The following picture shows the result after cropping the 200mm image: the yellow M now takes the whole vertical space available in the picture without any loss in quality.
The Mc Donald’s restaurant’s yellow M, after having been enlarged (focal 200mm) and cropped within the Canon 5DSR.
From my position on the hill, the yellow M was barely visible with the naked eye. By using a 200mm focal length, followed by serious cropping, I was able to obtain the result above. So it is possible to photograph a subject that is almost invisible without a telephoto lens and transform it into the principal subject of the picture without any loss in quality.
I chose the 5DSR because the anti-aliasing filter has been neutralized in the model R to offer even sharper images, although there is a risk of occasional moire effect when there are repetitive patterns in a scene. This is the compromise that Nikon users must also have to deal with.
Rethinking photography
The 50.6 megapixel full frame sensor in the Canon 5DS or 5DSR allows a new approach of photography for those who do not have access to a much more expensive and larger medium format camera that does not necessarily give really superior pictures.
When I go outside for a photo session, it seems to me that I now carry a huge telephoto lens without the weight and the cost. A lot of what seemed to be unavailable possibilities are now accessible.
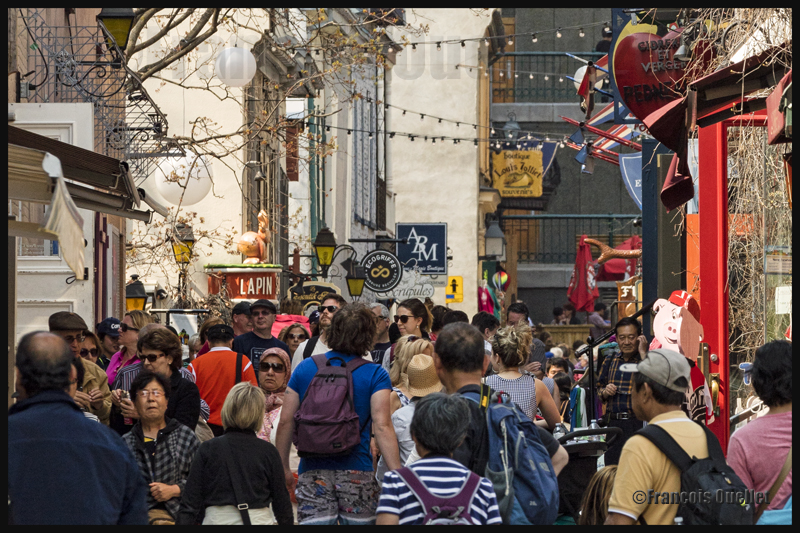
Taking pictures of people in the street is now less complicated: there are no more suspicious looks, artificial poses or people hiding their face. This is an ideal camera to capture people acting naturally without disrupting their routine. Gone is the feeling that you are bothering them in any way.
Quartier Petit-Champlain Old Quebec May 2016
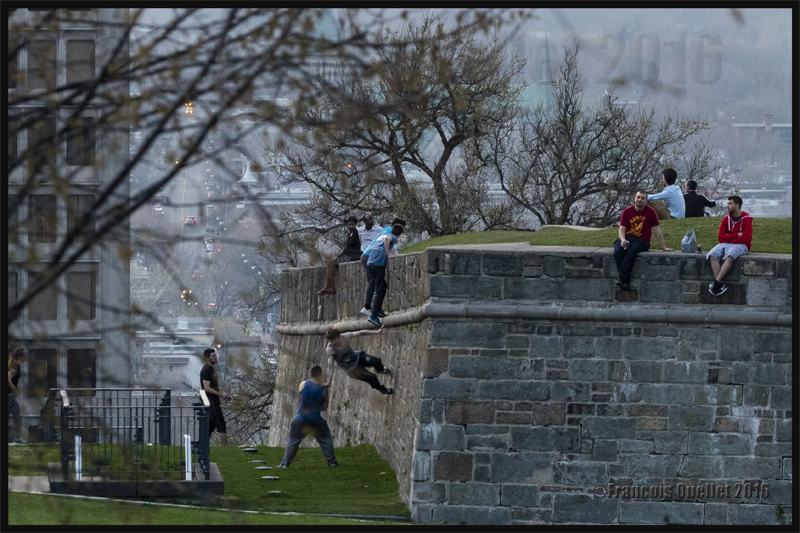
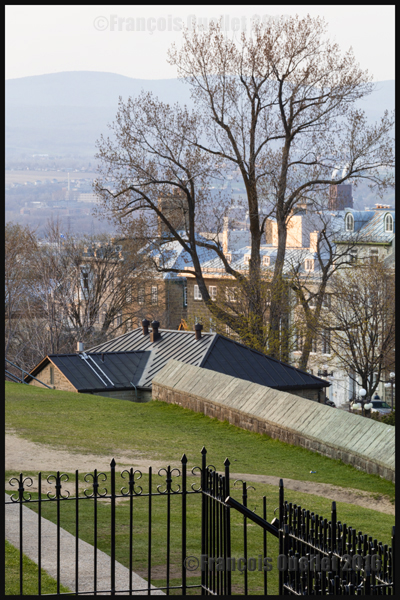
The photo below was taken while I was standing at least 300 meters from the scene, just after sunset. For those who are from Quebec City, I positioned the tripod on a high wall on the other side of Chemin St-Louis, near the St. Louis Gate. I had to slightly brighten up the picture to make the details more visible, risking at the same time to increase the digital noise. It was a May 2016 warm misty evening, which is clearly visible by the lack of details in the background as we look in the distance.
Quebecers defying gravity in Old Quebec, May 2016
But those are not the only possibilities of this camera. The Canon Company, in its promotional video, explains what exactly the camera was designed for:
How can someone maximize the use of a 50.6 megapixel full frame sensor
In order to bring a subject closer to you while fully benefiting from the Canon 5DSR 50.6 megapixel full frame sensor, it is obvious that there must be absolutely no vibrations. The photographer must therefore use a tripod, a remote control release and the mirror lock-up function. This allows for a very low ISO setting while avoiding a blurred picture.
The mirror lock-up function is very well thought through, with the possibility to choose a totally automatic processus according to a timing chosen by the photographer (between 0 and 2 seconds). The system eliminates any secondary micro vibrations.
In order to ensure an even better picture, the photographer must use Liveview and set it to the 16X enlargement available on that camera (versus 10X on my Canon 5D MKII) to manually adjust the focus. It is then possible to see the slightest vibrations caused by the wind. Doing so, I realized that my camera strap, lightly swaying in the wind, was causing some minimal vibrations. Every detail taken into consideration will improve the final result.
One must then ensure to immobilize the strap and even diminish the tripod height if possible when the wind is blowing. These steps will allow an incredible enlargement of a subject while maintaining the initial quality of the image offered by a full frame sensor.
Superior mirage effect (cold mirage)
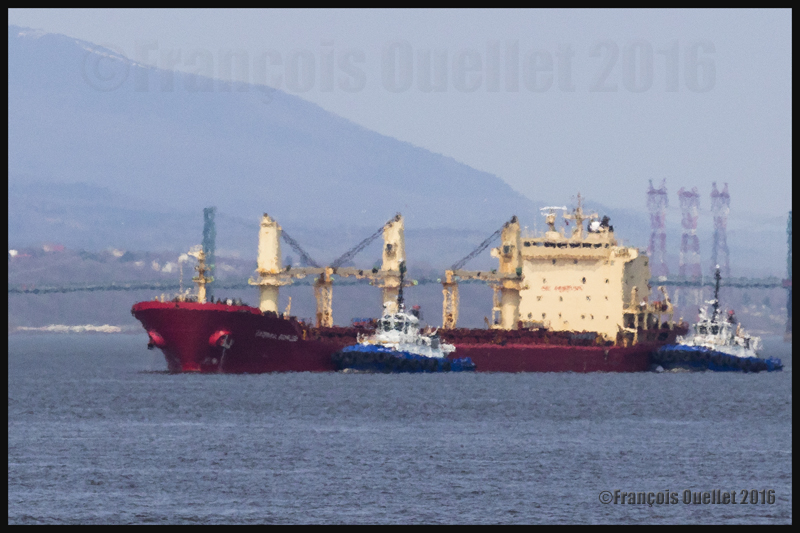
The photo below shows a ship being helped by two Ocean tugboats on its way towards the Quebec Harbour. The ship was at a good distance from the harbour; it is then possible to witness the superior mirage effect (cold mirage) resulting from a temperature inversion immediately over the water. The boats are deformed but the important close-up has not lowered the image quality. It has instead allowed to increase the atmospheric phenomenon effect.
Superior mirage (cold mirage) effect. Vessel and two Ocean tugboats on the St-Lawrence seaway heading to the Quebec Harbour, May 2016.
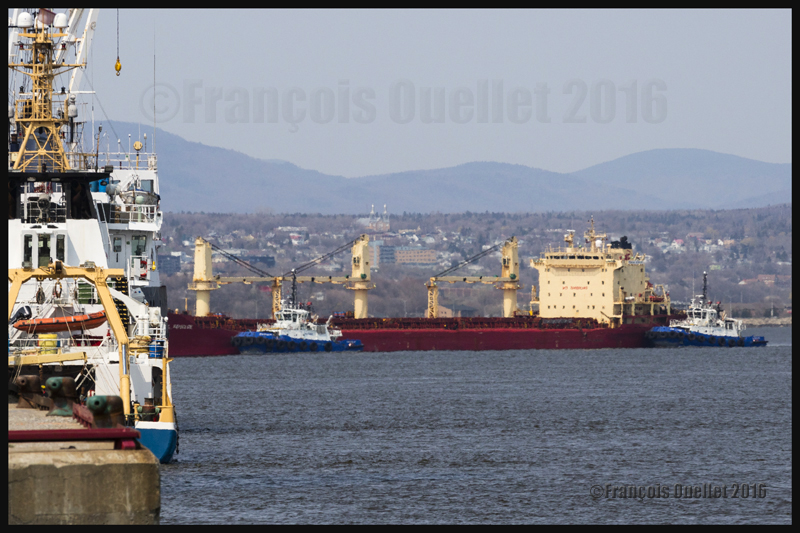
Once closer to the Quebec Harbour, the cold mirage effect decreased, as shown on the picture below:
Quebec Harbour, May 2016
The Canon 5DS or 5DSR without the use of a tripod or mirror-lock
Obviously, a tripod is not necessary if you do not intend to use a lot of cropping to enlarge a photo. You will obtain excellent results with the hand-held camera providing that you remember that this Canon DSLR is a specialized tool.
So many megapixels on a sensor of that size require that the photographer adapts his technique. But, as you can see from the picture below, it is totally possible to capture an aircraft in movement, even at dusk (May 11, 19:49), when the camera’s parameters are correctly adjusted. A higher shutter speed than normal is, in this case, absolutely mandatory.
The photo below shows an Air Canada Express Bombardier DHC-8-402NG (C-GSJZ) on final for runway 29 at the Quebec Jean-Lesage international airport (CYQB).
Bombardier DHC-8-Q-402NG (C-GSJZ — Air Canada Express) on final for the Quebec Jean-Lesage international airport, May 2016. Photo taken with a DSLR Canon 5DSR.
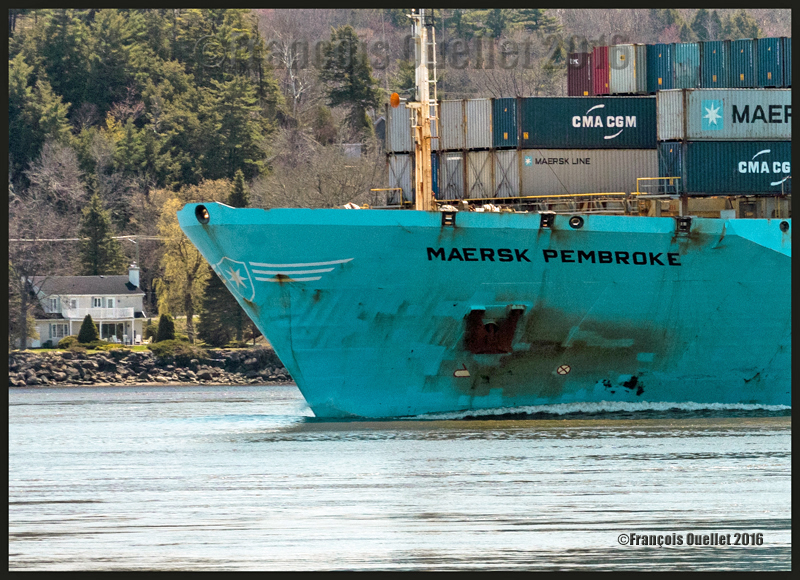
The Maersk Pembroke with the camera hand-held
The photo below shows the Maersk Pembroke container ship photographed with a hand-held camera using a Canon EF 70-200mm f/2.8L IS II USM telephoto lens during Spring 2016 near Quebec City. The focal length was only 140mm and the shutter speed 1/1000. The lens was equipped with a polarizing filter and the photo taken when the vessel was approaching the Quai des Cageux.
The Maersk Pembroke container ship on the St-Lawrence seaway near Quebec City, May 2016
The colours produced by the Canon 5DSR
The digital processing of the image and colours produced by the Canon 5DSR require different adjustments than what was necessary with the Canon 5D MKII. I am still learning how to handle the results produced by this camera so I will wait a bit before commenting.
View of Old Quebec from the St. Louis gate. Quebec City, May 2016
Night photography
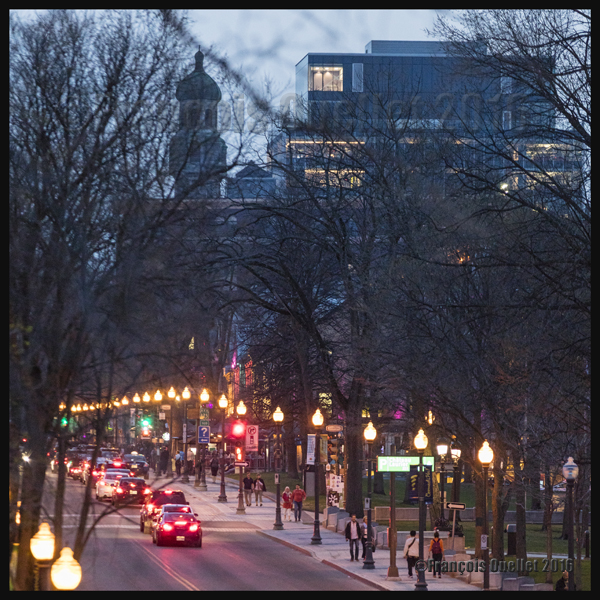
Here are two photos taken during the evening in Quebec City. The photo below required a 200mm focal, an ISO set at 4000 and a shutter speed at 1/30 in order to obtain something else than trailing lights. Luckily, the traffic was moving slowly…
Night photography, Grande-Allée avenue, Quebec City, May 2016
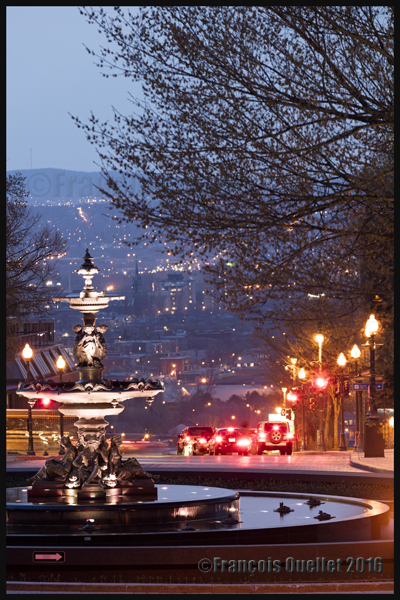
The picture below, taken with a 200 mm focal, required an exposure time a bit longer that one second with the ISO set at 800. To take the photo, I took advantage of the fact that the cars were momentarily stopped at a red light, so that they would be clearly visible.
Night photography, Tourny fountain and Quebec lower town, May 2016
The images per second of the Canon 5DS(R)
The Canon 5DSR is so far quite an impressive camera. I would have appreciated that Canon offer a higher rate of images per second (7 instead of 5) to make it more versatile.
The camera allows taking pictures with smaller formats than 50.6 MP, the two other options being 28 MP and 12 MP. If the camera can deliver five images per second with 50.6 MP RAW files, we can deduct that it is able to offer more speed for smaller formats. But the camera is blocked at 5 IMS so that it, I suppose, does not compete with other existing Canon models of the same category…
Nonetheless, Canon says that the rapid sequence of shooting lasts longer if the photographer uses the smaller files provided. So it is not faster, but it keeps on firing for a longer period. My guess is that it would only require a new firmware version to improve this camera’s number of images per second.
For other night pictures, click on the following link to my site:
1. A picture you would never have thought possible, because of extreme contrasts between brightness and darkness, is now accessible to you through HDR.
2. For a good HDR picture, you need at least 1) an interesting subject 2) an appropriate setting or background 3) the appropriate light and 4) a wide range in contrasts. That seems basic, but HDR will not save a picture that was not thought through.
3. You need a software like Photomatix, to transform several pictures taken at different exposures into one HDR picture. But this is only the first step. You will also need another editing software to improve the general result after Photomatix has been used.
4. A tripod is required to help Photomatix align the pictures and create the HDR effect.
5. As with your normal pictures, it is always better to try to use the lowest ISO as possible.
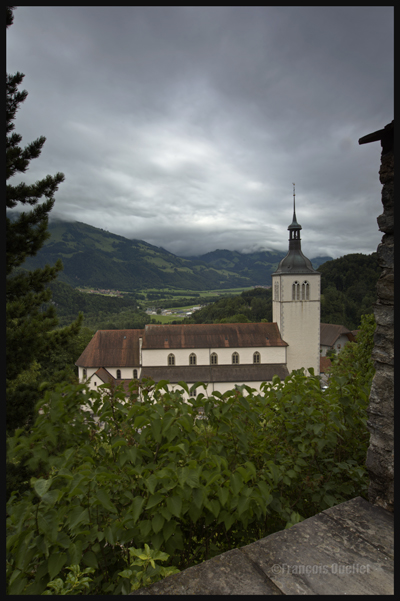
Gruyères, Switzerland, 2013.
6. It is safer to work with manual focus. This way, none of your shots will have been influenced by external objects without you noticing. It will always be the exact same focus throughout the HDR photo session. With automatic focus, you generally notice your blurred pictures when you’re back home and then it is too late (it will often happen under low light conditions).
7. The greater the contrast, the more exposures you need to take (up to nine) in order to match the dynamic range of your eyes.
8. The idea is to take each exposure at a different exposure setting. If you need seven exposures, an example of settings would be: -1, -2/3, -1/3, 0, +1/3, +2/3, +1. You might decide that three exposures only are necessary and go for -2, 0, +2 or -1, 0, +1. The choice is yours but you must take only the required number of exposures to avoid including too much noise in your shots.
Canon, 16-35mm, HDR format.
9. Throughout your HDR exposures of a specific scene, always keep the same aperture.
10. A scene is rarely perfectly balanced with light and shadows. If there are many shadow areas in the photo you want to take, then take more exposures over the recommended settings to ensure that you caught the whole dynamic range of the scene.
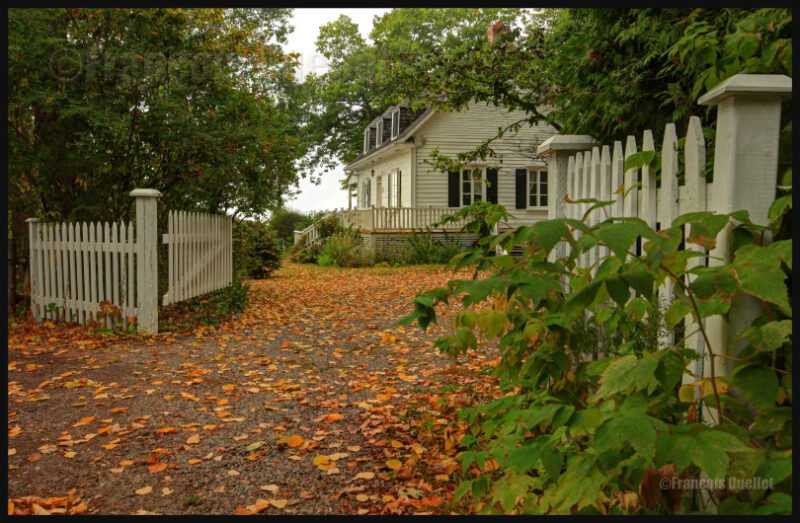
A house in Sainte-Pétronille, on Île d’Orléans, autumn 2012. HDR picture.
11. Inversely, if your scene has lots of highlight areas, take more exposures under the recommended settings.
12. Setting your camera to “automatic bracketing” is preferable because all the pictures are taken quickly thus avoiding to show any blurred picture in the final HDR picture. But if you want to show the movement of water in a creek, you don’t need bracketing: just take few shots with different time of exposure (in number of seconds). Just don’t overdo it otherwise it will give place to an uninteresting undefined white surface.
13. Check your LCD monitor so that none of the highlights are blown out. There would be a loss of details. For the same reason, you must avoid to block the shadows.
14. Always work with RAW files, it gives you better results. The RAW file already provides you with more f/stops then the JPEG file, and this before the transformation in HDR has even started).
15. Of all the lenses I’m using, the wide angle lens is my preferred one with it comes to HDR photography.
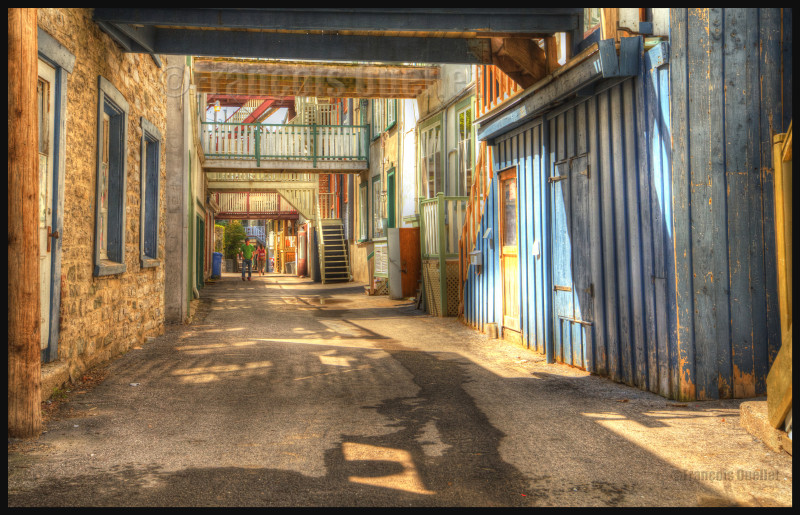
Spring light in the lower town of Quebec City
16. To improve the composition or enhance the general impact, crop the picture.
17. Not all pictures are appropriate for HDR transformation. If you want a dramatic silhouette as the final result, for example, HDR will not be appropriate. It will reveal too many details in the shadows and you will lose the high contrast effect that you were looking for. With practice, you will recognize where HDR is the most effective.
18. Whether you want a realistic picture or not, you can obtain surprising results with the combined effects of softwares like Photomatix, Topaz, Photoshop, Nik Software, Lightroom, Lucis Pro and so on. It’s only a matter of taking your time to experiment.
19. If you have only one picture on hand, like a shot you took years ago, and you would like to give it an HDR effect, you can use a software likeTopaz Adjust. There is an HDR effect section in that software that allows you to get a wide range of effects. But this is not going to be nearly as good as the real HDR resulting out of many pictures. The final editing step is, most of the time, done using Photoshop.
20. An unpretentious book about HDR is “Rick Sammon’s HDR Photography Secrets for Digital Photographers”. It is simple, colorful, well written and loaded with practical informations.
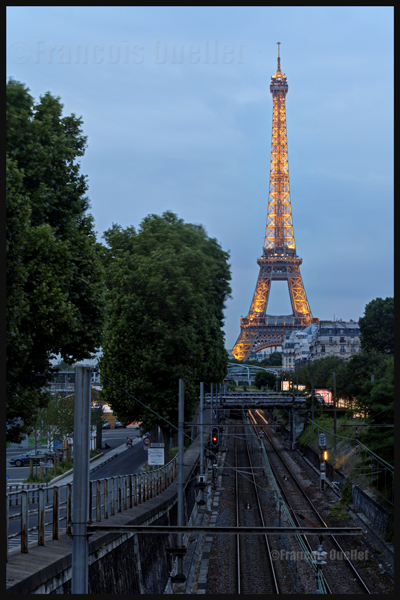
Eiffel Tower at night with HDR effect
Note: All the photos were taken with a Canon 5D MKII
Facing a field of flowers, a photographer has to choose among many possibilities. Here are just a few:
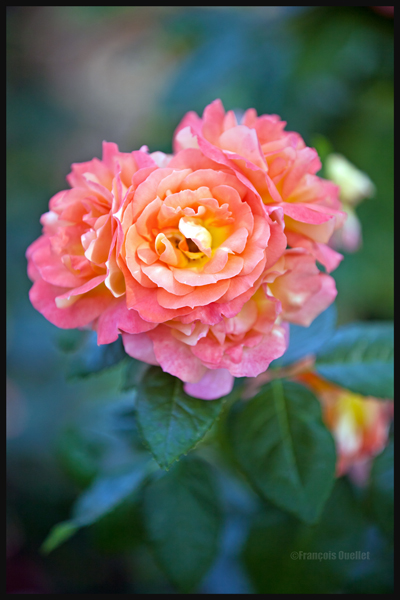
1) He can choose a really beautiful flower and make it the sole point of attraction. In that case, he must decide if the background will be free of any distractions.
A rose from the English Garden in Geneva, 2013.
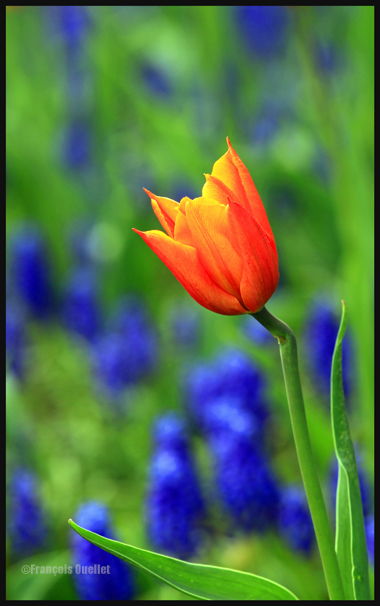
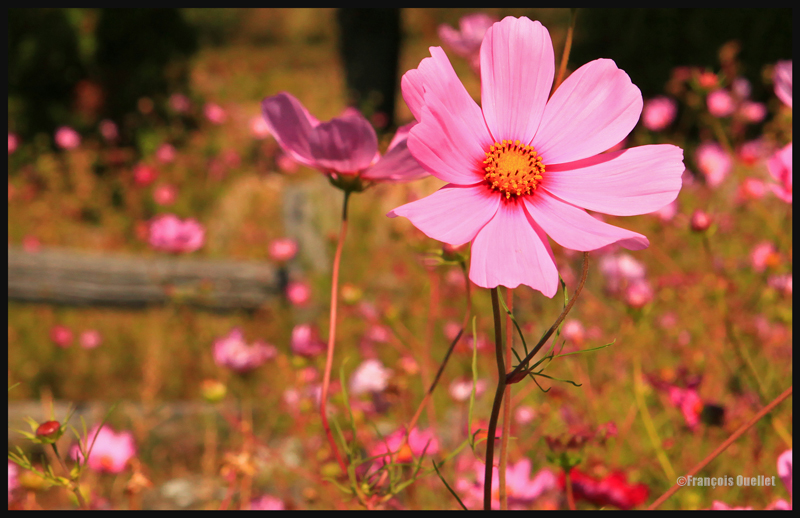
2) He can profit from a blurred background that is of a color dramatically opposed to the color of the chosen flower.
A tulip in the Bois-de-Coulonge, Québec City.
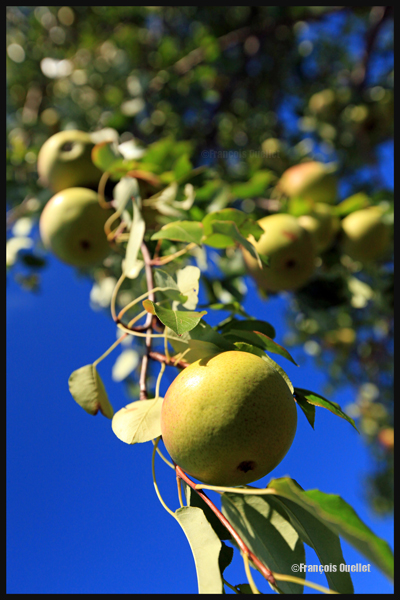
3) He might favor an overhead or a low angle shot. As this choice of the angle of view does not apply only to flowers, I found in my archives a low angle shot of a pear tree located in St-Nicolas, Québec. Here it is, so that you can see what kind of effect can be obtained.
Pears from Saint-Nicolas, Québec.
4) He can decide to show many flowers on the same picture, considering the interesting impact produced by all the color dots.
A field of flowers in Saint-Nicolas, Québec.
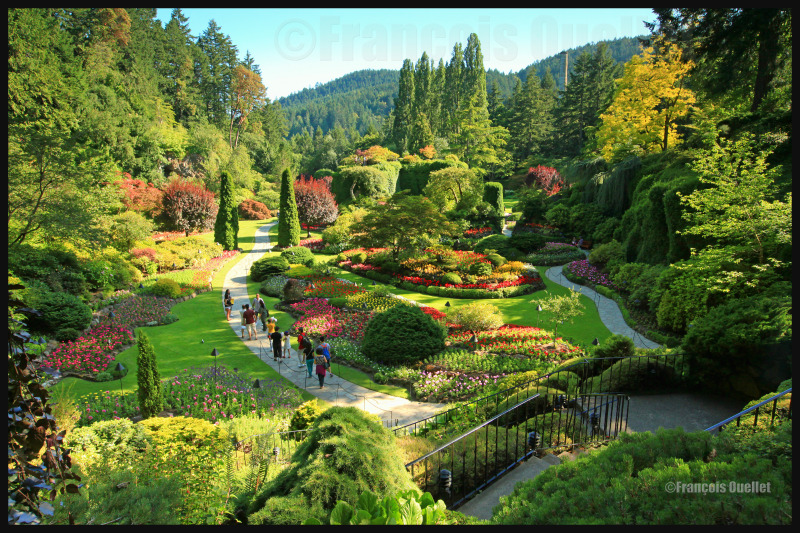
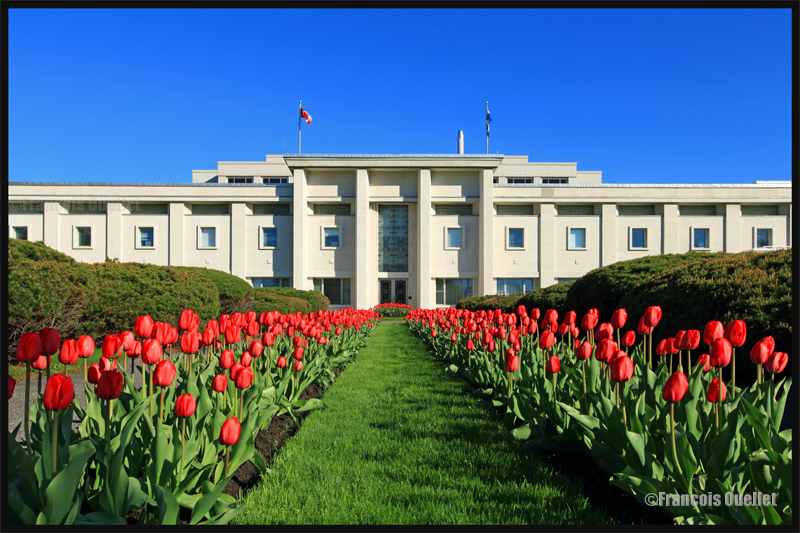
5) He might also use the flowers as accessories to direct the eye of the viewer to another point of interest like, for example, a building with special architectural characteristics.
Industrielle Alliance building, Quebec City, 2012
Flowers as accessories to improve a beautiful landscape in the background.
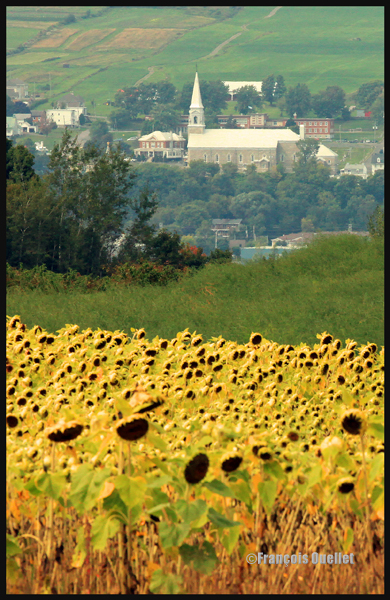
Sunflowers on Île d’Orléans
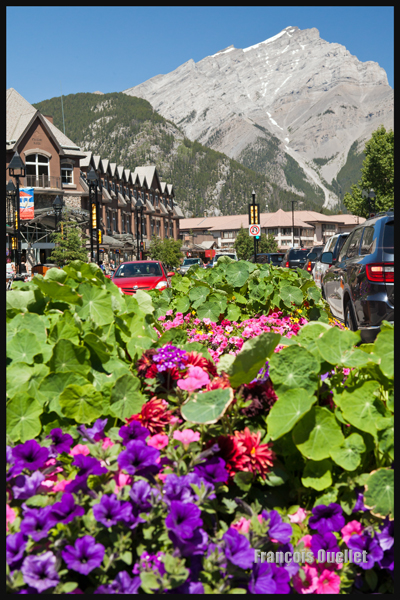
Photo of a part of Banff downtown, Alberta, Canada 2014
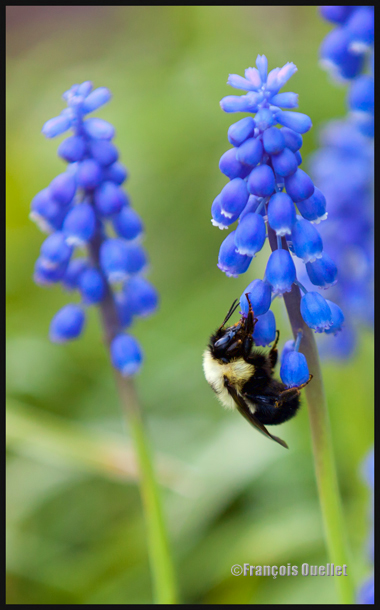
The flowers and the bumblebee are two interesting subjects; they complement each other in this picture. It would be hard for me to decide which one I prefer.
Bumblebee on a flower in the Parc du Bois-de-Coulonge, Québec City
Unless there is no other possibility, it is better to avoid shooting flowers under full sun as there will be considerable reflection on their petals. If you have no choice, use a polarizing filter, well adjusted, to reduce the undesirable effects of direct sunlight.
The ideal day to get out and take pictures of flowers is a day without wind, where there is a bright light but dimmed by an overcast sky.
The quality of colors and contrasts will be maximized if the pictures are taken during the morning or at the end of the afternoon.
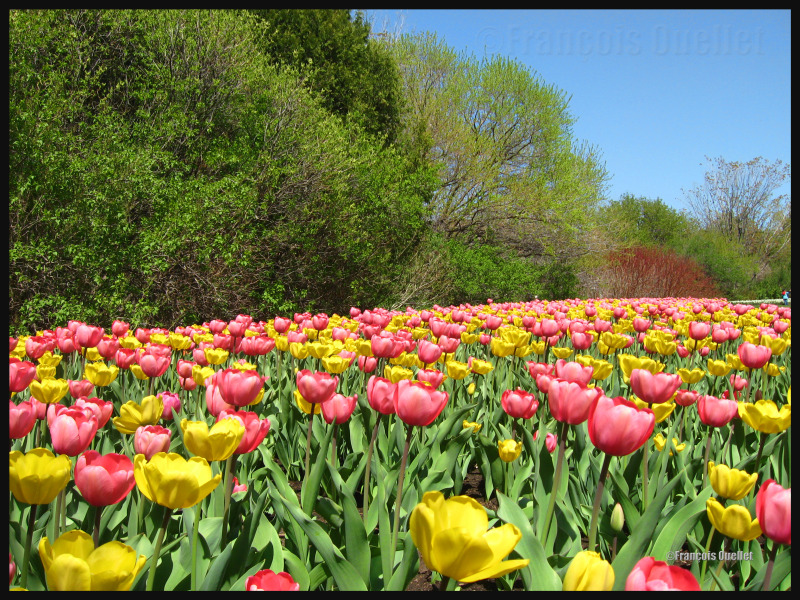
Aperture has a definite impact on the final result. With a wide aperture (smaller numbers like F2.8 or F4.0) you will get a sharp subject with everything blurred around it. This will make your flower stand out. With a small aperture (bigger numbers like F14, F16), both foreground and background will be sharper, with an even better result using a wide-angle lens. Your flower will lose a bit of its impact as all the elements in the picture will now shine. Below is a picture taken in Ontario, during the Ottawa Tulip Festival.
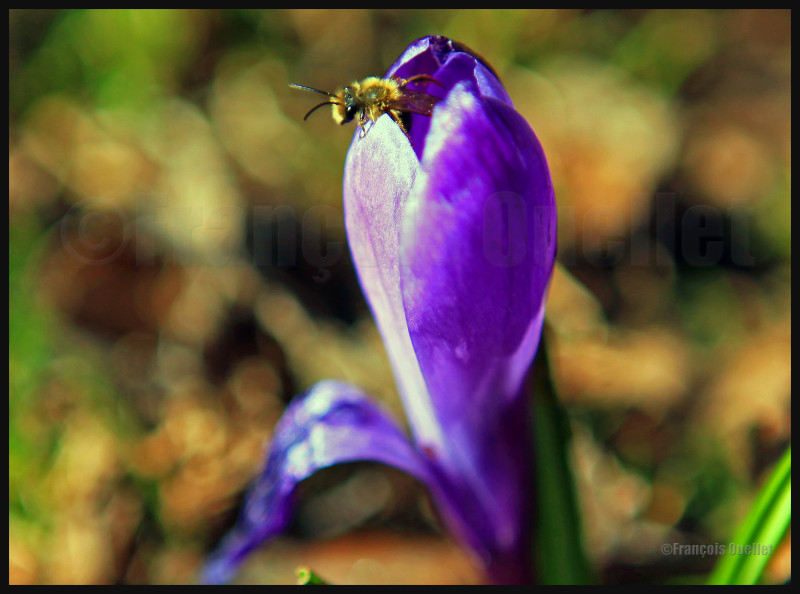
Macrophotography:
April 2012 on the Plains of Abraham: A bee makes its way out of a crocus.
1) Remove any dirt from the plant you want to capture and choose a plant whose petals are in perfect condition.
2) Use a tripod, a remote control release and the mirror lock-up (MLU) function for better results.
3) The camera should ideally be used with manual focus, for improved sharpness. In order to verify if the picture will be in focus, look at the LCD screen and enlarge the picture (5X or 10X). You will immediately see if a minor adjustment is needed to get a sharp photo or to improve the depth-of-field.
The histogram should be checked upon taking the picture to immediately compensate for the necessary amount of light.
You can use a flash to reduce aperture. You must adjust it so that it’s not shooting at full power otherwise there will be too much reflection and you will lose all the delicate nuances of colors and contrasts.
A method that will produce surprising results is called “zoom burst”. You slowly move the zoom of a lens on all its focal length while the shutter remains open during the process. You must select a speed that is slow enough to accommodate the full deflection of the zoom. You should know that many shots are normally needed before you get a satisfying image.
Every lens offers different possibilities:
1) The macro lens is useful if you wish to capture very precise details on the flower. To add an interesting effect, you can even spray the flower lightly with water so that a few droplets remain on the petals.
2) The wide-angle lens allows you to transform an image and give it an original perspective. The effect will be more important if you shoot the flower from a special angle like, for example, from the ground up. If you must lie on the ground, use a little carpet to keep yourself clean and dry. I bought a right-angle finder to ease the workload when shooting under complicated angles. This could be a potentially interesting addition to your equipment.
3) Finally, the telephoto allows you to pick a particular flower and, because of compressed perspective, offers you a background filled with multiple colors.
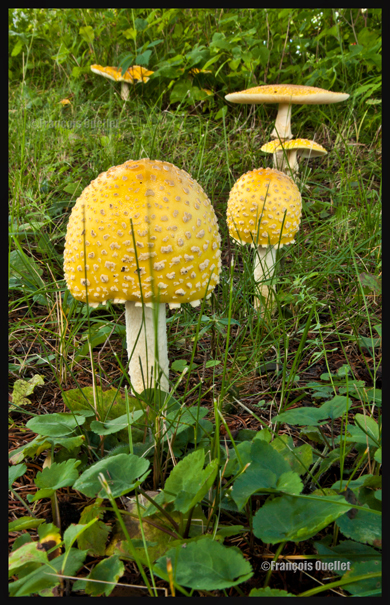
Let’s end this section with a mushroom picture. The same principles apply with regards to simplicity, settings and angles of views. I could have chosen to show only an oversize shot of a mushroom, or take only part of it, but I preferred an approach that would allow me to show the radically different shapes of the specimens found at the Laurentian Forestry Center in Québec.
Mushrooms around the Canadian Forestry Service building , Québec 2014.