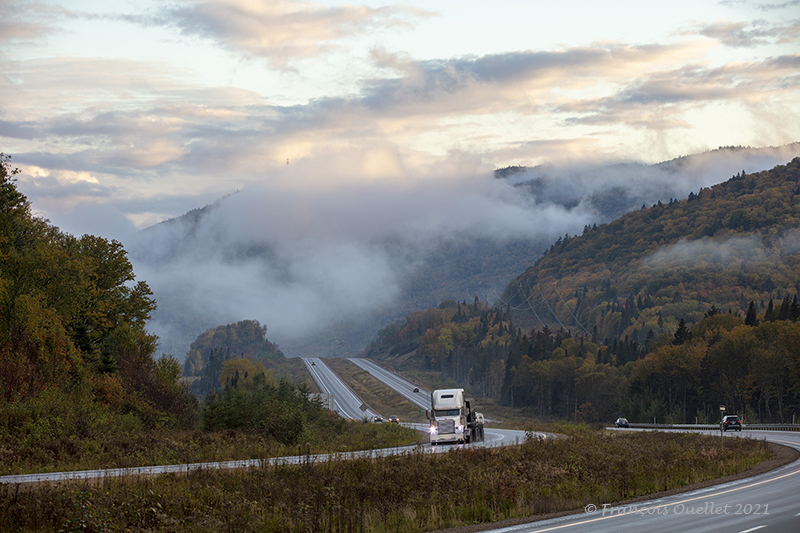
The above photo was taken while returning from a photography session in the Jacques-Cartier National Park on Route 175, near Quebec City. The rapid drop in temperatures in the early evening allowed the rapid formation of low clouds in the valley. The autumn colors and the effects of the setting sun on the clouds help bring the landscape to life. Landscape photography is often the result of careful planning; but one should not overlook unforeseen opportunities, as is the case here.
Route 175 is heavily used by semi-trailer trucks for trips between Québec and Saguenay-Lac-Saint-Jean. So I waited a bit for an eighteen wheeler to get close enough to include it in the photo.
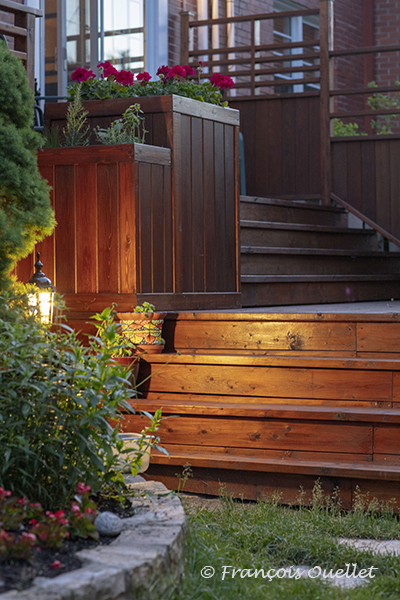
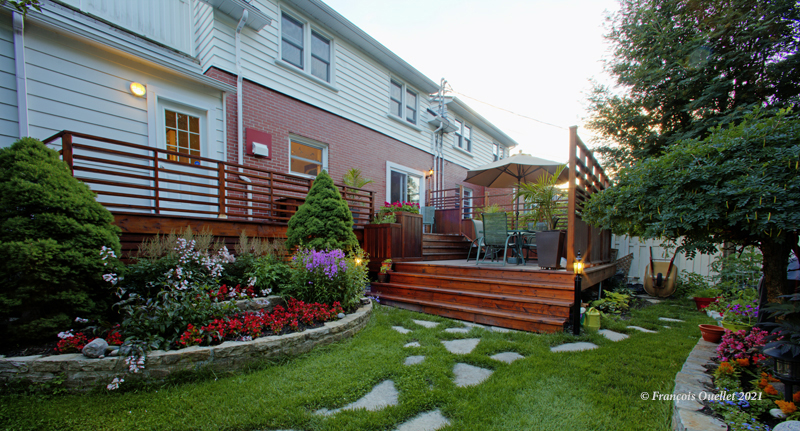
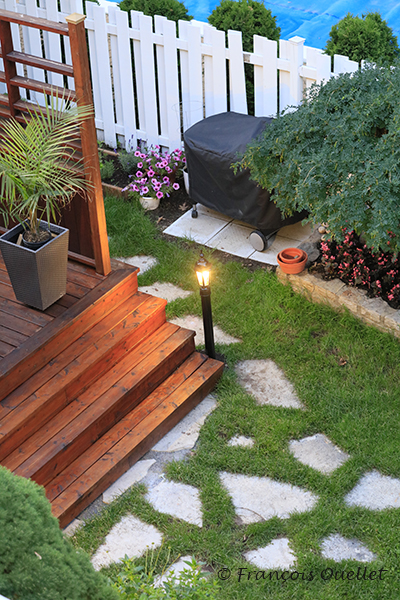
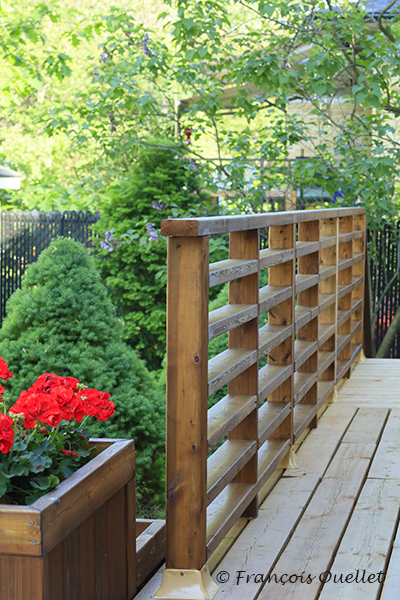
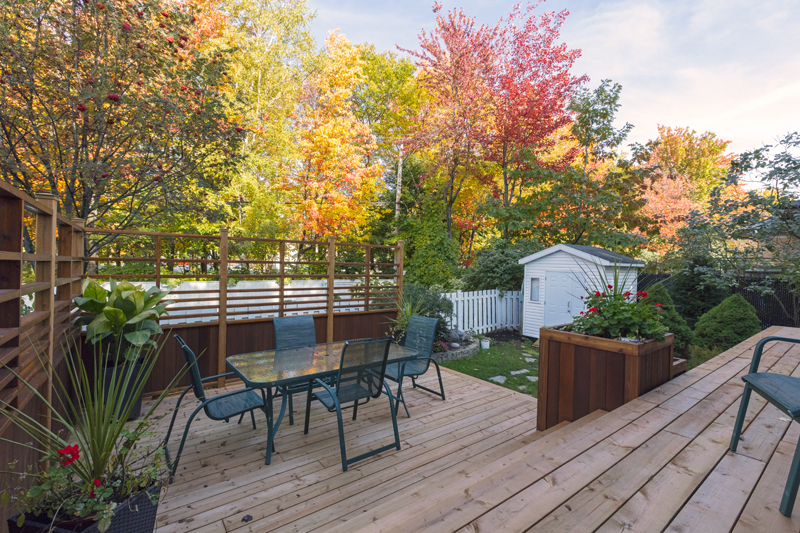
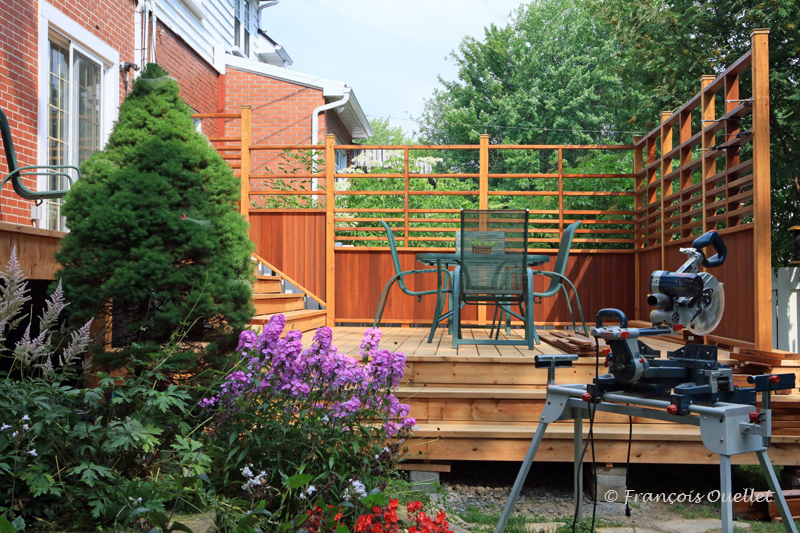
We have arrived at the last article in the “ Building a patio ” series. The photo above shows the two-tiered flower box as well as the three-step staircase that has been completely redone. The last step must be cut at an angle to follow the pronounced drop in the ground at this point, under the patio.
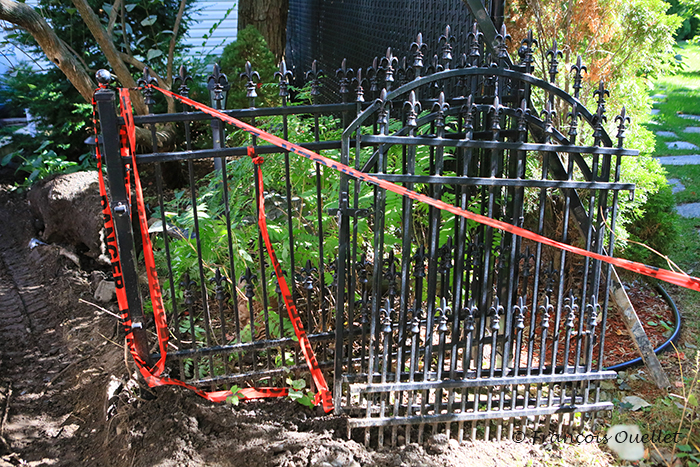
Black metal fence sawn and replanted.
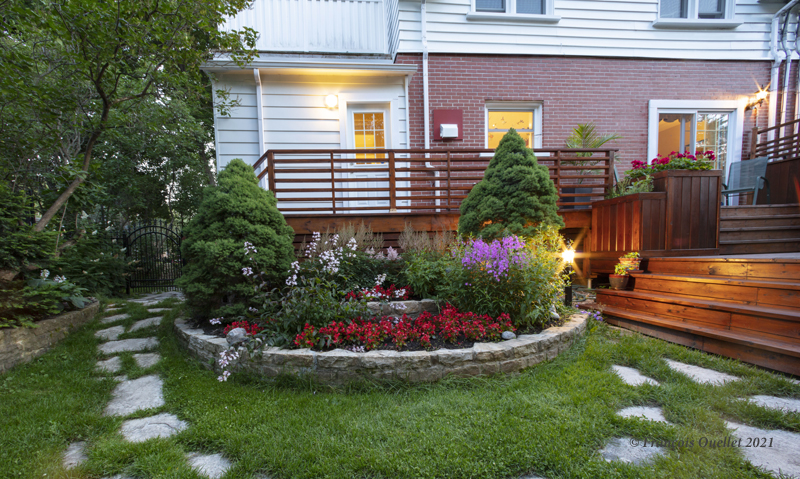
A general view of the railing and of the black metal fence to the left of the photo which has been sawn and set back in cement.
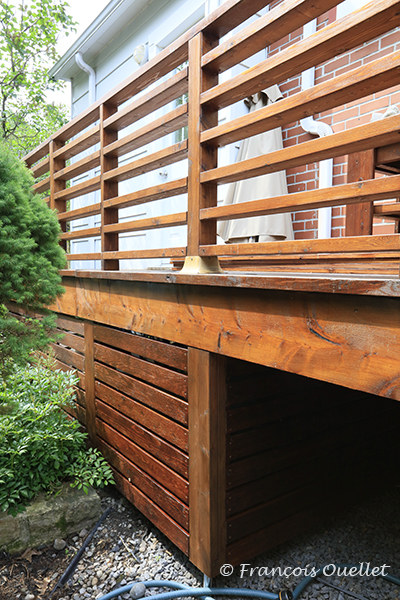
Red cedar siding under the patio and support post.
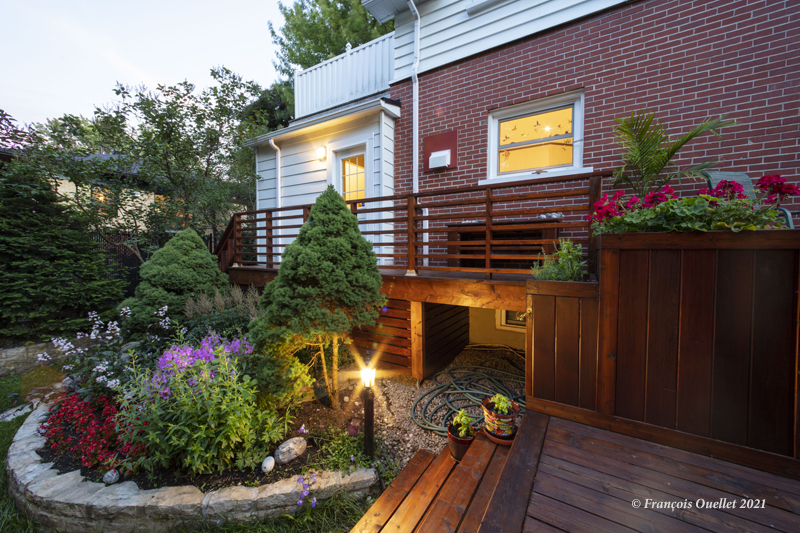
Above is a view of the red cedar siding built under the patio. I kept an access to the hose and didn’t block out all of the light entering in the basement window. Another fixture has also been reactivated.
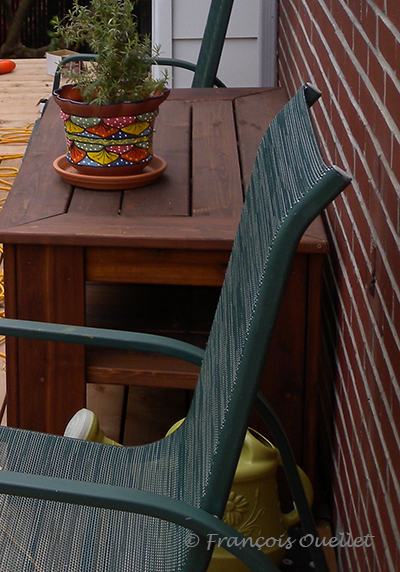
Close-up of the red cedar siding under the patio.
The photo above shows a close-up of the siding under the patio. We can see a metal pole near the watering can which seems to support the terrace: its practical function is null; it is only there for appearance (all the siding is firmly fixed from the top).
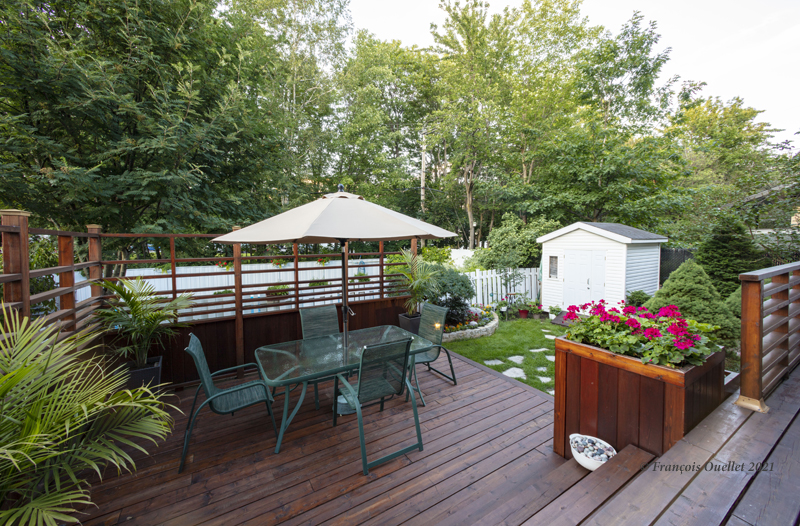
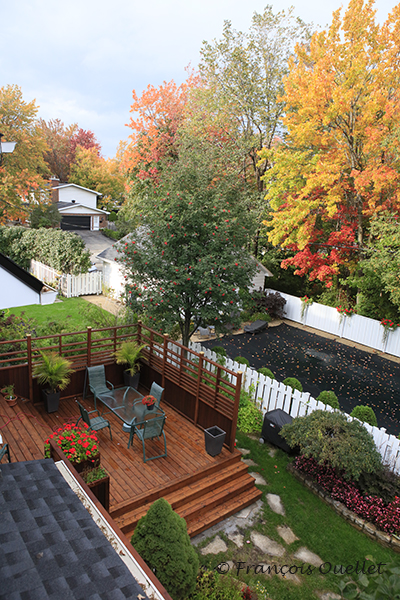
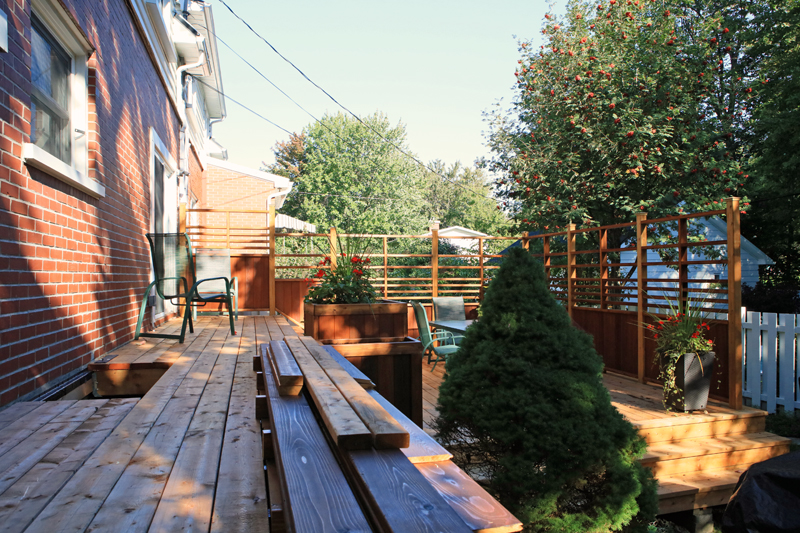
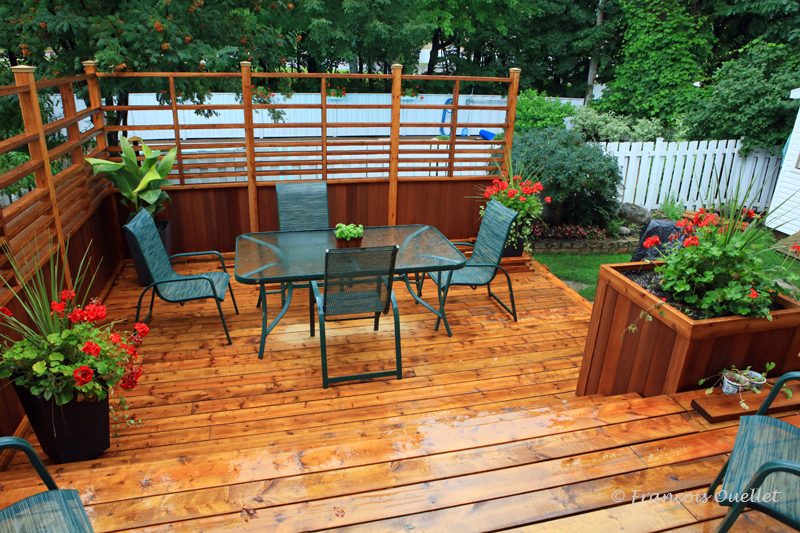
View of the completed terrace.
Overview of the terrace.
HDR Wide angle view of the wooden deck
Another overview of the patio. This time, I took the picture in HDR, meaning five pictures were taken with a different aperture and compiled on a computer to achieve a result that fights the highlights in the background. When you shoot westward with the sun going down, that’s what it looks like: you have to correct the photo in order to see something. The terrain looks larger than it actually is: this is due to the effect of the wide-angle lens.
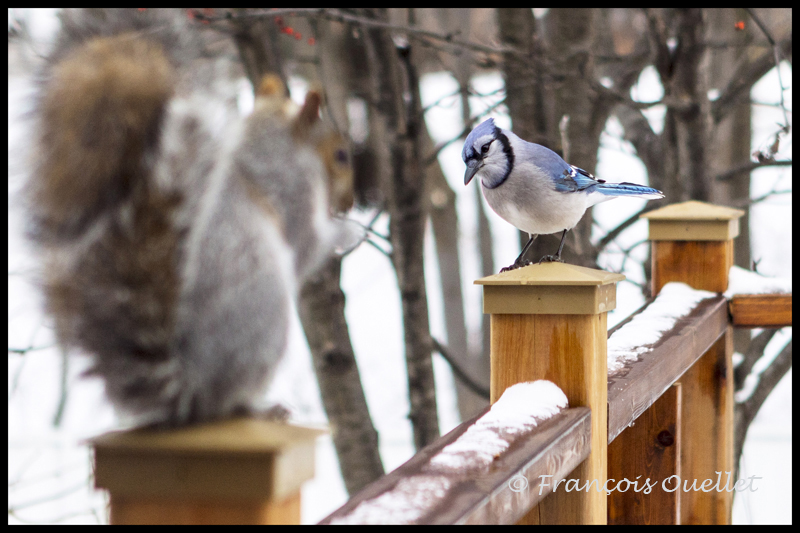
Squirrel and Blue Jay on the new patio.
The last photo is of a squirrel and a blue jay who regularly invite each other for a peanut meal on the patio. If you want to see some close-up photos of these blue jays, click on these pages of my site: Blue Jay in Autumn and Blue Jay and Russian Mountain Ash.
I hope this series on renovation and on building a patio has been helpful to you.
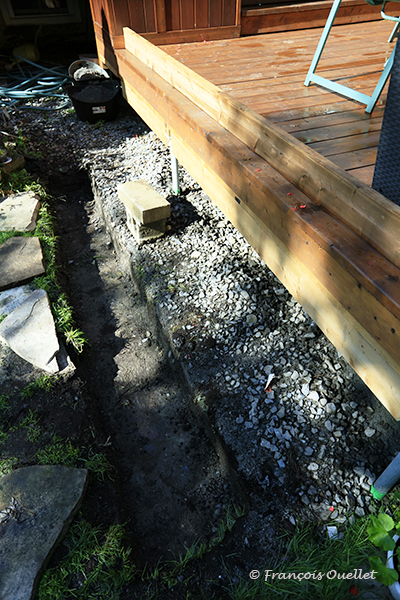
Planning and execution errors forced me to redo some work, including a staircase and the base that will receive this staircase. Renovation is also about going back (but as little as possible!). The cost of additional materials is negligible, but it will take time. It is now necessary to build a staircasewith three steps sitting on a very solid base.
Digging to prepare the foundation of the stairs.
This time, I dig a foot deep, and add 0-3 / 4 rock and stone dust, followed by a few slabs that will receive the stair stringers.
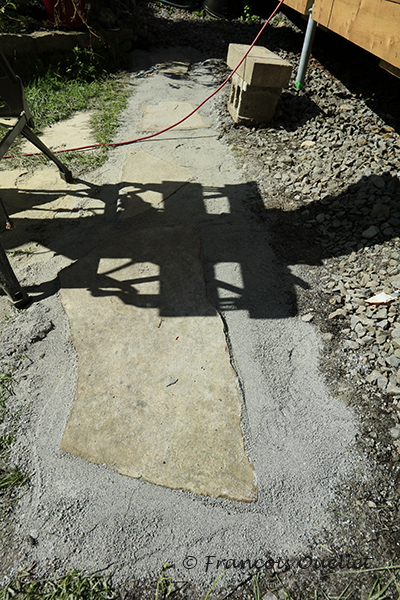
Rocks and stone dust and slabs to receive the staircase.
Here is the final result. Nothing will move.
Cutting the stairs in a 2X12 piece of wood.
From 2X12 spruce boards, the four stringers are cut.
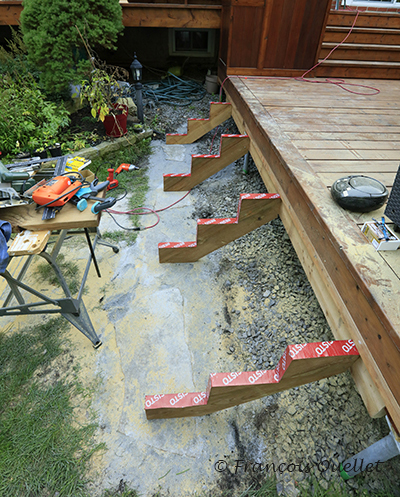
Installation of the four stairs stringers.
The four stringers rest securely on the slabs and are covered with a red Resisto waterproof membrane: this will prevent rot from settling on the stringers. An additional board is needed to accommodate the stringers and it should be placed under the contour beam.
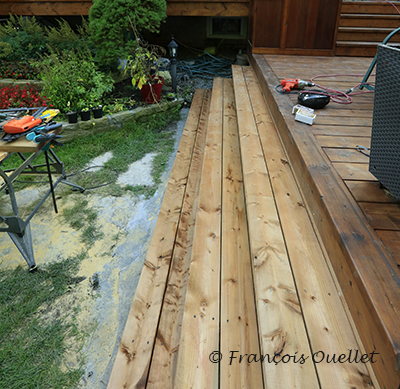
Three-step staircase redone.
The photo above shows the final result, just before the stain is applied.
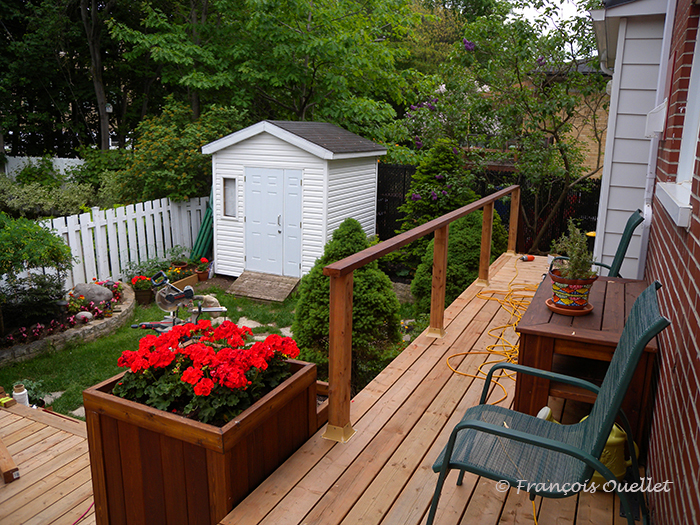
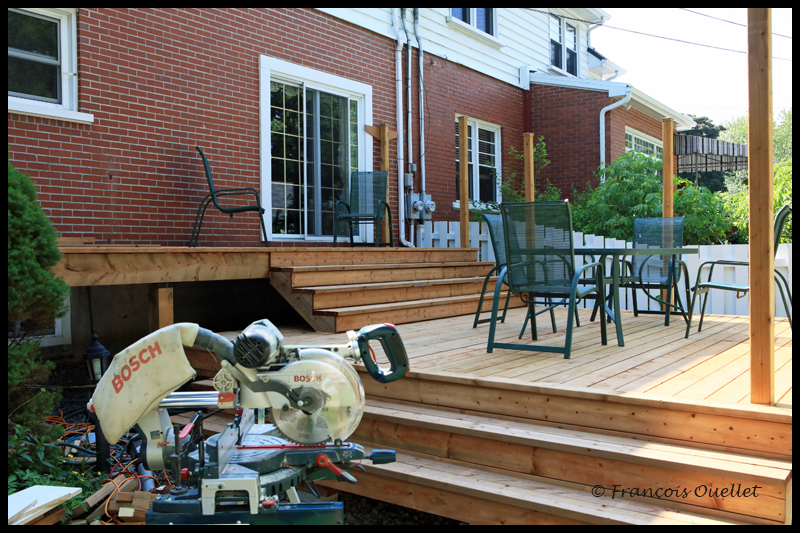
General view of the first section of the wooden deck.
Above is an overview of part of the new terrace, with the new three-step staircase. The grass in front of the steps is badly damaged, having suffered the effects of construction for an extended period. But next spring, everything will be back to normal.
New wooden stairs.
This is the final look of the new staircase the following spring, after the wood stain has been applied and the fixtures have been reinstalled one by one around the patio. Fortunately, not all of the electrical wires were cut by the mechanical shovel, which made their reinstallation easier.
Continued in the next article: “Building a patio (7 of 7)”.
The third staircase and the ramp are under construction. The vertical posts and steps are made of spruce and the rest will be red cedar.
Handrail and staircase.
Construction of the railing has started. Initially, we thought of a metal railing with glass panels. We investigated the available models and it seemed to us that the appearance was a bit too modern for the age of the house. We thought that continuing with the same materials as the terrace would be a better idea. I drew up railing plans and had family members vote on which model to use.
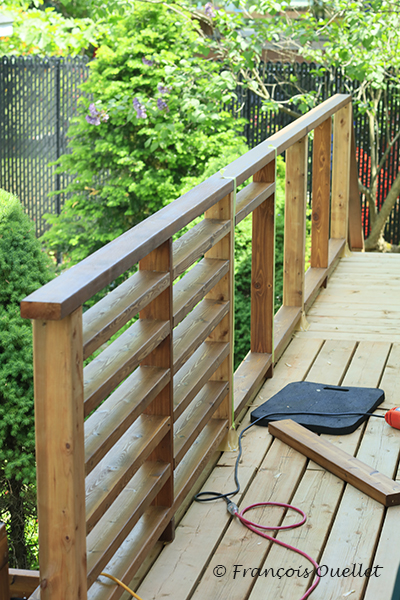
Installation of horizontal red cedar posts.
One at a time, the horizontal bars of red cedar are installed between the vertical posts. Spirit level and measuring gallon ensure that the appearance will be as correct as possible. The flaws are easy to see when a railing of this length is built, with so many separate pieces inside.
Completed red cedar ramp.
This is the final effect, when the thirty-six pieces of wood have been cut and laid.
The sections of metal fence to cut and reinstall.
The black metal fence that stood right next to the patio was partially dismantled during the installation of the new French drain. The cement bases of the fence posts were damaged by machinery. It was now necessary to get this old cement out of the ground, regroove, cut off five centimeters from the fence, re-weld the parts of the fence together, recast cement and replant the metal posts.
I tried to have the work done by Clôture Provinciale, of St-Augustin, because the initial fence had been made by them, according to my drawing. After ten calls, months of waiting and no return calls, I tried to approach other companies to do the work. I was told I would have to wait until next year because all the companies had contracts for months to come. Finally, I found a company in Beauport that bid $ 2700.00 to do the work. But it was a bit expensive.
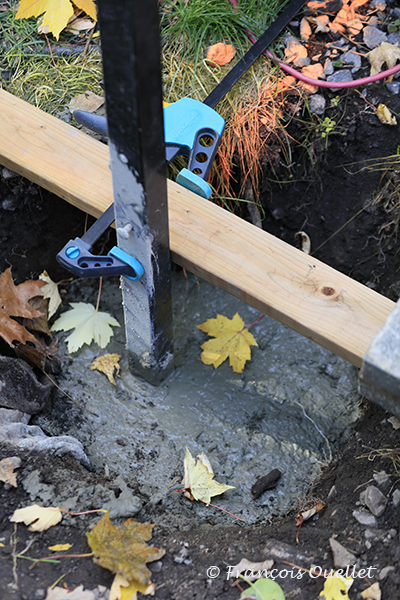
Cement is poured to secure the fence post.
So I decided to do a lot of the work myself, but still called on Clôture Nordik to pull the old cement bases out of the ground and dig two new holes at least 5 feet deep. I sawed off the metal fence and had the sections welded together. I then poured 700 pounds of cement into the two holes, laid the metal posts and reinstalled the fence. I then applied a coat of black Tremclad paint. Total expenses: $ 700 instead of the $ 2700 proposed by the Beauport company.
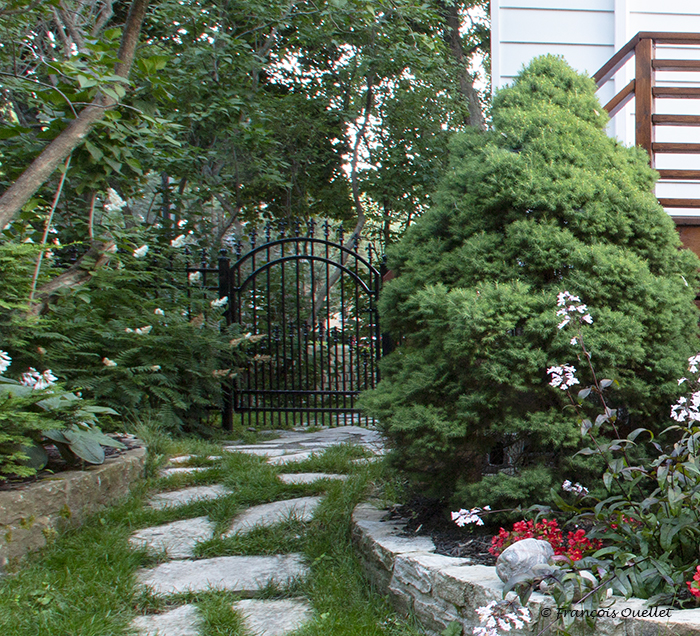
Reinstalled metal fence.
Here is the final result for the fence.
Continued in the next article: “Building a patio (6 of 7)”.
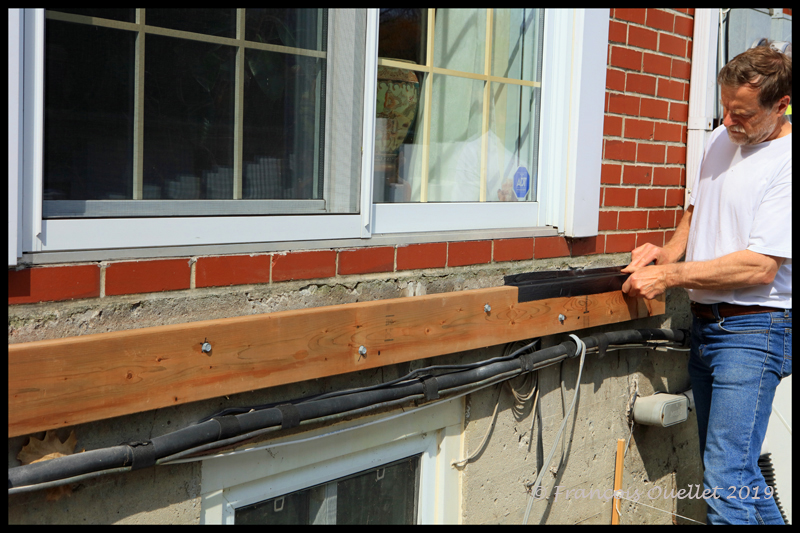
I had counted on the presence of a carpenter to make the connection between the beamsunder the white shed and the new terrace. Connecting a 1954 construction with a new, differently designed patio is not that easy, especially for me. What was also not easy was to hire experienced staff to do this part of the job. After multiple calls left and right to find an employee, I resolved to take on the job alone. Everything went well, however, with savings as a bonus.
In the picture above, a red Resisto waterproof membrane is glued to each beam and joist to protect the wood from rot.
Opening in the floor of the deck.
The opening into the terrace is still clearly visible. It was closed, after a change of plan. Two joists were added in the middle of the hole for added strength and a few boards were cut and rearranged to complete the floor and close the opening.
Red cedar table and patio.
A red cedar table (the first table I ever built) was placed where the old opening in the terrace floor was.
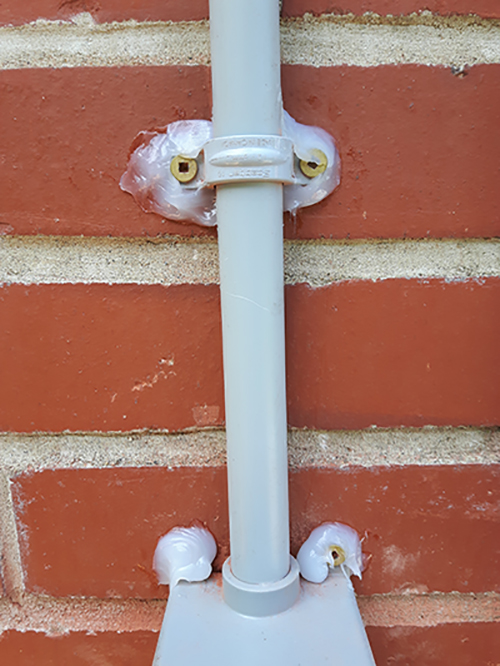
Picture of a shitty job
During the project, I made the mistake of not supervising the work after hiring an electrician to lay the exterior wiring. The photo above is the very definition of a job poorly done (a better term would be a shitty job). The guy made multiple holes in the brick, not even aligned, and buttered the wall with silicone, after installing a lamp that hangs crooked. That’s why you have to do the work yourself, when possible. But with electricity, we are forced to deal with professionals. In short, the company had to redo the work.
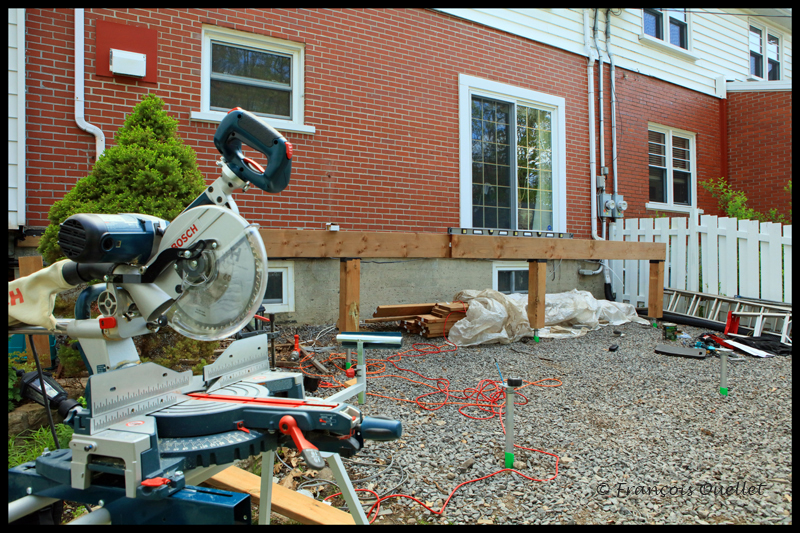
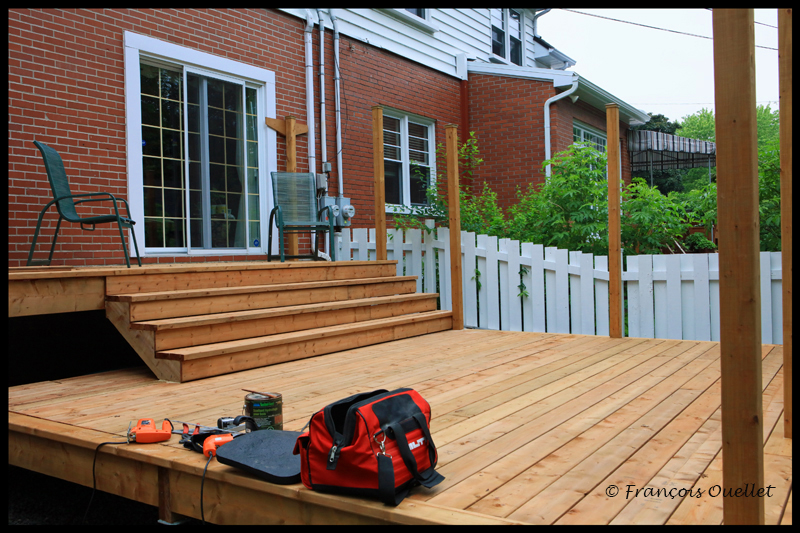
The patio flooring is completed.
The flooring is now completed on both levels, but I haven’t had time to stain it yet. It also lacks a railing on the second level, a third staircase at the end of the terrace, a ramp, and it is also necessary to resize and reinstall a metal fence that was taken out of the ground during the work of the new drain, in addition to reconnect the wiring of the lampposts that was cut by the mechanical shovel. But the renovations are moving forward …
Continued in the next article: “Building a patio (5 of 7)”.
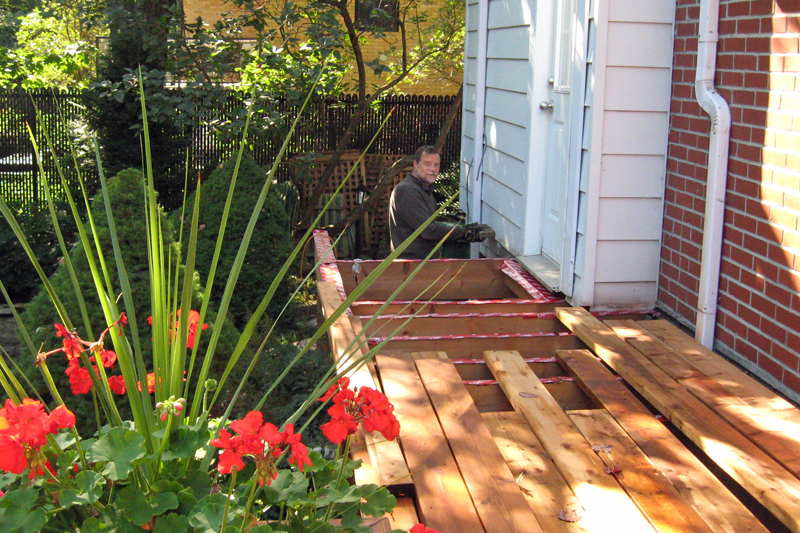
To screw the 2X6 boards I use the CAMO system with screws that do not show, being screwed obliquely to the side of the boards: this improves the overall appearance without compromising on strength. When it comes to tools, I belong to the dinosaurs: only wire equipment, nothing with a battery.
The original plans called for an opening in the patio floor on the first level to allow light to pass through to a basement window. It is also in this opening that I work in the photo above. The plan messed up, with the final aesthetic and positive family comments missing. Project management also involves unforeseen events… I had to apply plan B, that is to say improvise.
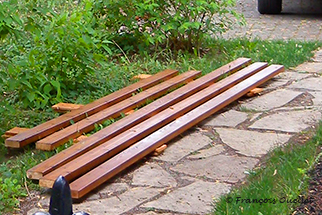
Two-layer stained red cedar planks.
The red cedar planks are used in the construction of the railing, the flower box, the handrail and the siding under the terrace. Some are knotless, for the more visible places, and others are with knots. There is naturally a good price difference between the two categories.
Each red cedar plank has a very pale beige color. To give it a darker tone, it must be sanded and stained with two coats of a special oil. It is important to wait a day between layers. In the photo above, six boards that have received the proper treatment are quietly drying outside. This is a process that requires time and proper weather if you don’t have a garage to let it dry out.
The second staircase from the patio.
Above, the second staircase has just been completed. It has only two steps, because I wanted to rise the terrain a bit and I thought it would eventually reach the threshold of the stairs. Unfortunately, it was a step in the planning that was reviewed the following summer and this two-step staircase was eventually destroyed and redone to contain three steps. I miscalculated the optimal ground elevation and the wrong estimates have consequences. To add to the problem, the winter frost that followed the 2019 construction proved to me that the base of the stairs needed to be redesigned. I should have made a deeper hole in the ground to build a more stable base for the steps. Renovation also means learning and having to correct mistakes …
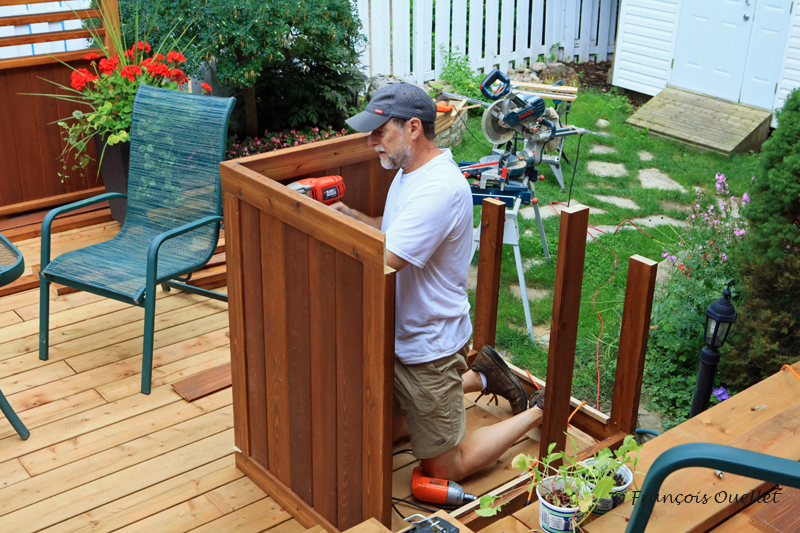
Building a two-tier flower box.
Above is the two-tiered flower box, made of knotless red cedar. You can see that the patio floor is not stained yet. Once dyed, it will never look exactly the same color as the flower box, as the floor is made of spruce (the good old regular 2X6) while the rest of the construction is usually red cedar. But the colors will be sufficiently alike.
Decorative patio walls.
Above, a general view of the work in progress. Everything is still far from over.
Part of the new wooden deck
Another general view of the first part of the terrace. The floor looks darker than in the previous photo, but this is only due to the effect of the rain.
Continued in the next article: “Building a patio (4 of 7)”.
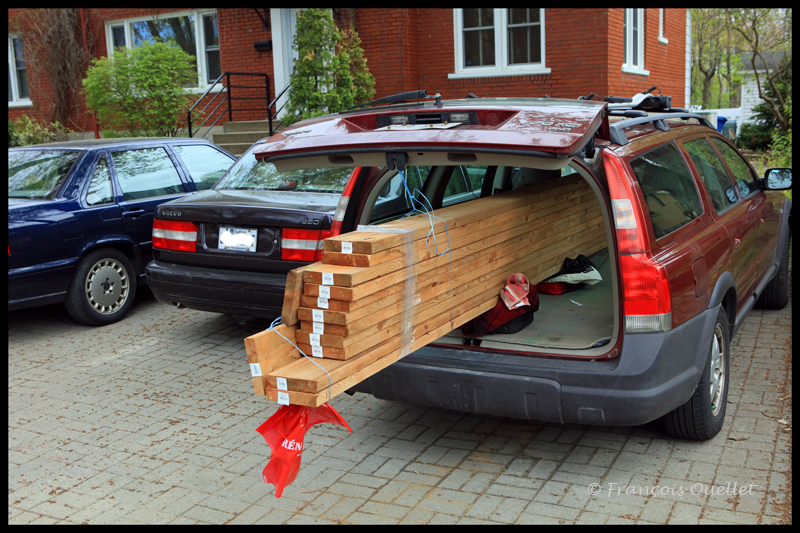
If you can (you have the vehicle and the time), go get your wood yourself and select it piece by piece. Take as many trips as you need, because the effort is worth it. Often, if you order, you end up with certainly a 10-15% of pieces of wood that are crooked, twisted, cracked or with significant knots: the general appearance suffers, in addition to the losses with which you will have to contend and the increased difficulty level to adjust all those pieces together. Building a patio is made easier with quality products.
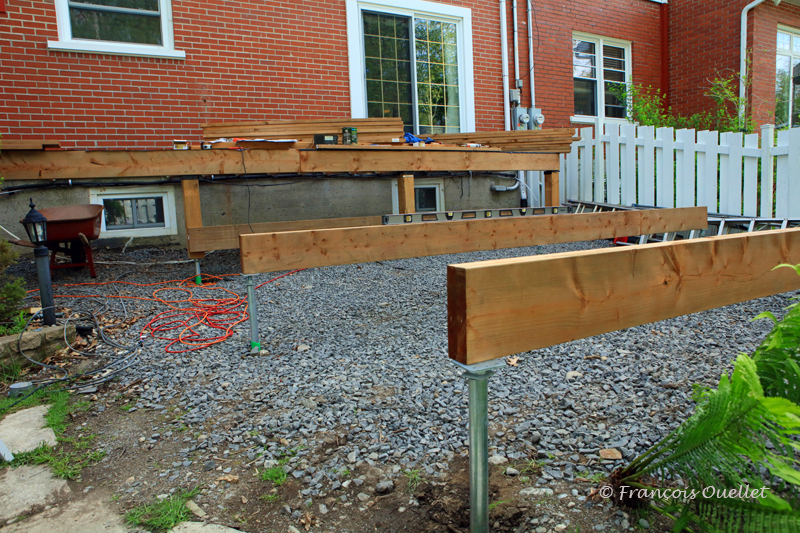
6X6 beams on screw piles.
The first 6 x 6 posts are placed on five adjustable piles, to support the large contour beam that will run along the house. The contour beam is made of pieces of wood 2 X 12 that are doubled, glued and screwed.
Patio in construction and spirit level.
In the picture above, the contour beam is under construction. In the background, a few joists are already anchored to the building. The family wants to get out through the patio door as soon as possible and I must therefore lay a first section of flooring as soon as possible.
The spirit level on the beam makes it possible to verify that the height of the first floor of the patio will be the same over the entire length of the house. It is easier to work with a long spirit level because it is less forgiving of mistakes.
Three beams on screw piles.
The beams are now placed on the eleven adjustable piles. At this point, I tell myself that it is too late to go back … Some of the piles having been slightly repositioned because of the rocks, so I have to accept some compromises in order to be able to screw the underside of the beams to the piles. But it ends up working …
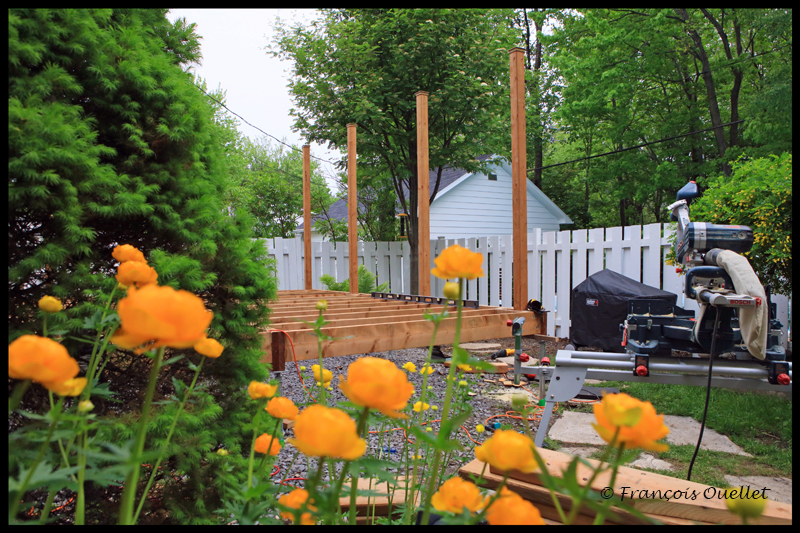
Installation of large posts on the terrace.
The joists are now attached to the beams with joist hangers. Then begins the delicate task (at least for me) of fixing the long wooden posts vertically to the patio. When a post is slightly crooked, it must be repositioned immediately before the construction adhesive solidifies. Here, the spirit level and the neighbors’ comments are useful. Subsequently, the screws make it possible to solidify the construction definitively.
A first chair is installed on a temporary floor.
View of the patio from another angle. The first chair is already out on a temporary installation on the second floor of deck! The black waterproof membrane shown in the picture above was not good enough : it wrinkled and did not stick enough. I changed it to a red Resisto membrane.
One of three stairs is now completed.
It’s starting to look like a patio. I completed my first stairs. There are some minor renovation errors on my part, but I’m very happy overall. No one fell yet, and the patio doesn’t make any weird sounds. Two chairs are out and there is finally a semblance of normalcy, while the project progresses further. It will be necessary to stain all this, but there is no hurry.
Continued in the next article: “Building a patio (3 of 7)”.
The following series of seven articles discuss patio building. This new patio was necessary because the old one was over thirty years old and showing obvious signs of fatigue, in addition to greatly hampering the digging work along the foundation to change the French drain and insulate the foundation.
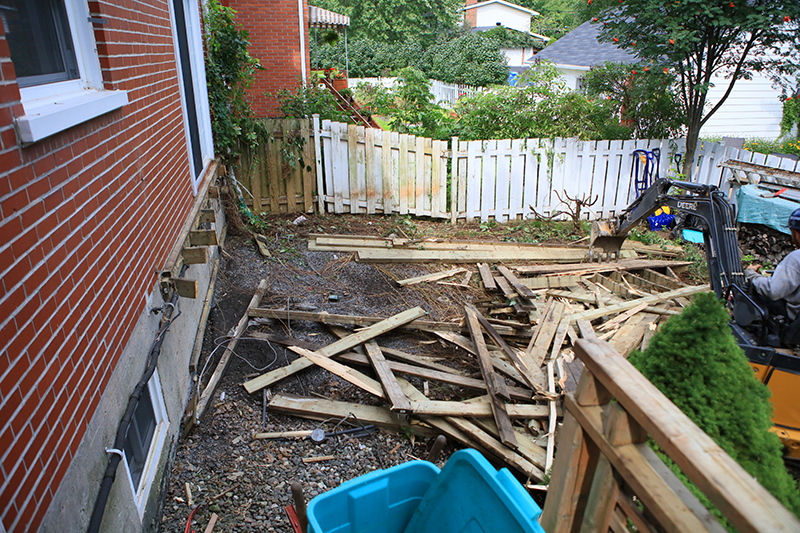
Destruction of the old patio.
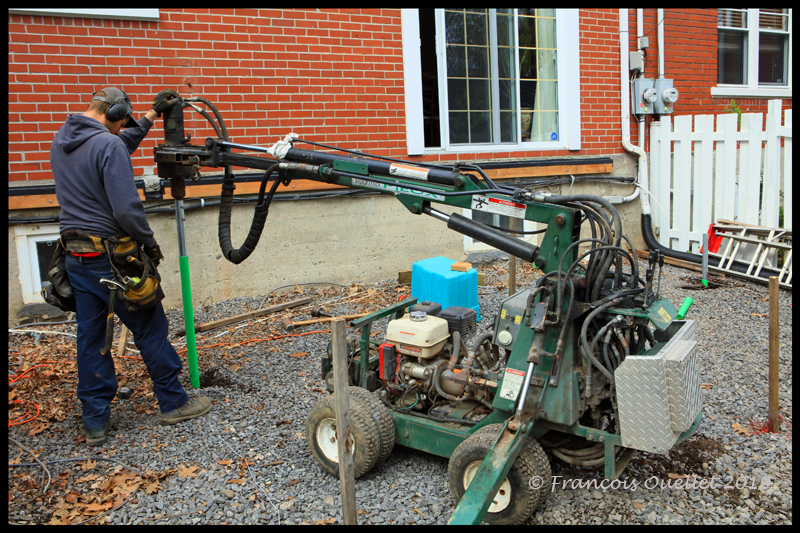
Above, the old wooden patio is demolished with a mechanical shovel. Where the machine cannot go, I finish the demolition by hand. Subsequently, digging begins to reach the foundation.
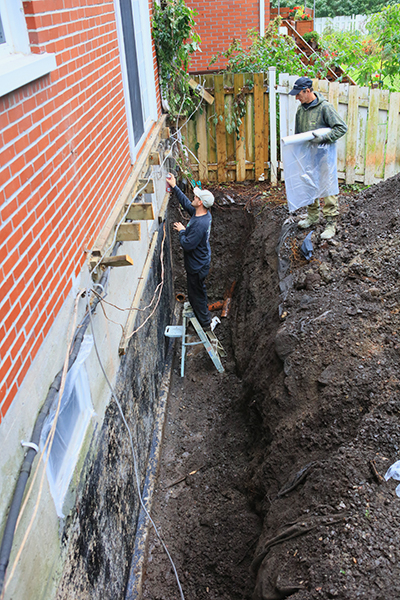
Digging for the new French drain
Once the trench has been dug, the employees of the Garco company install the French drain and prepare the concrete surface that will receive the new insulation (blown urethane).
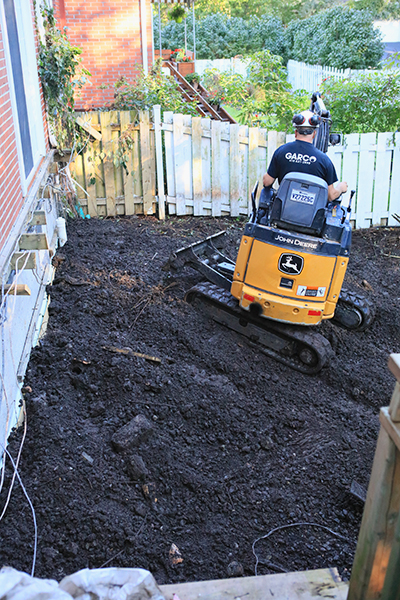
Added dirt and rocks to the terrain.
When the drain is complete and the urethane has been blown out, an employee reseals the hole, adding soil, rock and sand, the latter only required for less stable terrain.
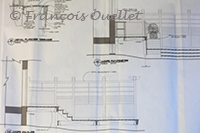
One of the pages of the construction plan.
Now we have to think about rebuilding a patio. The savings are significant when you do the work yourself. It has been reported to me that generally the cost of labor is 2.7 times the cost of materials. In the case of a large patio made up mainly of cedar planks, each plank of which will be sanded and stained by hand, the savings amount to several tens of thousands of dollars.
At 62, I unfortunately have no experience in the field. Risk management (especially financial) is necessary and, since the work will be carried out without assistance, I prefer to work from plans designed by a company. A specialist in the construction industry offered me his advice before the project started, because there was no question of starting the patio again.
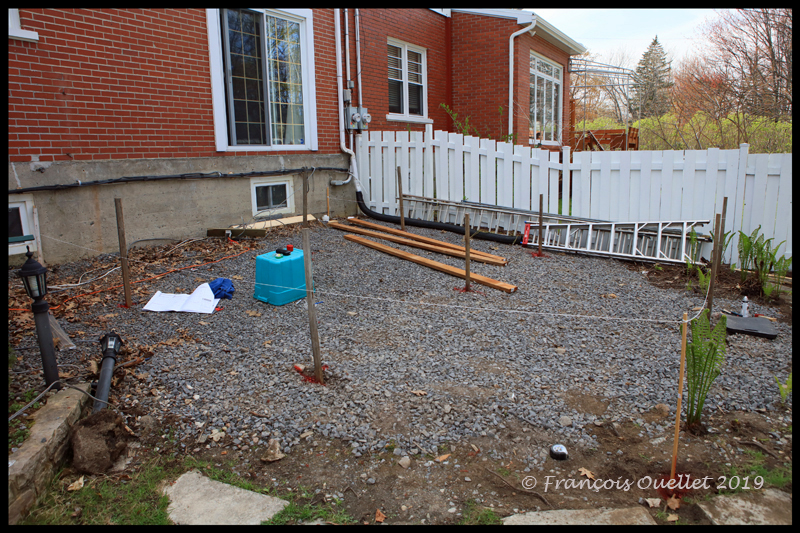
Positioning of wooden posts with the laser
On the proposed plan, there must be eleven adjustable metal piles anchored in the ground to receive the patio. We must therefore measure where the eleven metal poles from Techno-Pieux will go, because they are not responsible for doing the calculations for me.
I am using a laser pointer for the first time. It is not easy to work with this device outdoors, the red dot of the laser being difficult to see in bright light (the base model I got myself certainly did not make the job easy). Eventually, I got through it. Luckily, I wasn’t doing the job for a client.
The Techno-Pieux technician places his screwed piles at the locations of the wooden posts.
The Techno-Pieux technician gets to work. He relies on the wooden posts to drive his stakes and then checks with his laser (much better) if his posts are perfectly aligned. The problem that sometimes occurs is that he meets a rock and has to start over and reposition his stakes slightly off the ideal line. A slight slope is also necessary to facilitate the flow of water onto the patio. The piles therefore must not be perfectly level from the house to the end of the patio.
Installation of the first piece of wood which will receive the patio.
A rented hammer drill is sufficient to make the holes in the concrete that will be used to fix the first piece of wood in the foundation of the house. The screws are laid alternately to avoid creating weaknesses in the wood. It is on this piece of wood that a small part of the patio will rest. Special waterproof insulating tape is applied to the wood to protect it from rotting that could occur after several years when water gets under the patio boards.
Continued in the next article: “Building a patio (2 of 7)”.
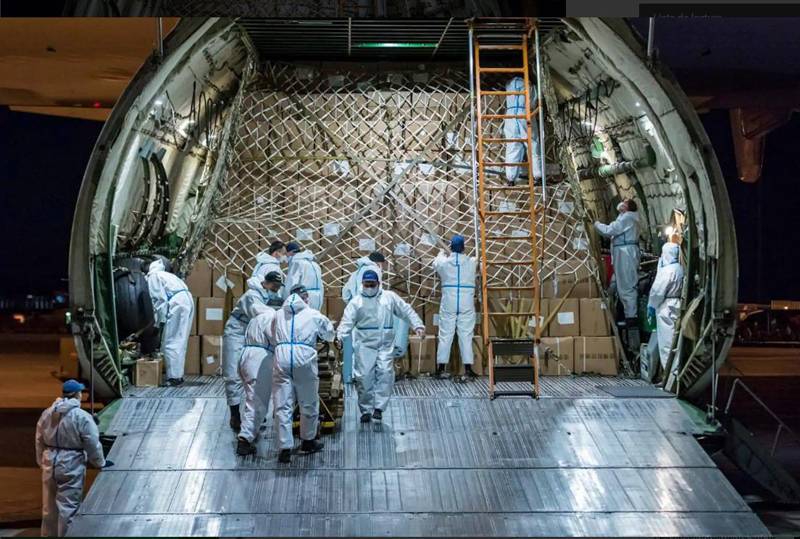
On Friday May 1st 2020, Quebec received a shipment of medical equipment destined to the people fighting COVID-19. An Antonov 225 was carrying the goods. The flight was organized thanks to a joint collaboration between Nolinor, Momentum Solutions and Antonov Airlines.
Departing from Tianjin, China, the plane made a stopover in Anchorage, Alaska, before continuing its flight over Canada towards the province of Quebec.
The Antonov 225 carrying medical supplies for Canada makes a stopover in Anchorage, Alaska.
The arrival of the Antonov 225 in Anchorage was announced in advance by the media, which allowed a large crowd to stand near the airport and monitor the approach of the aircraft. The following link allows you to view the approach and arrival: KTUU Video Antonov 225
At 5:35 on the KTUU video, we can see a Fedex MD-11F. It is worth mentioning, because this was a very impressive plane at the time of its conception, but companies are progressively getting rid of it due to the age and fuel costs associated with its operation. Today, the aircraft is only used for the transport of goods. The production of aircrafts of this size, with three engines, was stopped years ago. There is a good chance that the Antonov 225 will continue to fly long after the MD-11F has made its last flight. (Edit: The Russians destroyed the Antonov 225 during the invasion of Ukraine)
After taking off from Anchorage in the morning of May 1st, the Antonov 225 arrived in Mirabel, Quebec, in the evening of the same day at around 8:22 p.m. The aircraft’s flight path (ADB3381) could be followed on Flightradar24 at the time of its approach for Mirabel (CYMX).
The Antonov 225 ADB3381 on final for Mirabel airport in Canada on May 1st 2020.
We can see on the Flightradar24 screen capture that a helicopter (C-GSTV) is positioned to film the arrival of the world’s biggest aircraft. It is an AS 350 BA from TVA, a French-language news media in Quebec.
The Québec TVA news helicopter C-GSTV.
Source : FlightAware.
The Antonov 225 arrives in Mirabel from Anchorage on May 1st 2020.
Several challenges were encountered for this flight to be a success: the language barrier, the verification of equipment quality (contaminated material is not of a big help), the airport operation’s requirements from China, customs limited hours of operation, maximum daily time in service for the Antonov 225 crew, international competition for slot times and orders, initiatives from some countries to acquire shipments not intended for them, etc. But finally, after hard work, Quebec finally received the precious cargo.
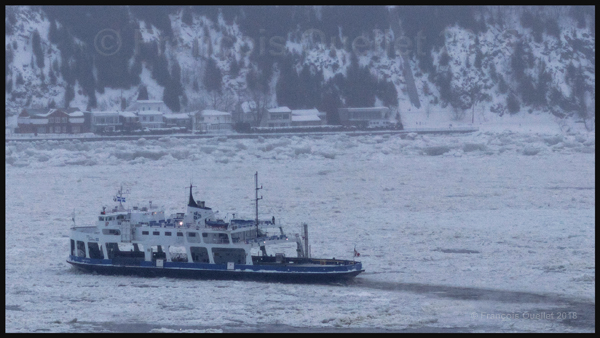
So far, this winter has been especially cold in Quebec City. There have been several weeks where the temperature stayed below -20 C. The STQ ferries, property of the Government of Quebec, must navigate the ice covered St. Lawrence Seaway between Lévis and Quebec City.
Government of Quebec ferry in the icy St. Lawrence Seaway between Lévis and Quebec. Winter 2018.
The ferries Alphonse-Desjardins and Lomer-Gouin, carrying cars and passengers between the two cities, must sometimes completely cancel the service. On three occasions so far, a ferry stayed stuck while trying to cross the ice covered seaway. The passengers had to wait patiently up to four hours for a crossing that normally takes ten minutes.
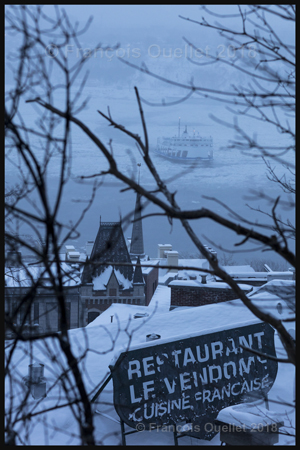
The picture below was taken from Old Quebec. In the foreground stands the “Le Vendôme” restaurant, which has been for sale for years now. In the distance, a ferry makes its way through ice towards Quebec City.
Ferry approaching Quebec during the winter in 2018
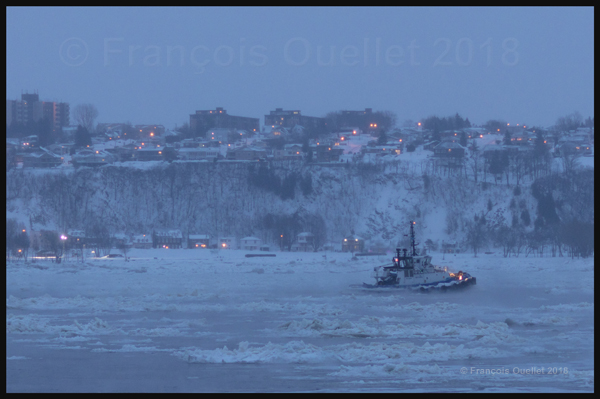
Ocean’s tugboats are also working on the seaway, regardless of the temperature. The picture below shows one of those tugboats enroute to the Jean-Gaulin refinery to help an oil tanker.
Ocean’s tugboat on the St. Lawrence Seaway near Quebec City. Winter 2018, by -20 C.
The pictures in this article were taken on January 7th 2018 with a Canon 5DSR equipped with a Canon EF 85 mm f/1.2L II USM. The temperature was -18 C.
The next day, a man who had fallen in the icy waters of the St. Lawrence Seaway was luckily spotted by one of the passengers who was standing on the Lomer-Gouin ferry heading to Quebec City. The man suffering from severe hypothermia was saved by the Government of Quebec STQ staff (Société des traversiers). Here is the link to TVA news (in French): Une personne tombe dans le fleuve Saint-Laurent à Québec.
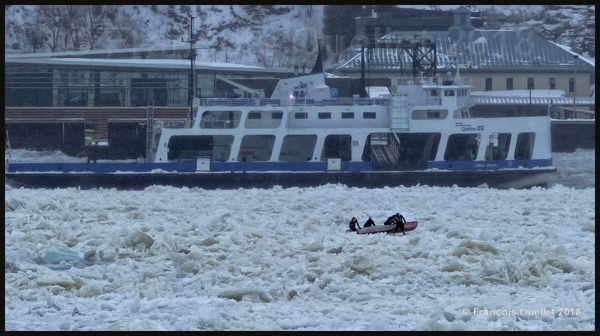
The cold temperature and winds did not stop the Château Frontenac canoeists from training on the icy seaway in preparation for the Quebec Carnival competition. This year, the race will be held on February 4th. The Association des coureurs en canots à glace du Québec (Ice canoeists Association of Quebec) recently faced a tragedy went they lost one of their members in a training session during very harsh weather conditions.
Château Frontenac ice canoe team at work by -18 C on the St. Lawrence Seaway between Lévis and Quebec.