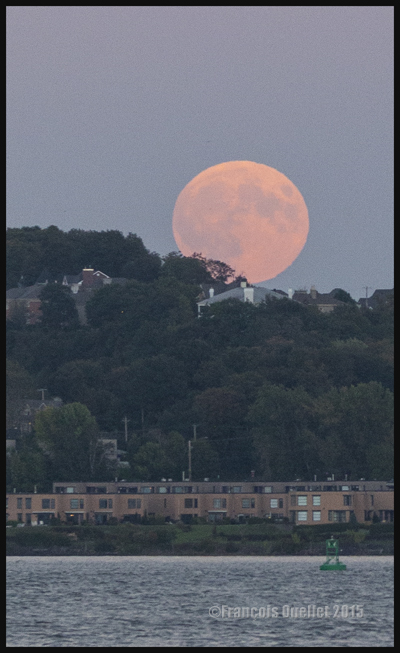
A quick look on internet provided the exact location and time where the moon would rise in the Quebec City region. On September 27th 2015, one had to look towards 089 degrees and be ready for 18:25 PM.
September 27th 2015. Blood Moon photo taken from Promenade Champlain, Quebec City, with a Canon 5D MKII.
Imagine being able to connect your camera to a modern personal telescope. That would make for fantastic shots. But since I deal with a Canon 70-200 f2.8L IS II USM coupled with an extender, I cannot expect the same results. Nonetheless, it is not a reason to stay at home…
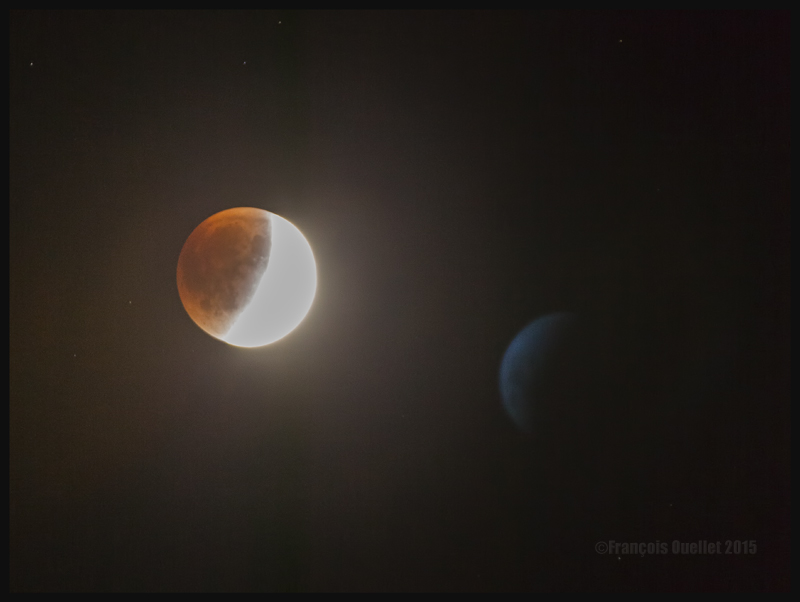
September 27th 2015 Blood Moon Eclipse. As for the blue object to the right of the screen, your explanations are welcomed.
The most interesting effect happened during late evening. I caught the above shot around 22:15. Cranking the ISO, I saw a blue planet or something that looks like it in the frame. The shot was not taken through a window so there was no glass reflection. I was kind of surprised to see this addition to the Blood Moon Eclipse. I wrote to a local astronomy club, asking them what it could be. They answered that unless I took the shot through a window, causing a reflection, they did not know what it was.
I know nothing yet about astronomy. If it is the reflection of the moon, I don’t know how it got there since I was taking the photo outside, without a polarizer. According to a recent comment sent by Mario Cloutier (see the comments) who points the reader to another blog looking at this question, it is possible that the picture of this ghost moon is the result of an overexposed shot combined with the atmosphere’s specific characteristics of temperature and moisture which would increase the reflexion and refraction. That is a logical explanation. The last shot was taken around 22:35:
September 27th 2015 Blood Moon Eclipse. Camera adjusted on BULB priority, with ISO 100 and 2.8 aperture.
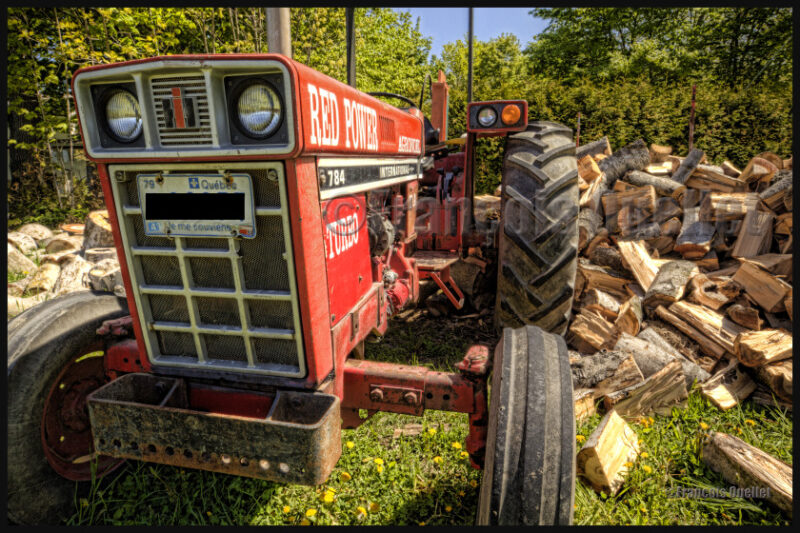
1. A picture you would never have thought possible, because of extreme contrasts between brightness and darkness, is now accessible to you through HDR.
2. For a good HDR picture, you need at least 1) an interesting subject 2) an appropriate setting or background 3) the appropriate light and 4) a wide range in contrasts. That seems basic, but HDR will not save a picture that was not thought through.
3. You need a software like Photomatix, to transform several pictures taken at different exposures into one HDR picture. But this is only the first step. You will also need another editing software to improve the general result after Photomatix has been used.
4. A tripod is required to help Photomatix align the pictures and create the HDR effect.
5. As with your normal pictures, it is always better to try to use the lowest ISO as possible.
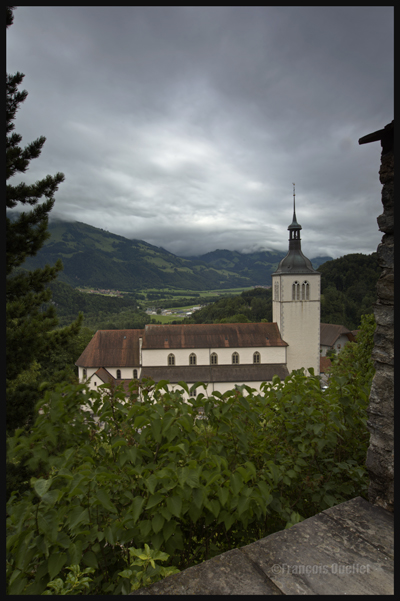
Gruyères, Switzerland, 2013.
6. It is safer to work with manual focus. This way, none of your shots will have been influenced by external objects without you noticing. It will always be the exact same focus throughout the HDR photo session. With automatic focus, you generally notice your blurred pictures when you’re back home and then it is too late (it will often happen under low light conditions).
7. The greater the contrast, the more exposures you need to take (up to nine) in order to match the dynamic range of your eyes.
8. The idea is to take each exposure at a different exposure setting. If you need seven exposures, an example of settings would be: -1, -2/3, -1/3, 0, +1/3, +2/3, +1. You might decide that three exposures only are necessary and go for -2, 0, +2 or -1, 0, +1. The choice is yours but you must take only the required number of exposures to avoid including too much noise in your shots.
Canon, 16-35mm, HDR format.
9. Throughout your HDR exposures of a specific scene, always keep the same aperture.
10. A scene is rarely perfectly balanced with light and shadows. If there are many shadow areas in the photo you want to take, then take more exposures over the recommended settings to ensure that you caught the whole dynamic range of the scene.
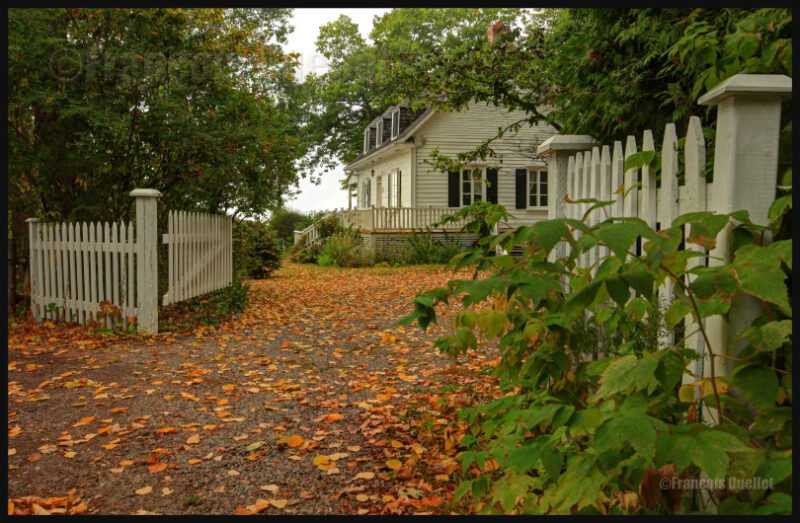
A house in Sainte-Pétronille, on Île d’Orléans, autumn 2012. HDR picture.
11. Inversely, if your scene has lots of highlight areas, take more exposures under the recommended settings.
12. Setting your camera to “automatic bracketing” is preferable because all the pictures are taken quickly thus avoiding to show any blurred picture in the final HDR picture. But if you want to show the movement of water in a creek, you don’t need bracketing: just take few shots with different time of exposure (in number of seconds). Just don’t overdo it otherwise it will give place to an uninteresting undefined white surface.
13. Check your LCD monitor so that none of the highlights are blown out. There would be a loss of details. For the same reason, you must avoid to block the shadows.
14. Always work with RAW files, it gives you better results. The RAW file already provides you with more f/stops then the JPEG file, and this before the transformation in HDR has even started).
15. Of all the lenses I’m using, the wide angle lens is my preferred one with it comes to HDR photography.
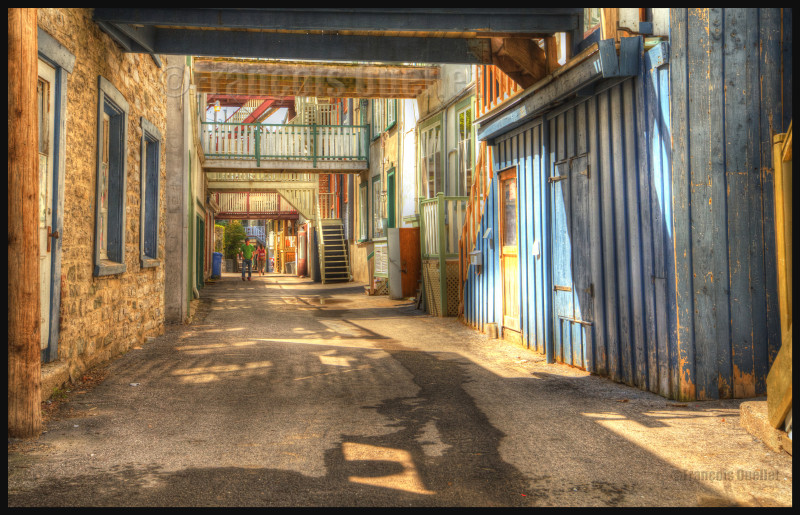
Spring light in the lower town of Quebec City
16. To improve the composition or enhance the general impact, crop the picture.
17. Not all pictures are appropriate for HDR transformation. If you want a dramatic silhouette as the final result, for example, HDR will not be appropriate. It will reveal too many details in the shadows and you will lose the high contrast effect that you were looking for. With practice, you will recognize where HDR is the most effective.
18. Whether you want a realistic picture or not, you can obtain surprising results with the combined effects of softwares like Photomatix, Topaz, Photoshop, Nik Software, Lightroom, Lucis Pro and so on. It’s only a matter of taking your time to experiment.
19. If you have only one picture on hand, like a shot you took years ago, and you would like to give it an HDR effect, you can use a software likeTopaz Adjust. There is an HDR effect section in that software that allows you to get a wide range of effects. But this is not going to be nearly as good as the real HDR resulting out of many pictures. The final editing step is, most of the time, done using Photoshop.
20. An unpretentious book about HDR is “Rick Sammon’s HDR Photography Secrets for Digital Photographers”. It is simple, colorful, well written and loaded with practical informations.
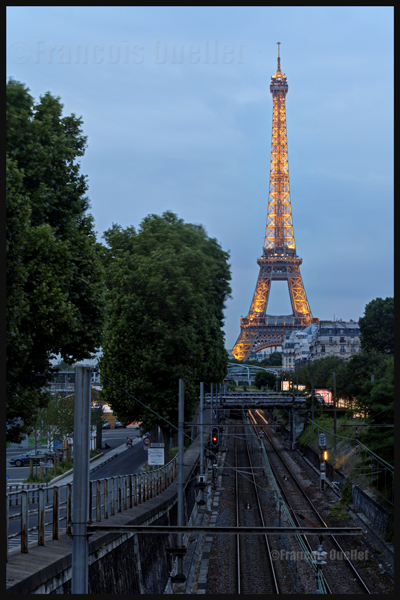
Eiffel Tower at night with HDR effect
Note: All the photos were taken with a Canon 5D MKII
You must decide the ideal combination between the following: aperture, speed and ISO. All three are interrelated and choosing one has a direct influence on the other two.
You are facing a beautiful landscape in which you want everything to be in focus: you decide that the aperture is what matters the most. Choosing aperture as the priority is a very popular choice. Let’s consider that you choose F16, which should give you a very interesting depth-of-field but will demand a lot of light. You have to compensate somewhere. If there is not much movement in the scene, and you have access to a tripod, you might decide to choose a slow speed, which allows more time for the light to enter the camera. Doing so, you won’t need to crank the ISO and you will avoid adding useless noise to your picture.
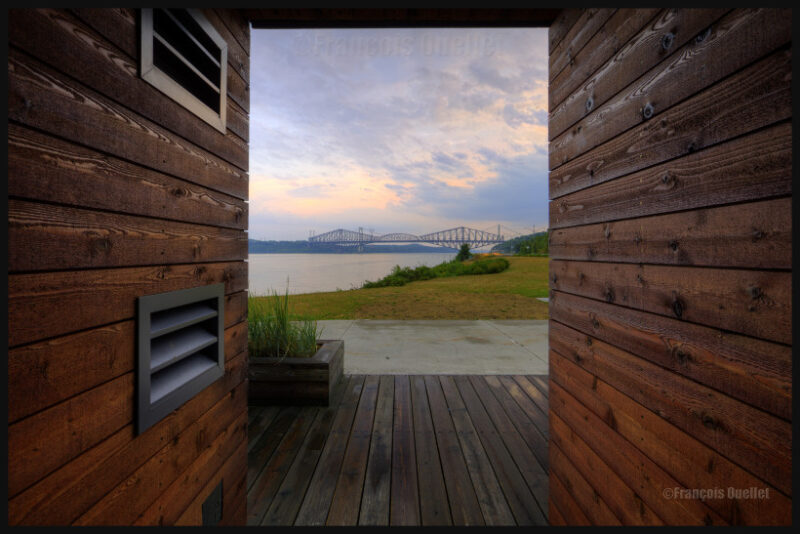
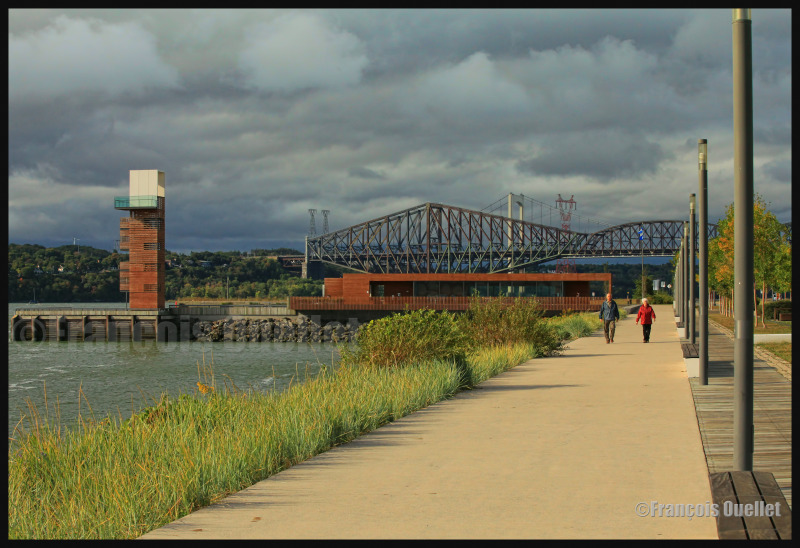
In the picture below, aperture is set at F16. The vegetation in the left corner draws the viewer’s eye toward the pedestrians, and then progressively to the quai des Cageux. We finally see the Quebec bridge, the longest cantilever bridge in the world.
Quai des Cageux, Québec 2012.
If you decide that speed is a priority, you will have to compromise ISO or aperture. ISO will have to be increased to improve light sensibility, but doing so will increase the size of the grain in the picture. Depth-of-field will have to be adjusted as well since a higher speed does not let much light enter the camera. You won’t be able to pick F16 this time. So you will eventually find that there are some out of focus areas in your picture. With a bit of practice, you can be less demanding on the speed, providing you can follow the subject with your camera (it is like if you were slowing down the subject, so less speed is required).
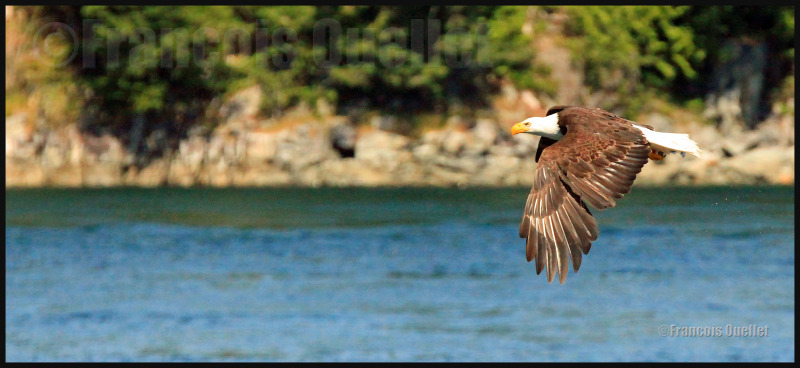
The picture below was a bit particular: it was taken when I was on a boat rocked by waves. The eagle was far away and was traveling in the opposite direction, thus increasing the relative speed of the subject. The Canon 5D MKII was hand held and 400mm focal was necessary. Speed was crancked at 1/1600 and the ISO required was set at 5000. Naturally, the grain in the picture being larger, slightly diminishes the quality. This was a necessary compromise if the eagle was to be taken in flight.
Eagle observed in the Campbell River region. Summer 2012.
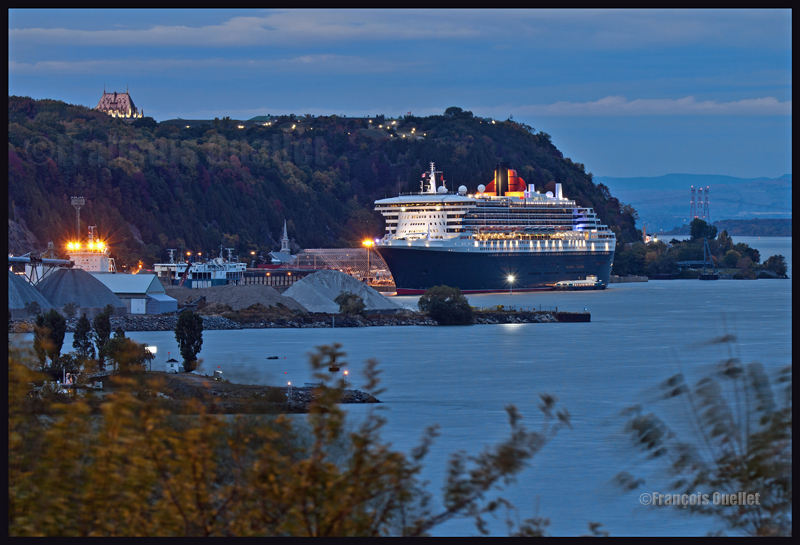
It is getting dark and you want a photo with absolutely no noise and you decide that the aperture is what matters the most. You make no compromise and choose ISO 50. This setting requires a lot of light, because the lower the ISO, the higher the demand for light. In order to make sure that your picture will not be blurred, a tripod will be necessary, since there will be an extended exposition time. In the picture below, the shutter has been opened for ten seconds, with a 9.0 aperture, 200mm focal and 50 ISO. Only the small branches in the foreground are blurred.
Note: in general, it is better to use a tripod as often as possible, even in daylight, in order to optimize quality. Choose a heavy enough tripod to prevent vibrations under windy conditions. A light tripod is easy to carry but does not allow for acceptable pictures in adverse weather. It’s obvious that this Queen Mary II photo would not have been as precise if a light tripod had been used. In this case, it would have meant that continual vibrations would have been recorded during 10 seconds. The boat would have been totally blurred.