Categories
Renovation

Building a patio (3 of 7)

Building the deck along the house.

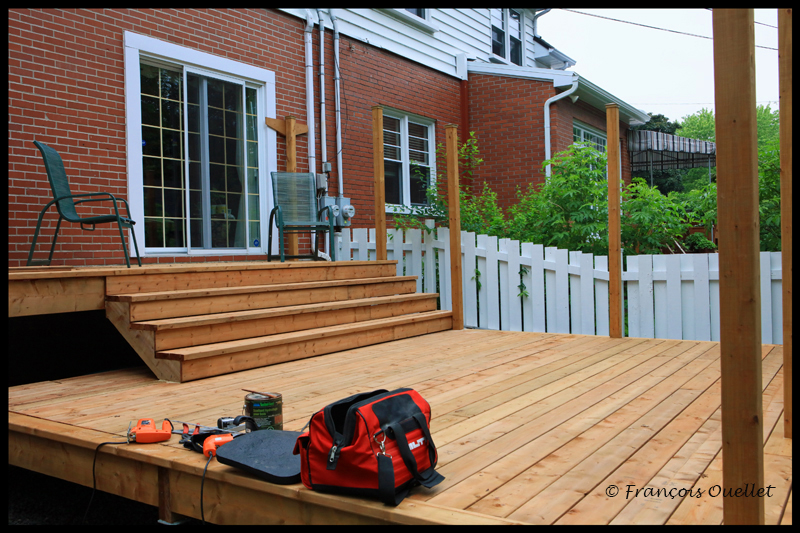
To screw the 2X6 boards I use the CAMO system with screws that do not show, being screwed obliquely to the side of the boards: this improves the overall appearance without compromising on strength. When it comes to tools, I belong to the dinosaurs: only wire equipment, nothing with a battery.

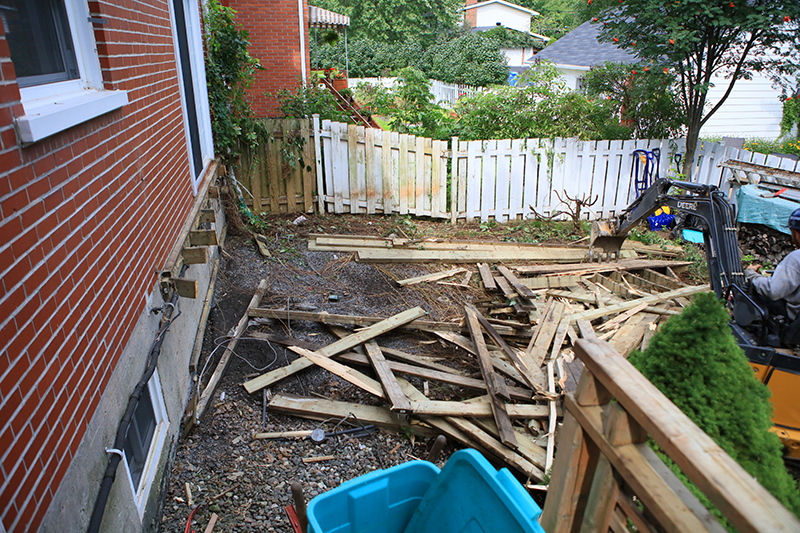
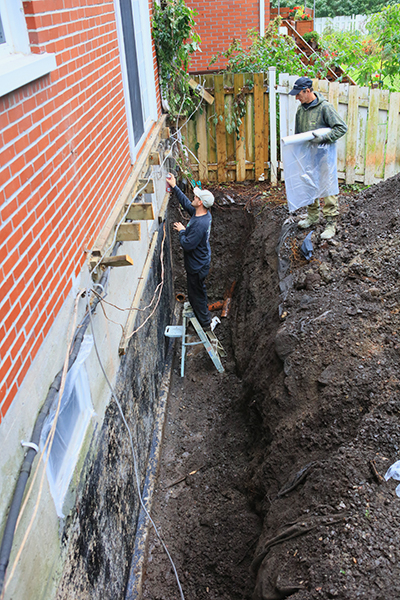
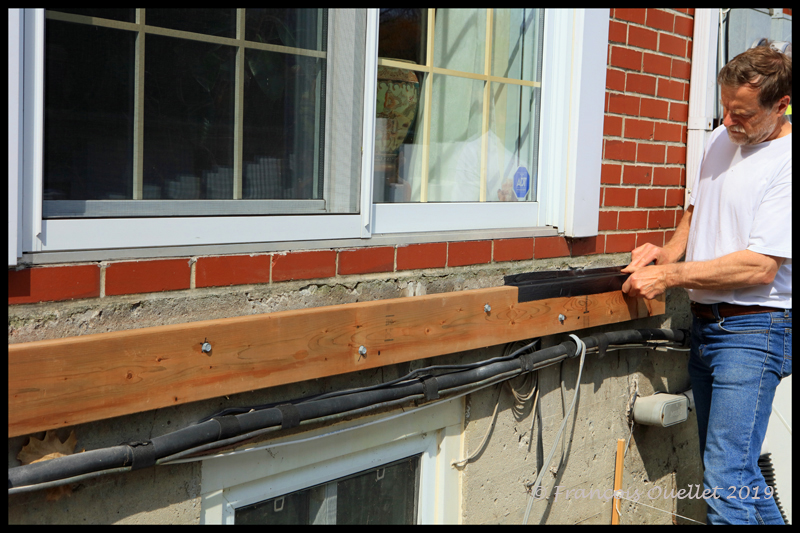
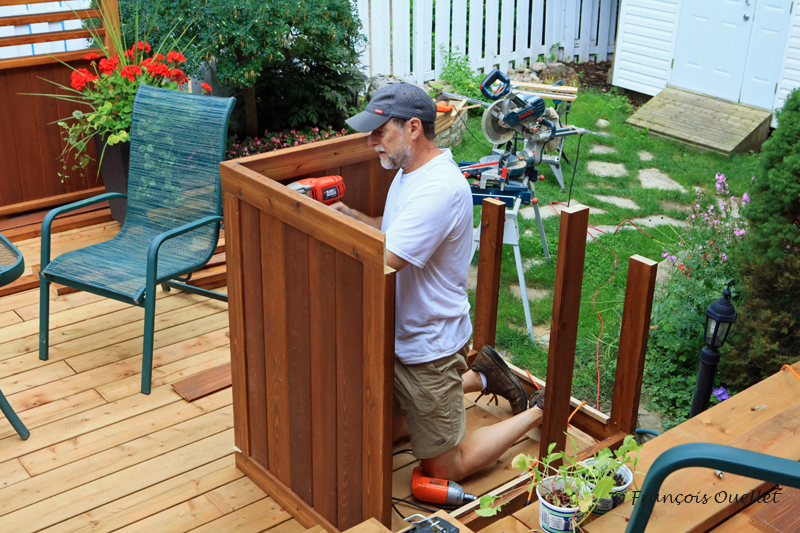
The original plans called for an opening in the patio floor on the first level to allow light to pass through to a basement window. It is also in this opening that I work in the photo above. The plan messed up, with the final aesthetic and positive family comments missing. Project management also involves unforeseen events… I had to apply plan B, that is to say improvise.

Two-layer stained red cedar planks.

The red cedar planks are used in the construction of the railing, the flower box, the handrail and the siding under the terrace. Some are knotless, for the more visible places, and others are with knots. There is naturally a good price difference between the two categories.

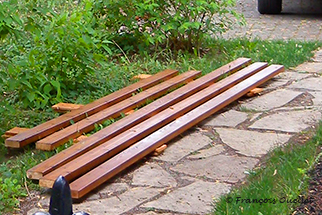
Each red cedar plank has a very pale beige color. To give it a darker tone, it must be sanded and stained with two coats of a special oil. It is important to wait a day between layers. In the photo above, six boards that have received the proper treatment are quietly drying outside. This is a process that requires time and proper weather if you don’t have a garage to let it dry out.

The second staircase from the patio.

Above, the second staircase has just been completed. It has only two steps, because I wanted to rise the terrain a bit and I thought it would eventually reach the threshold of the stairs. Unfortunately, it was a step in the planning that was reviewed the following summer and this two-step staircase was eventually destroyed and redone to contain three steps. I miscalculated the optimal ground elevation and the wrong estimates have consequences. To add to the problem, the winter frost that followed the 2019 construction proved to me that the base of the stairs needed to be redesigned. I should have made a deeper hole in the ground to build a more stable base for the steps. Renovation also means learning and having to correct mistakes …

Building a two-tier flower box.

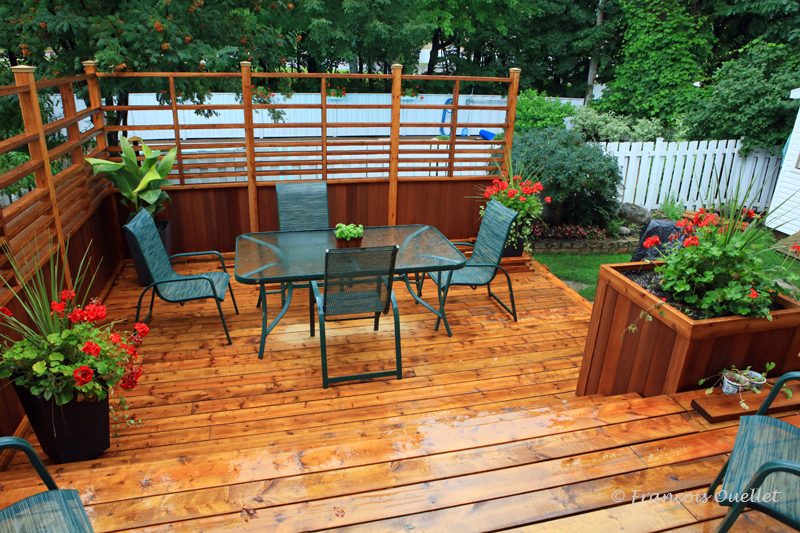
Above is the two-tiered flower box, made of knotless red cedar. You can see that the patio floor is not stained yet. Once dyed, it will never look exactly the same color as the flower box, as the floor is made of spruce (the good old regular 2X6) while the rest of the construction is usually red cedar. But the colors will be sufficiently alike.

Decorative patio walls.

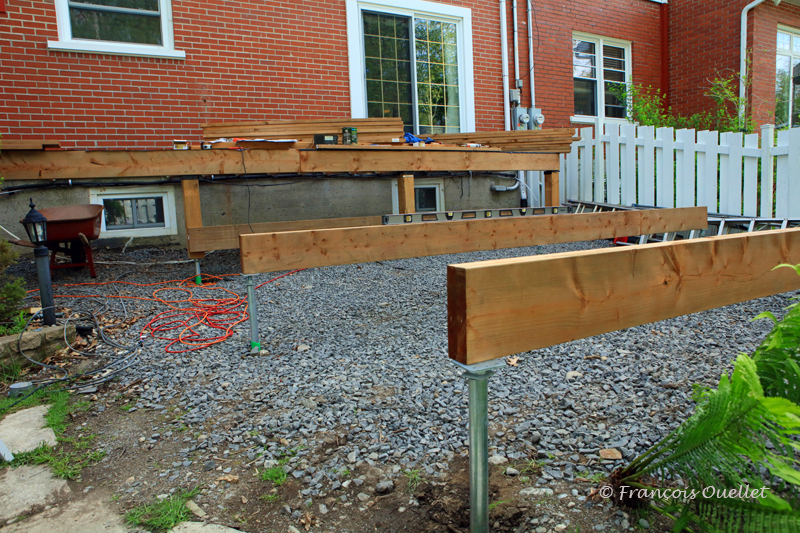
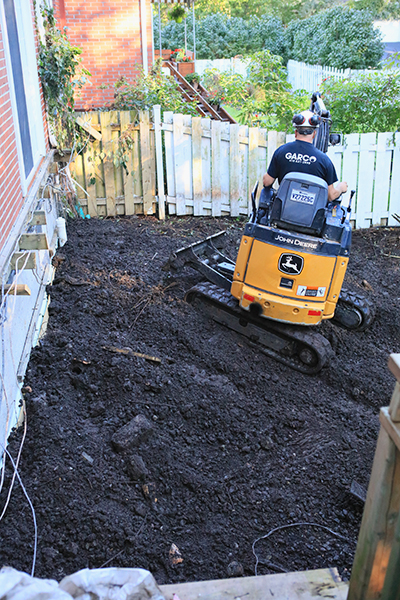
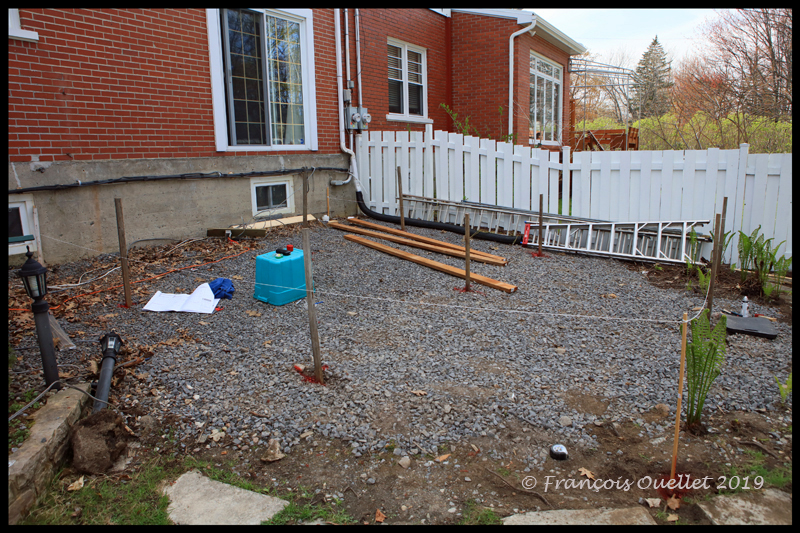
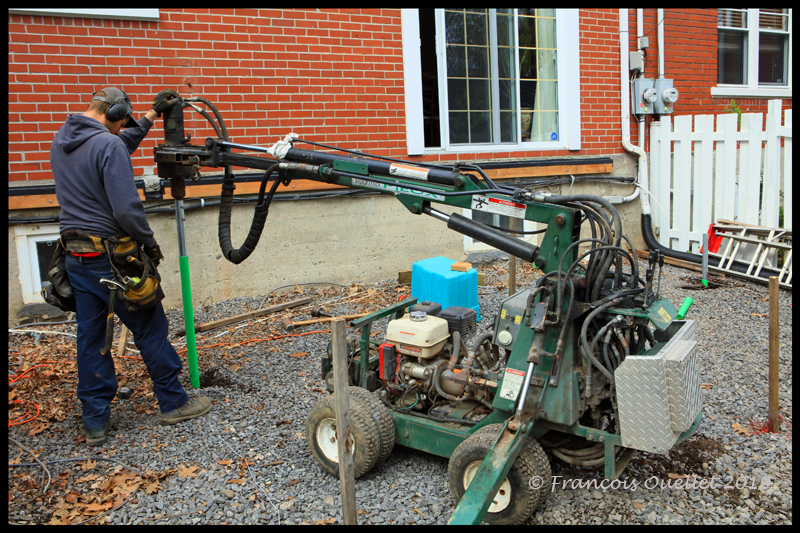
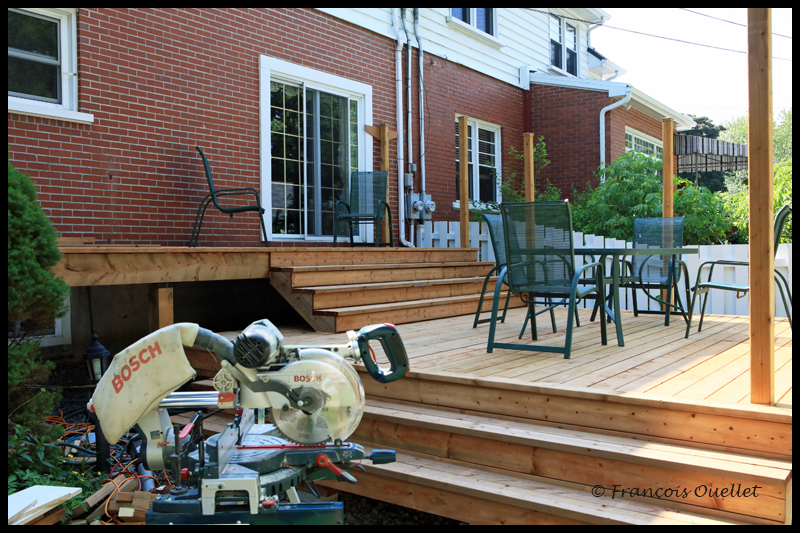
Above, a general view of the work in progress. Everything is still far from over.

Part of the new wooden deck

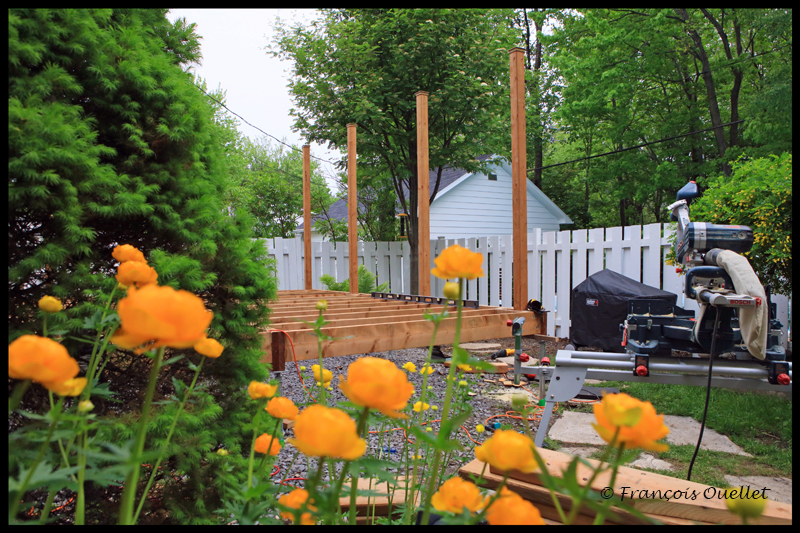
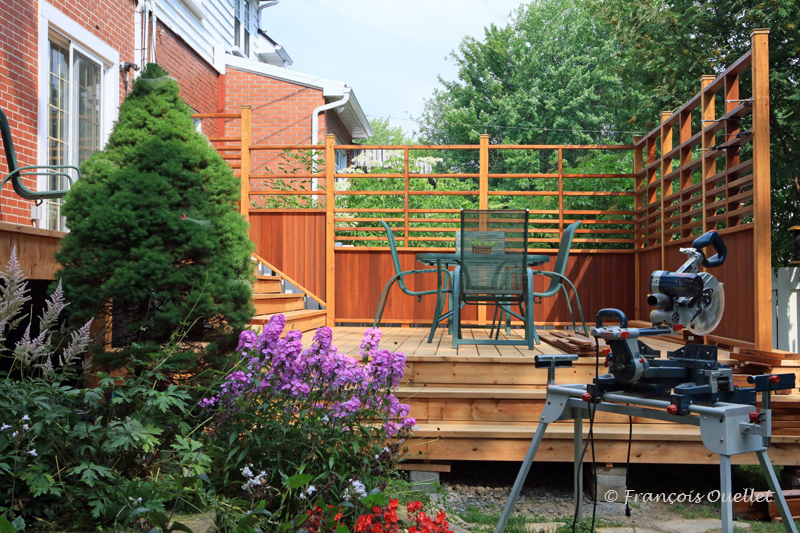
Another general view of the first part of the terrace. The floor looks darker than in the previous photo, but this is only due to the effect of the rain.

Continued in the next article: “Building a patio (4 of 7)”.

Categories
Renovation

Building a patio (2 of 7)

Each piece of wood is selected individually.

If you can (you have the vehicle and the time), go get your wood yourself and select it piece by piece. Take as many trips as you need, because the effort is worth it. Often, if you order, you end up with certainly a 10-15% of pieces of wood that are crooked, twisted, cracked or with significant knots: the general appearance suffers, in addition to the losses with which you will have to contend and the increased difficulty level to adjust all those pieces together. Building a patio is made easier with quality products.

6X6 beams on screw piles.

The first 6 x 6 posts are placed on five adjustable piles, to support the large contour beam that will run along the house. The contour beam is made of pieces of wood 2 X 12 that are doubled, glued and screwed.

Patio in construction and spirit level.

In the picture above, the contour beam is under construction. In the background, a few joists are already anchored to the building. The family wants to get out through the patio door as soon as possible and I must therefore lay a first section of flooring as soon as possible.

The spirit level on the beam makes it possible to verify that the height of the first floor of the patio will be the same over the entire length of the house. It is easier to work with a long spirit level because it is less forgiving of mistakes.

Three beams on screw piles.

The beams are now placed on the eleven adjustable piles. At this point, I tell myself that it is too late to go back … Some of the piles having been slightly repositioned because of the rocks, so I have to accept some compromises in order to be able to screw the underside of the beams to the piles. But it ends up working …

Installation of large posts on the terrace.

The joists are now attached to the beams with joist hangers. Then begins the delicate task (at least for me) of fixing the long wooden posts vertically to the patio. When a post is slightly crooked, it must be repositioned immediately before the construction adhesive solidifies. Here, the spirit level and the neighbors’ comments are useful. Subsequently, the screws make it possible to solidify the construction definitively.

A first chair is installed on a temporary floor.

View of the patio from another angle. The first chair is already out on a temporary installation on the second floor of deck! The black waterproof membrane shown in the picture above was not good enough : it  wrinkled and did not stick enough. I changed it to a red Resisto membrane.

One of three stairs is now completed.

It’s starting to look like a patio. I completed my first stairs. There are some minor renovation errors on my part, but I’m very happy overall. No one fell yet, and the patio doesn’t make any weird sounds. Two chairs are out and there is finally a semblance of normalcy, while the project progresses further. It will be necessary to stain all this, but there is no hurry.

Continued in the next article: “Building a patio (3 of 7)”.

Categories
Renovation

Building a patio (1 of 7).

The following series of seven articles discuss patio building. This new patio was necessary because the old one was over thirty years old and showing obvious signs of fatigue, in addition to greatly hampering the digging work along the foundation to change the French drain and insulate the foundation.

Destruction of the old patio.

Above, the old wooden patio is demolished with a mechanical shovel. Where the machine cannot go, I finish the demolition by hand. Subsequently, digging begins to reach the foundation.

Digging for the new French drain

Once the trench has been dug, the employees of the Garco company install the French drain and prepare the concrete surface that will receive the new insulation (blown urethane).

Added dirt and rocks to the terrain.

When the drain is complete and the urethane has been blown out, an employee reseals the hole, adding soil, rock and sand, the latter only required for less stable terrain.

One of the pages of the construction plan.

Now we have to think about rebuilding a patio. The savings are significant when you do the work yourself. It has been reported to me that generally the cost of labor is 2.7 times the cost of materials. In the case of a large patio made up mainly of cedar planks, each plank of which will be sanded and stained by hand, the savings amount to several tens of thousands of dollars.

At 62, I unfortunately have no experience in the field. Risk management (especially financial) is necessary and, since the work will be carried out without assistance, I prefer to work from plans designed by a company. A specialist in the construction industry offered me his advice before the project started, because there was no question of starting the patio again.

Positioning of wooden posts with the laser

On the proposed plan, there must be eleven adjustable metal piles anchored in the ground to receive the patio. We must therefore measure where the eleven metal poles from Techno-Pieux will go, because they are not responsible for doing the calculations for me.

I am using a laser pointer for the first time. It is not easy to work with this device outdoors, the red dot of the laser being difficult to see in bright light (the base model I got myself certainly did not make the job easy). Eventually, I got through it. Luckily, I wasn’t doing the job for a client.

The Techno-Pieux technician places his screwed piles at the locations of the wooden posts.

The Techno-Pieux technician gets to work. He relies on the wooden posts to drive his stakes and then checks with his laser (much better) if his posts are perfectly aligned. The problem that sometimes occurs is that he meets a rock and has to start over and reposition his stakes slightly off the ideal line. A slight slope is also necessary to facilitate the flow of water onto the patio. The piles therefore must not be perfectly level from the house to the end of the patio.

Installation of the first piece of wood which will receive the patio.

A rented hammer drill is sufficient to make the holes in the concrete that will be used to fix the first piece of wood in the foundation of the house. The screws are laid alternately to avoid creating weaknesses in the wood. It is on this piece of wood that a small part of the patio will rest. Special waterproof insulating tape is applied to the wood to protect it from rotting that could occur after several years when water gets under the patio boards.

Continued in the next article: “Building a patio (2 of 7)”.

Categories
Photos of Canada Photos of Quebec

The Quebec Bridge by Bike.

The Promenade Samuel-De Champlain seen from the Quebec Bridge in 2021.

Crossing the Quebec Bridge by bike allows you to stop and admire the surroundings at will, while observing the maritime traffic up close.

In the photo above, part of the Promenade Samuel-De Champlain is visible from the bridge. As for the photographic composition (for those interested), part of the bridge is included in the photo’s foreground to add to the height effect. The path to the right of the promenade, with its pronounced curves, also helps to energize the scene. I think it was a prime location, but tastes are debatable!

The Federal Clyde and MSC Brianna vessels on the St.Lawrence Seaway near the Quebec Bridge in 2021.

At the time of passage of the Federal Clyde and MSC Brianna vessels under the Quebec Bridge, the sound of the large diesel engines was clearly perceptible and it was even possible to feel the vibrations of the engines retransmitted into the metal structure of the bridge.

Inspection of the Québec Bridge in 2021.

Above, an employee inspects the structure of an aging Quebec Bridge. Good risk management in this case is to rely on a part of the bridge that has not aged prematurely.

Inspection of the Québec Bridge. July 29th 2021.

The wide-angle lens of the Canon 5DSr gives a better idea of ​​the delicate position in which inspectors find themselves when they are evaluating the work to be carried out on the Quebec Bridge. It’s not a job for everyone …

Click on the link for other pictures of Québec City in Summer on my blog.

Categories
Photos of Quebec

Overturned cars in Québec City

Three cars turned over in Old Québec in 2021.

This photo of three overturned cars shows an ephemeral creation made for the “Les passages insolites” event in Québec City in 2021.

However, a few days later, in early August 2021, I saw an overturned car on Boulevard Laurier and this time it was not an artificial creation. The first information received from the emergency services was that there was no death or serious injury in this rollover.

A car turned over on boulevard Laurier in Quebec City.

The conditions prevailing on this stretch of boulevard Laurier on this August morning would have frightened the bravest among you: speed limit of 50 km/h, light traffic, clear sky, unlimited visibility, straight asphalted road, dry surface without potholes, white lines at regular intervals to delimit each traffic lane. There were no distracting billboards, no crosswalks, no traffic lights, and no intersections to watch. When you want to hit the road next time in such adverse conditions, think twice and use public transport!

Click on the link for other pictures of Québec City in Summer on my blog.

Categories
Aviation photography

The RCAF flies by Québec City

The Snowbirds passing by Québec City in June 2021.

The Snowbirds flew over Quebec City in June 2021, followed by many other jets and canadian military transport planes and helicopters. Until the last minute, a layer of low clouds and occasional showers worried event organizers.

A ferry crosses the St.Lawrence Seaway in front of Lévis in June 2021.

Low clouds are visible over Lévis in the picture above taken from the Dufferin terrace in Québec City. On the St. Lawrence Seaway, the ferry bound to Lévis is approaching its destination.

Three canadian CF-18 fly by Québec City in June 2021.

The CF-18s initially flew in a formation of three. For photography enthusiasts, the full frame camera used to capture those photos was a Canon 5DSr equipped with an EF 70-200mm f / 2.8L IS II USM telephoto lens. For the photo above, the shutter speed was set at 1/4000 and the focal length was 200mm. Given the CF-18’s fast fly-by, I opted for the AI ​​Servo autofocus which quickly adapts to changes in the position of the objects to be photographed. Since the original image size was 50.6 megapixels, this allowed me to crop it in order to enlarge the military jets without losing quality.

Four canadian CF-18 flying by Québec City in June 2021.

Above, four CF-18s were photographed with a shutter speed of 1/5000.

The bulk carrier Spar Taurus is arriving in the Québec City harbour in June 2021.

Between each fly-by of the various military jets, the maritime traffic continued as usual on the St. Lawrence River. Above, the Spar Taurus vessel , a bulk carrier built in 2005 and sailing under the flag of Norway, is heading towards the port of Quebec, accompanied by two Ocean company tugs. In the background, the Île d´Orléans bridge, which will be redone in a few years.

A canadian C-17 Globemaster III flies over the Dufferin terrace in Québec City in June 2021.

A C-17 Globemaster III, military transport aircraft built by McDonnell Douglas, flies over the Dufferin Terrace. Canada owns five of these aircrafts.

A canadian Bell CH-146 Griffon at Québec in June 2021

Above, a Canadian Bell CH-146 Griffon military helicopter , slowly flies near the Château Frontenac. A soldier seated behind takes a picture of the crowd gathered on the Dufferin Terrace. To photograph a helicopter, the shutter speed must be drastically reduced, so that the movement of the blades can be observed. For the photo above, I opted for 1/250, but I could have gone down to 1/125 without too much risk of the helicopter being out of focus.

There were other aircrafts that flew over the seaway, such as the CP-140 Aurora and the Lockheed C-130J Super Hercules, but the photos were not of sufficient quality to be published on the web.

Click on the link for other pictures of Québec City in Summer on my blog.

Categories
Photos of Quebec

A third link between Lévis and Québec City

Economical version of a third link between Québec and Lévis.

In Quebec, there are currently political debates on what should be a third link that would link Lévis to Quebec City. The current solution is the creation of a tunnel under the St. Lawrence Seaway that would cost at least $ 10 billion.

Following numerous comments from citizens regarding the exorbitant costs associated with this new future link, new, more economical formulas will have to be studied. I was passing over the Île d’Orléans Bridge   recently and saw a bus on a floating platform. This is possibly a prototype whose testing has now been revealed.

In the above concept, up to 40 passengers at a time can be transported from shore to shore by a relaxed driver whose seat has been completely redesigned and relocated outside the vehicle. This gives him unparalleled air quality and he can end his working day much more rested.

You cannot stop progress!

Click on the link for more pictures of Québec City and Île d’Orléans in Summer on my blog.

Categories
Street photography

A Guay crane at work in Old Québec.

This is what a Demag AC435 all-terrain telescopic crane looked like before it received the colors of the Quebec company “Grues Guay“:

Demag AC 435 crane
Demag AC 435 crane

This all-terrain crane was recently at work in Old Quebec, on the Côte de la Montagne. The coast has a fairly steep slope and it was necessary to create an artificial horizontal surface using pieces of wood to make the work safe.

Stabilization of a Guay crane at work.

The crane operator used a stepladder to get in and out of his vehicle as needed:

Stepladder provided for the Guay crane's driver at work in Old Québec.
Stepladder provided for the Guay crane’s driver at work in Old Québec.

So this gave the following result, once the crane was at work:

All-terrain Demag AC 435 crane at work in Old Québec

With the telescopic arm fully extended:

All-terrain Demag AC 435 crane from Guay at work in Old Québec in 2021.

In the last photo below, you can see a person in a basket that is suspended at the end of the telescopic arm, confident that the tens of thousands of pounds of counterweight will keep the crane from tipping over. The calculation had to be very precise. Everything had to remain stable throughout the day! And since the work on the building lasted several days, the same operation had to be repeated every morning …

Guay crane at work in Old Québec on Côte de la Montagne in 2021.

Click for more pictures of Québec City in summer on my blog.

Categories
Environment

Popularity of Plastics

Old publicity on the promising future of plastics.

Times are changing and plastic is losing steam because of its effect on the environment. However, there was a time when it was just the opposite and when we praised the promising future (with good reason!) of plastic. Above you can see a photo of an old advertisement with a very different message than what we hear today. We even offer to teach you how to use plastic at home!

Click on the link for other articles on environment on my blog.

Categories
Flight Simulation Screen captures

A few Microsoft Flight Simulator 2020 screenshots.

Below are a few Microsoft Flight Simulator 2020 (MFS 2020) screen captures taken during virtual flights.

Le Mont St-Michel en France, sous MFS 2020.

Mont St-Michel is a very nice addition to the France virtual scenery provided by MFS 2020. Such great sites can be found in many places in the Microsoft Flight Simulator 2020 program, but many more are also available for free through the flight simulation community : they can then be downloaded and installed in MFS 2020, thus ever improving the overall experience.

Heading to KLAX from KBUR with a TBM 930 on the flight simulator MFS 2020.

The haze is quite present in the Los Angeles area and adds to the realism in the screenshot above. The FedEx livery comes from « Liveries Mega Pack Manager ».

Puerto Vallarta with MFS 2020 and improved scenery by John Lovell

The Icon A5 Kingfisher is seen flying along the Puerto Vallarta coast in Mexico. The scenery was hugely improved by John Lovell and is available through Flightsim.to. But it will require 5 GiG on your hard disk!

The Burbank Bob Hope (KBUR) modelized by Orbx on the flight simulator MFS 2020.

The picture above shows a small part of the Burbank Bob Hope airport (KBUR) modelized by Orbx. The screen capture was taken with the X-Box drone. This drone is a fantastic addition to what is now available to flight simulation enthousiasts when comes the time to bring back souvenirs from a flight.

Heading to Iqaluit with the flight simulator MFS 2020.

Enroute to Iqaluit (CYFB), the jet just got out of the cloud deck and some rime icing is still visible on the nose and the wing’s leading edge. That evening, there was a sigmet reporting high level turbulence and it is exactly what I experienced during the flight, using REX Weather Force 2020 as a weather engine.

I’ll be back with more flight simulation screen captures soon. Meanwhile, have a good virtual flight!

Click on the following link for virtual flight simulation pictures on my blog.